


POPULAR PLATFORMS
- 1964-1967 GM A-Body
- 1968-1972 GM A-Body
NEWEST PRODUCTS
TOP SELLING PRODUCTS
- 1978-1996 GM B-Body
NEWEST PRODUCTS
TOP SELLING PRODUCTS
- 1963-1972 GM C10/C15
TOP SELLING PRODUCTS
- 1973-1987 GM C10/C15
NEWEST PRODUCTS
TOP SELLING PRODUCTS
-
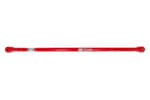
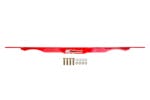
 6452F - 1963-1987 GM C10 Front Lowering Springs, 2" drop
$149.99
6452F - 1963-1987 GM C10 Front Lowering Springs, 2" drop
$149.99
-
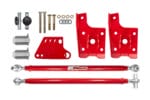
643233 - 1973-1987 GM C10 Street Performance A-Arm Kit
$1,488.99 – $1,568.99Price range: $1,488.99 through $1,568.99
-
6410 - 1973-1987 GM C10 Flip Kit
$149.99
-
- 1970-1981 GM F-Body
TOP SELLING PRODUCTS
- 1982-1992 GM F-Body
TOP SELLING PRODUCTS
- 1993-2002 GM F-Body
NEWEST PRODUCTS
- 1978-1988 GM G-Body
TOP SELLING PRODUCTS

- 1982-2003 GM S10/S15

1982-2003 GM S10/S15
TOP SELLING PRODUCTS
-
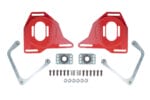
303233 - GM A-Arm Kit, Delrin Bushings, Standard Upper Ball Joints
$1,389.99
-
383001 - 1982-2003 S10/S15 Handling Kit, Corner Max, Race/Street Handling
$2,948.99
-
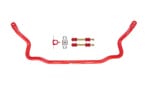
3833 - 1982-2003 S10/S15 Sway Bar, Front , Solid, 1-¼”
$259.99
-
3059 - Competition Front End Kit
$2,259.99 – $2,309.99Price range: $2,259.99 through $2,309.99
-
- 2015-2025 Ford F-150NEW
- 2016-2024 CamaroNEW
- 1979-2004 Ford Mustang
- 2005-2014 Ford Mustang
TOP SELLING PRODUCTS
- Other PlatformsMORE HERE >
- Other Products