

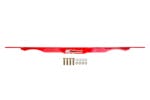


 6452F - 1963-1987 GM C10 Front Lowering Springs, 2" drop
$149.99
6452F - 1963-1987 GM C10 Front Lowering Springs, 2" drop
$149.99
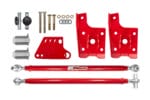
 643233 - 1973-1987 GM C10 Street Performance A-Arm Kit
$1,488.99 – $1,568.99Price range: $1,488.99 through $1,568.99
643233 - 1973-1987 GM C10 Street Performance A-Arm Kit
$1,488.99 – $1,568.99Price range: $1,488.99 through $1,568.99
 6410 - 1973-1987 GM C10 Flip Kit
$149.99
6410 - 1973-1987 GM C10 Flip Kit
$149.99

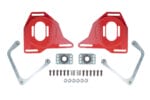
 303233 - GM A-Arm Kit, Delrin Bushings, Standard Upper Ball Joints
$1,389.99
303233 - GM A-Arm Kit, Delrin Bushings, Standard Upper Ball Joints
$1,389.99
 383001 - 1982-2003 S10/S15 Handling Kit, Corner Max, Race/Street Handling
$2,948.99
383001 - 1982-2003 S10/S15 Handling Kit, Corner Max, Race/Street Handling
$2,948.99
 3833 - 1982-2003 S10/S15 Sway Bar, Front , Solid, 1-¼”
$259.99
3833 - 1982-2003 S10/S15 Sway Bar, Front , Solid, 1-¼”
$259.99
 3059 - Competition Front End Kit
$2,259.99 – $2,309.99Price range: $2,259.99 through $2,309.99
3059 - Competition Front End Kit
$2,259.99 – $2,309.99Price range: $2,259.99 through $2,309.99
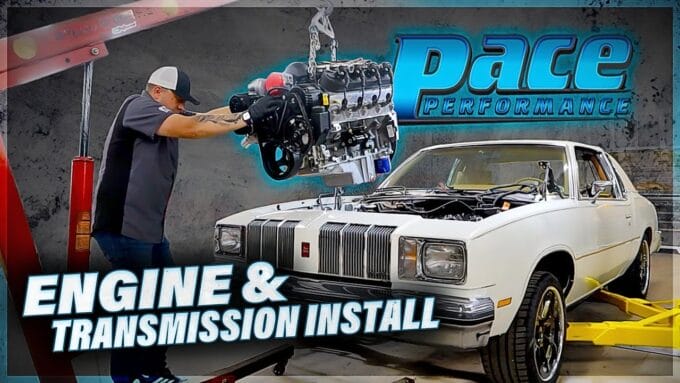
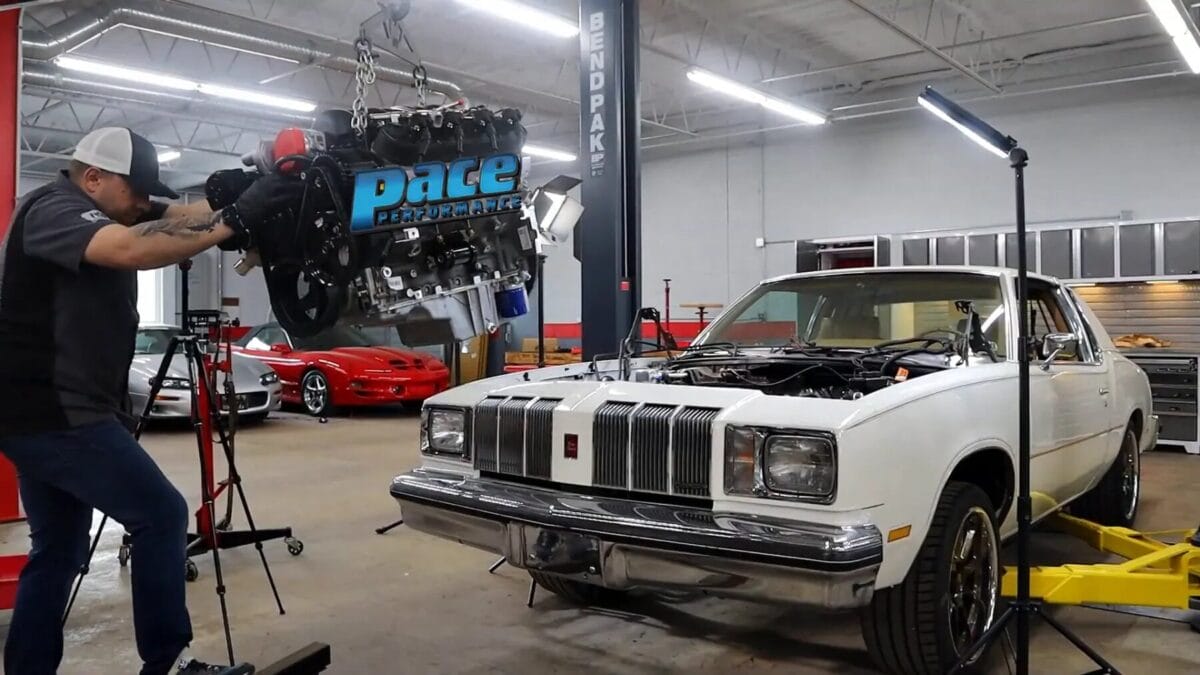
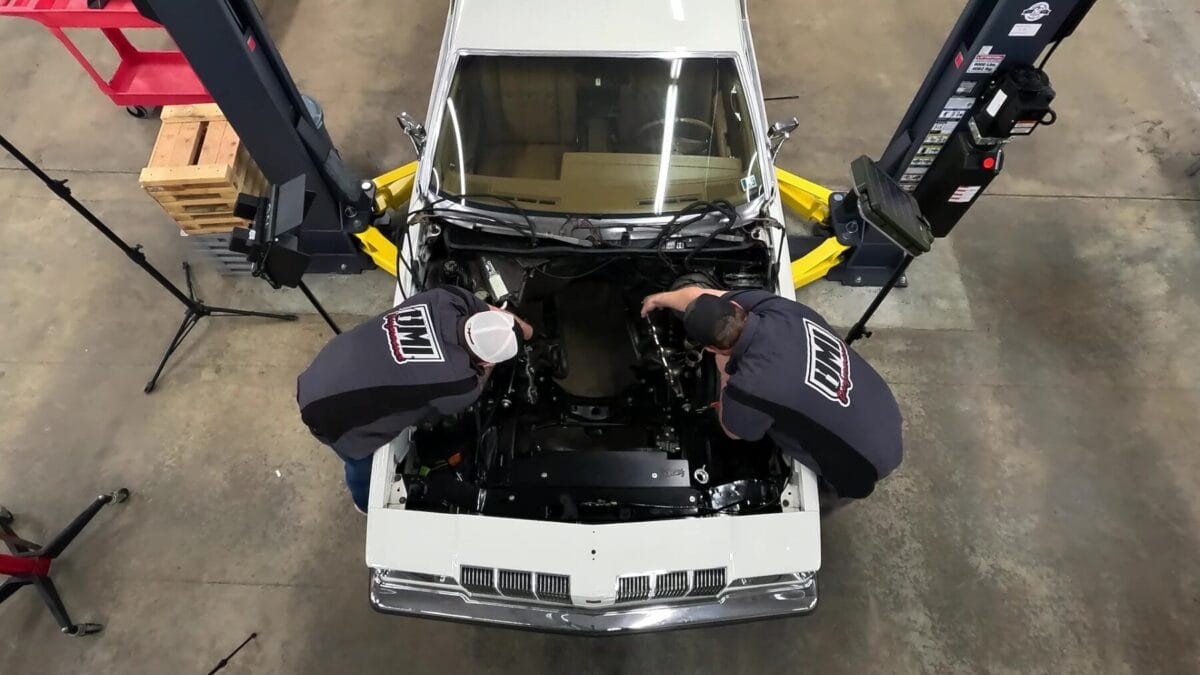
At UMI Performance, we’re passionate about blending classic muscle car style with cutting-edge performance upgrades. In this detailed walkthrough, we take you through our comprehensive G-body LS swap install process on a 1978 Cutlass. From installing a Holley mid-mount system on a powerful Pace Performance LS3 engine to fitting a robust Bowler transmission, this project showcases how modern engineering can breathe new life into an iconic classic.
Whether you’re planning your own LS swap or simply love seeing how a classic muscle car gets transformed into a modern powerhouse, this guide covers every step, insight, and challenge we encountered along the way. Let’s dive into the build and explore how we achieve a sleek, factory-inspired look while maximizing performance and reliability.
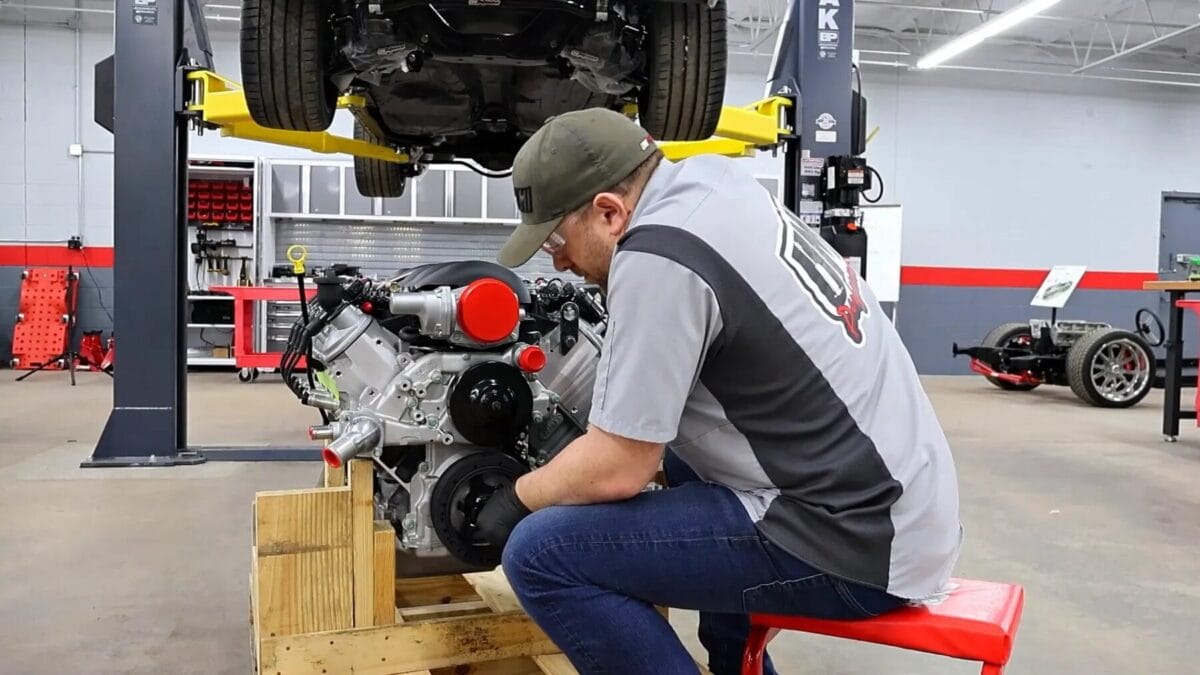
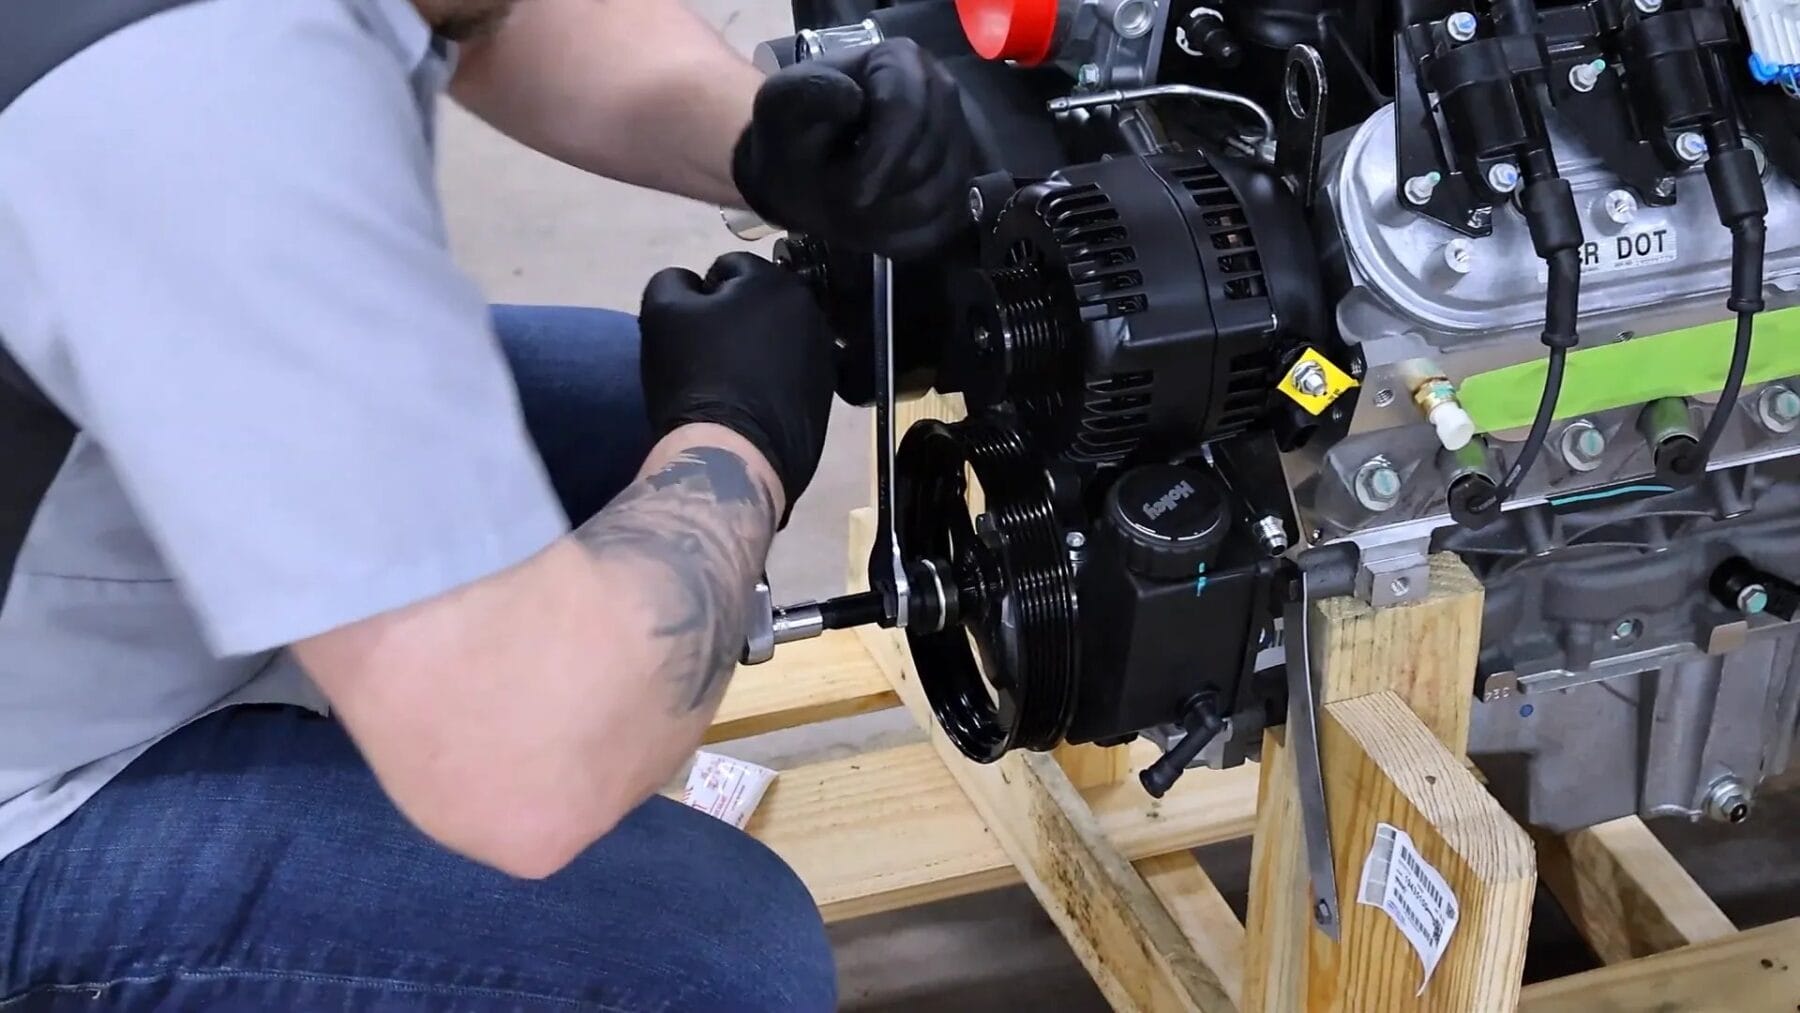
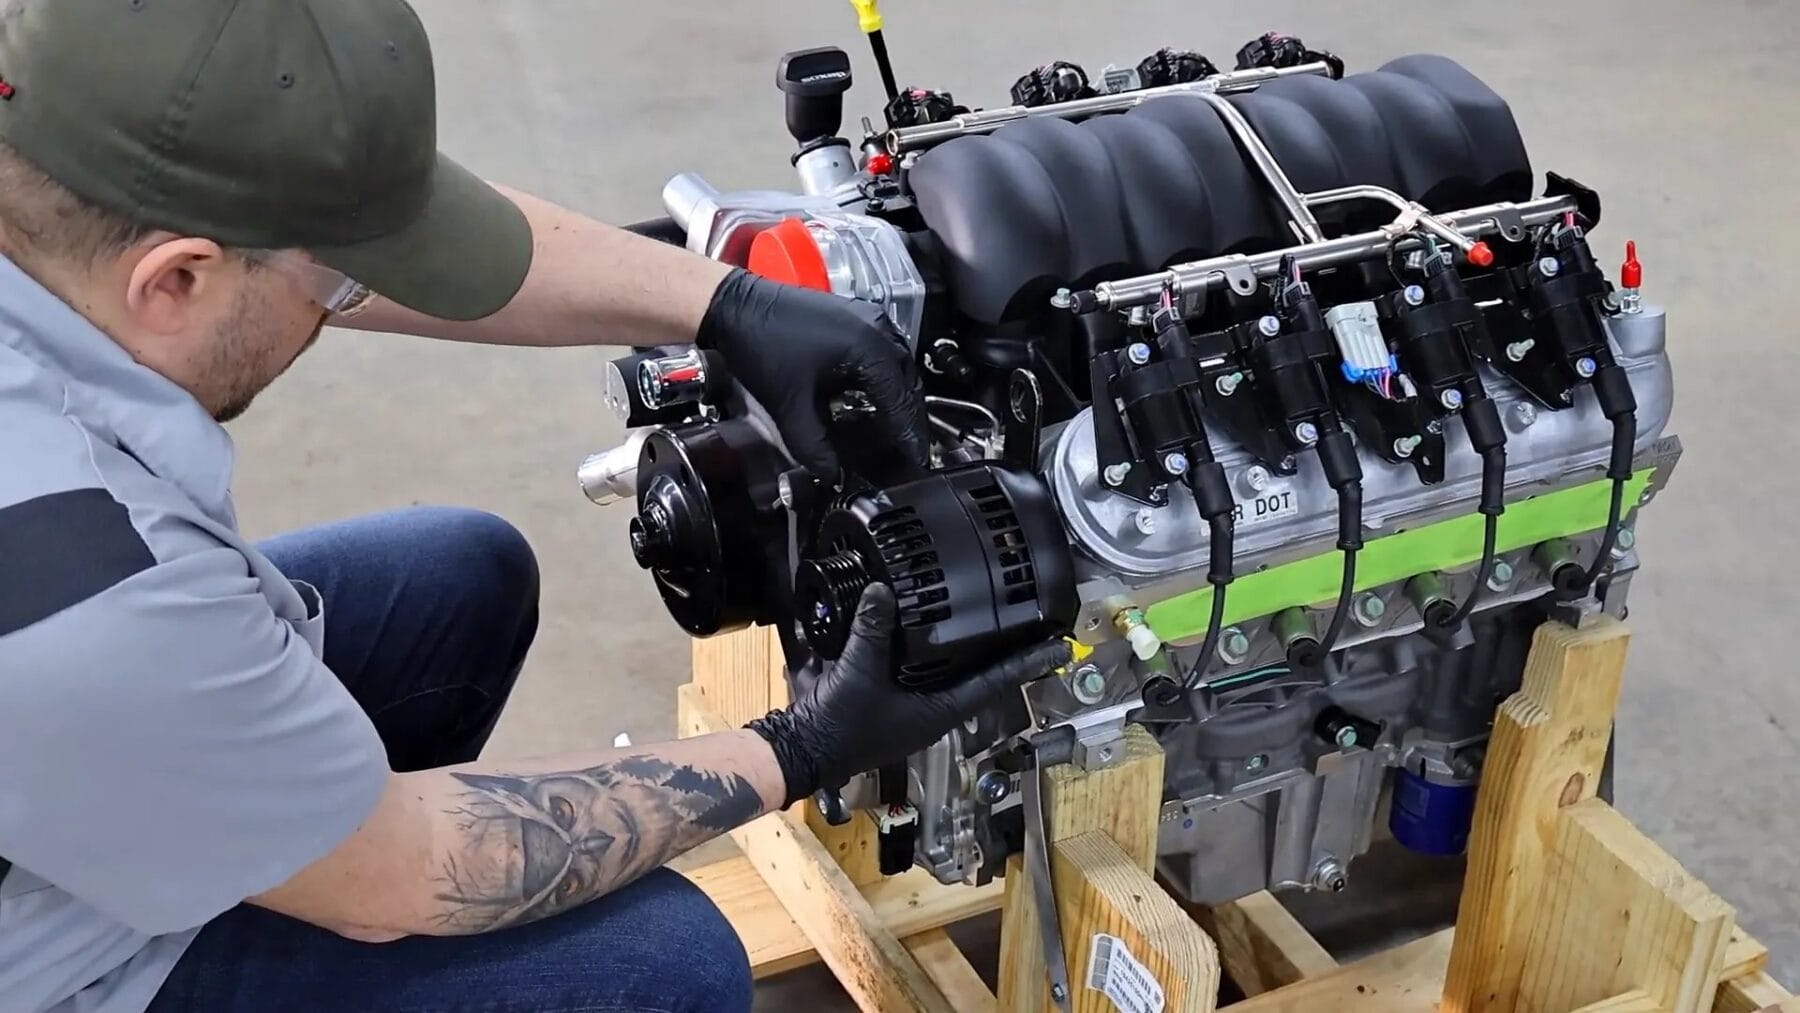
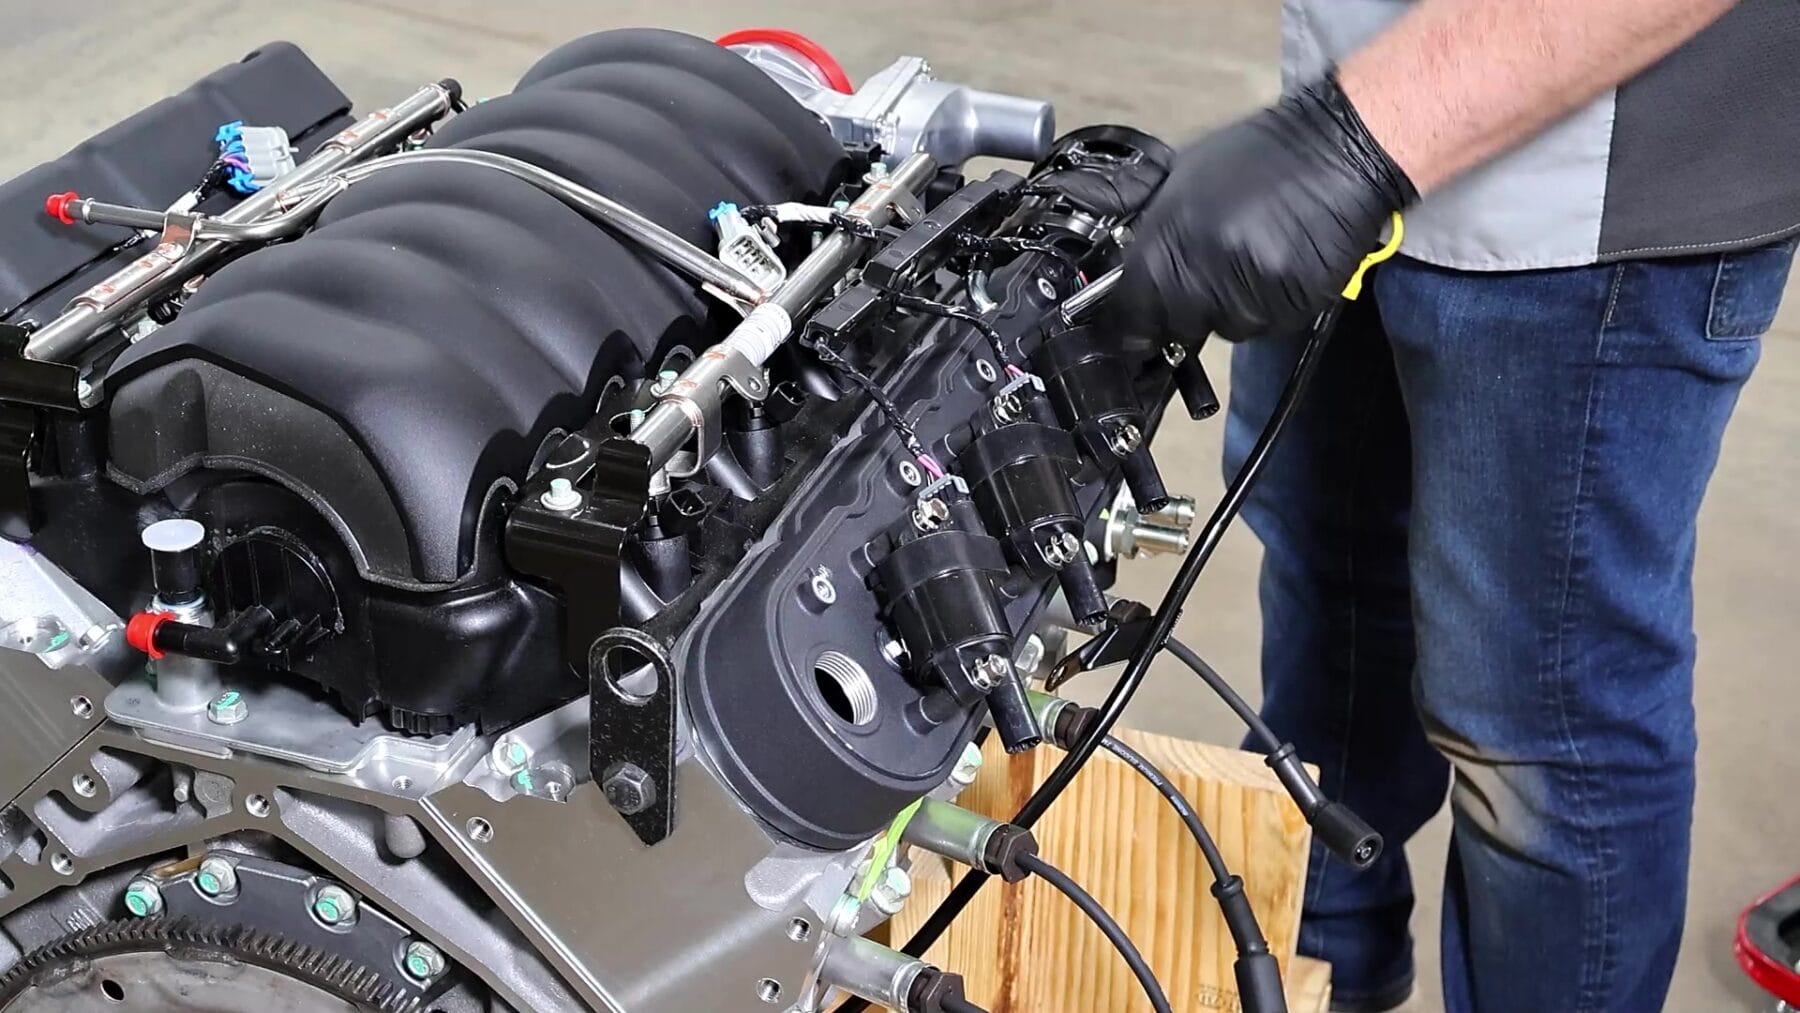
Our journey began with the Pace Performance LS3 crate motor, which came equipped with all the necessary front accessories like the water pump and pulleys. However, to achieve a cleaner, more stealthy appearance, we decided to swap out the stock components for a Holley mid-mount system. Choosing black components allowed us to maintain a subtle, factory-like aesthetic that blends seamlessly into the engine bay.
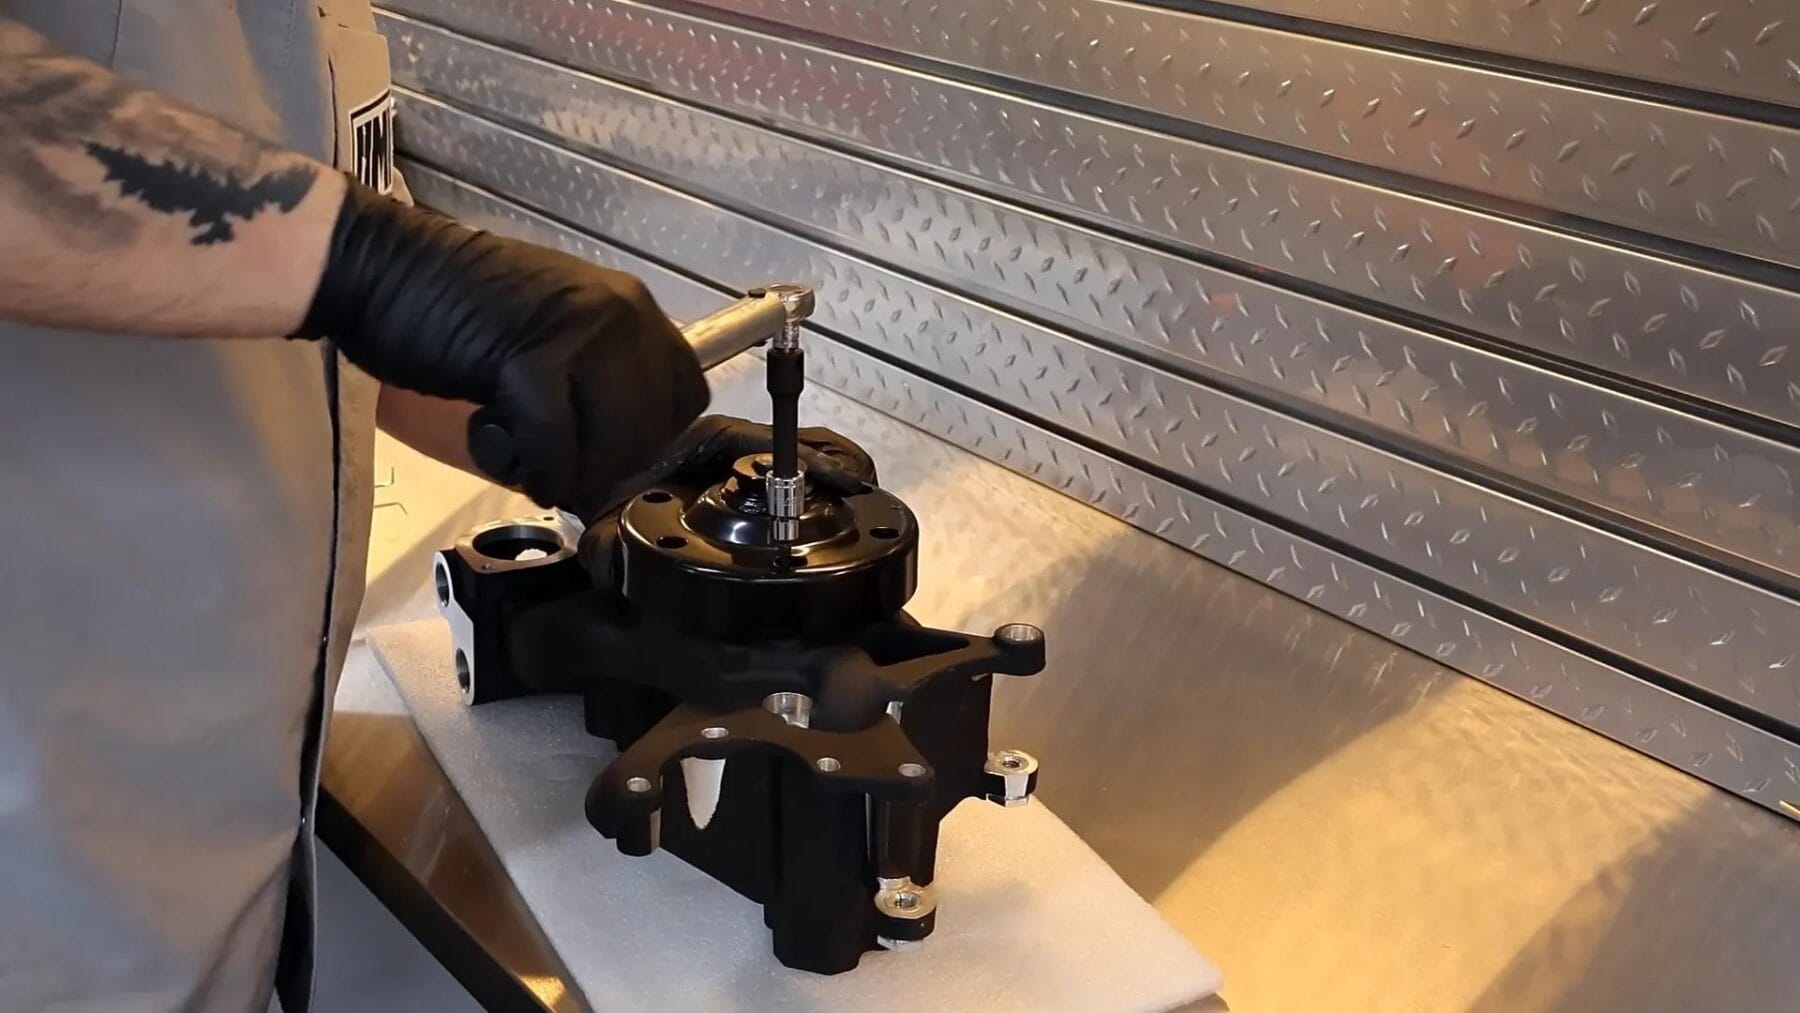
One of the first tasks was removing the original water pump to install the new mid-mount water pump pulley assembly. This new setup not only supports the essential engine accessories but also provides multiple mounting points for additional components that may be added in the future.
We also made sure the heater system would continue working flawlessly by tightening new barbed fittings on the water pump. This attention to detail ensures the car remains comfortable to drive in all conditions.
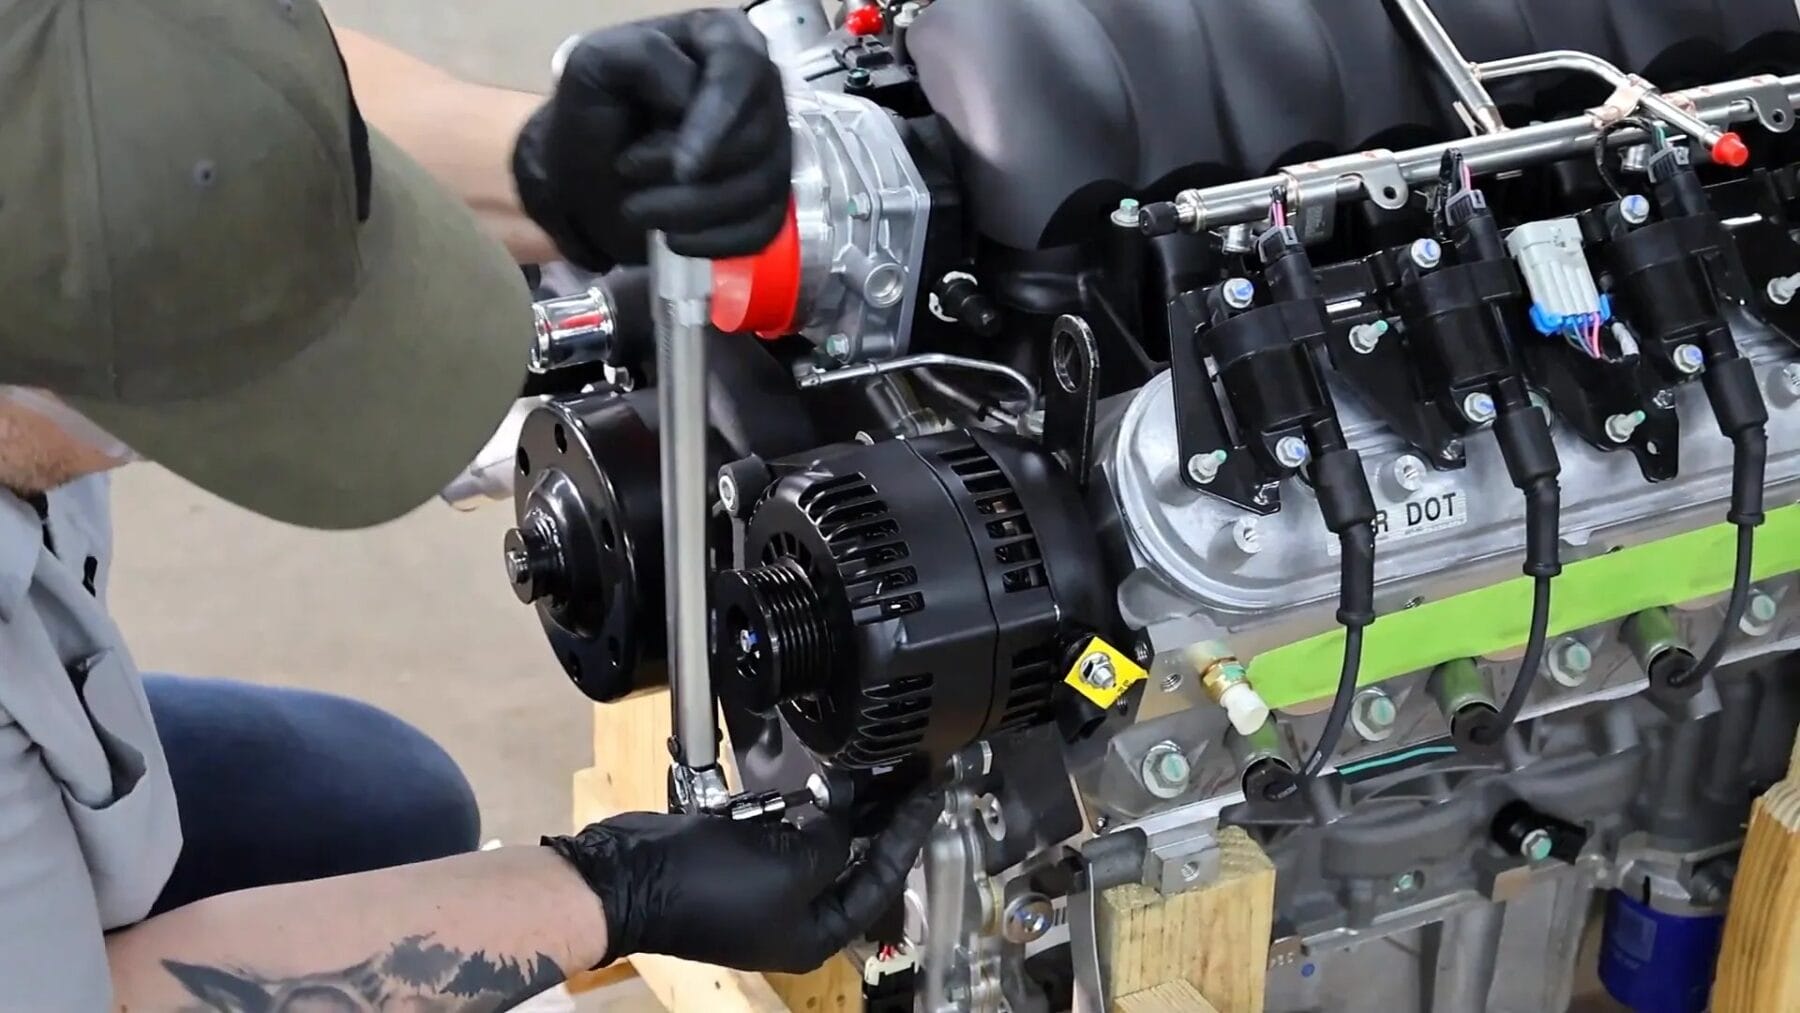
Powering the electrical system reliably is critical, so we installed a high-quality alternator to handle everything from engine management tunes to the vehicle’s electrical needs. For steering, we reached out to Turn One and sourced one of their power steering pumps, which offers both performance and reliability. This pump was assembled carefully and integrated into the mid-mount system.
A quick tip from our experience: when installing pulleys, double-check the orientation! We initially installed the water pump pulley backwards, which caused damage and required a replacement. It’s a small detail that can save you time and money.
Following the pulley installation, we moved on to installing the AC compressor, crank pulley, and idler pulley. While the process is straightforward, having specialty tools is essential—one tool, in particular, locks the flywheel to allow proper torque application on the crankshaft bolts. This ensures everything is tightened to spec and runs smoothly.
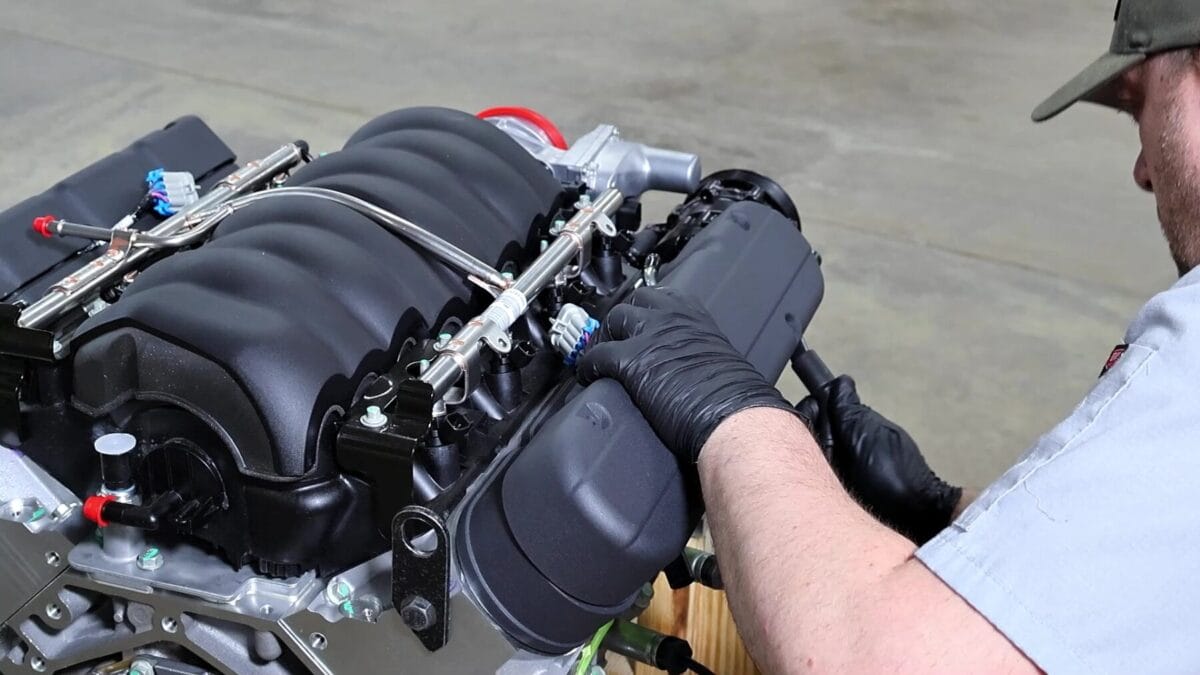
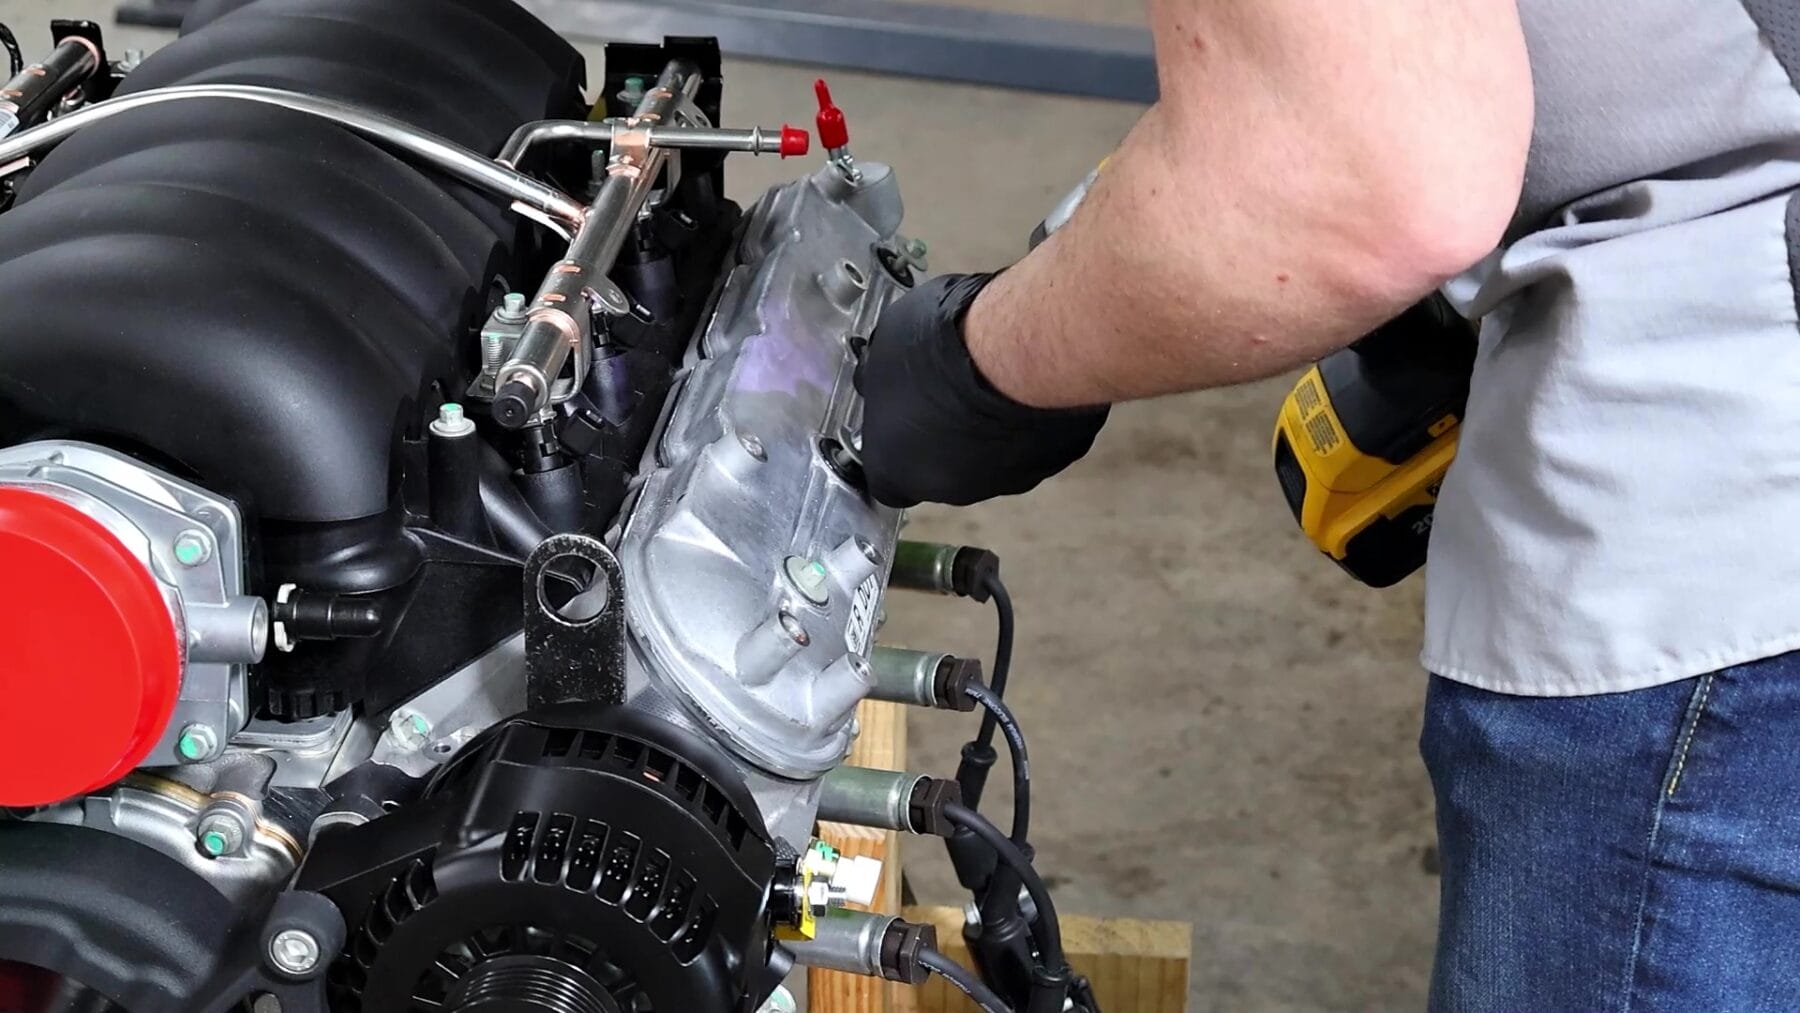
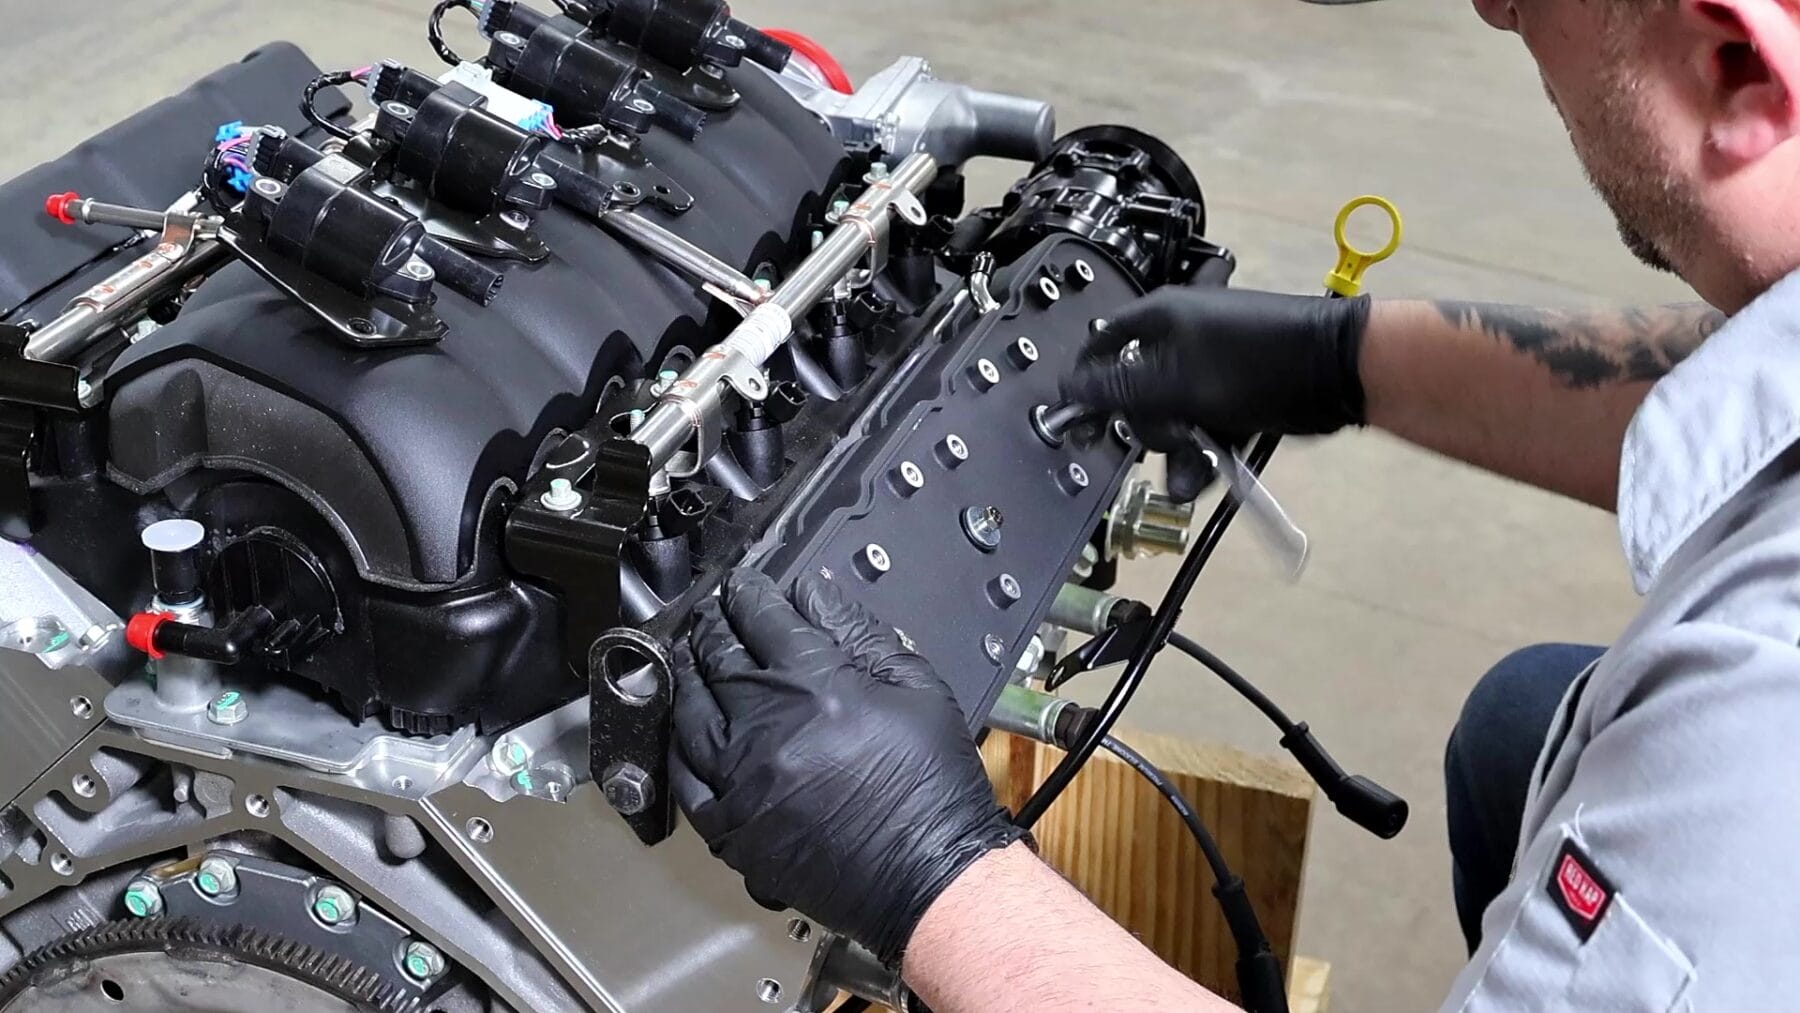
For a sleeker appearance, we initially opted for two-piece valve covers that look fantastic and can hide ignition coils, lending a clean, old-school vibe. However, because our Cutlass is a factory AC car, tight space in the engine bay presented fitment issues. We didn’t want to cut into the AC box, so we decided to switch back to factory-style LS3 valve covers and used fiberglass LS3 covers over them for a refined, sleek appearance without sacrificing functionality.
This solution perfectly balances aesthetics and practicality, especially for applications where preserving original components like the AC system is important.
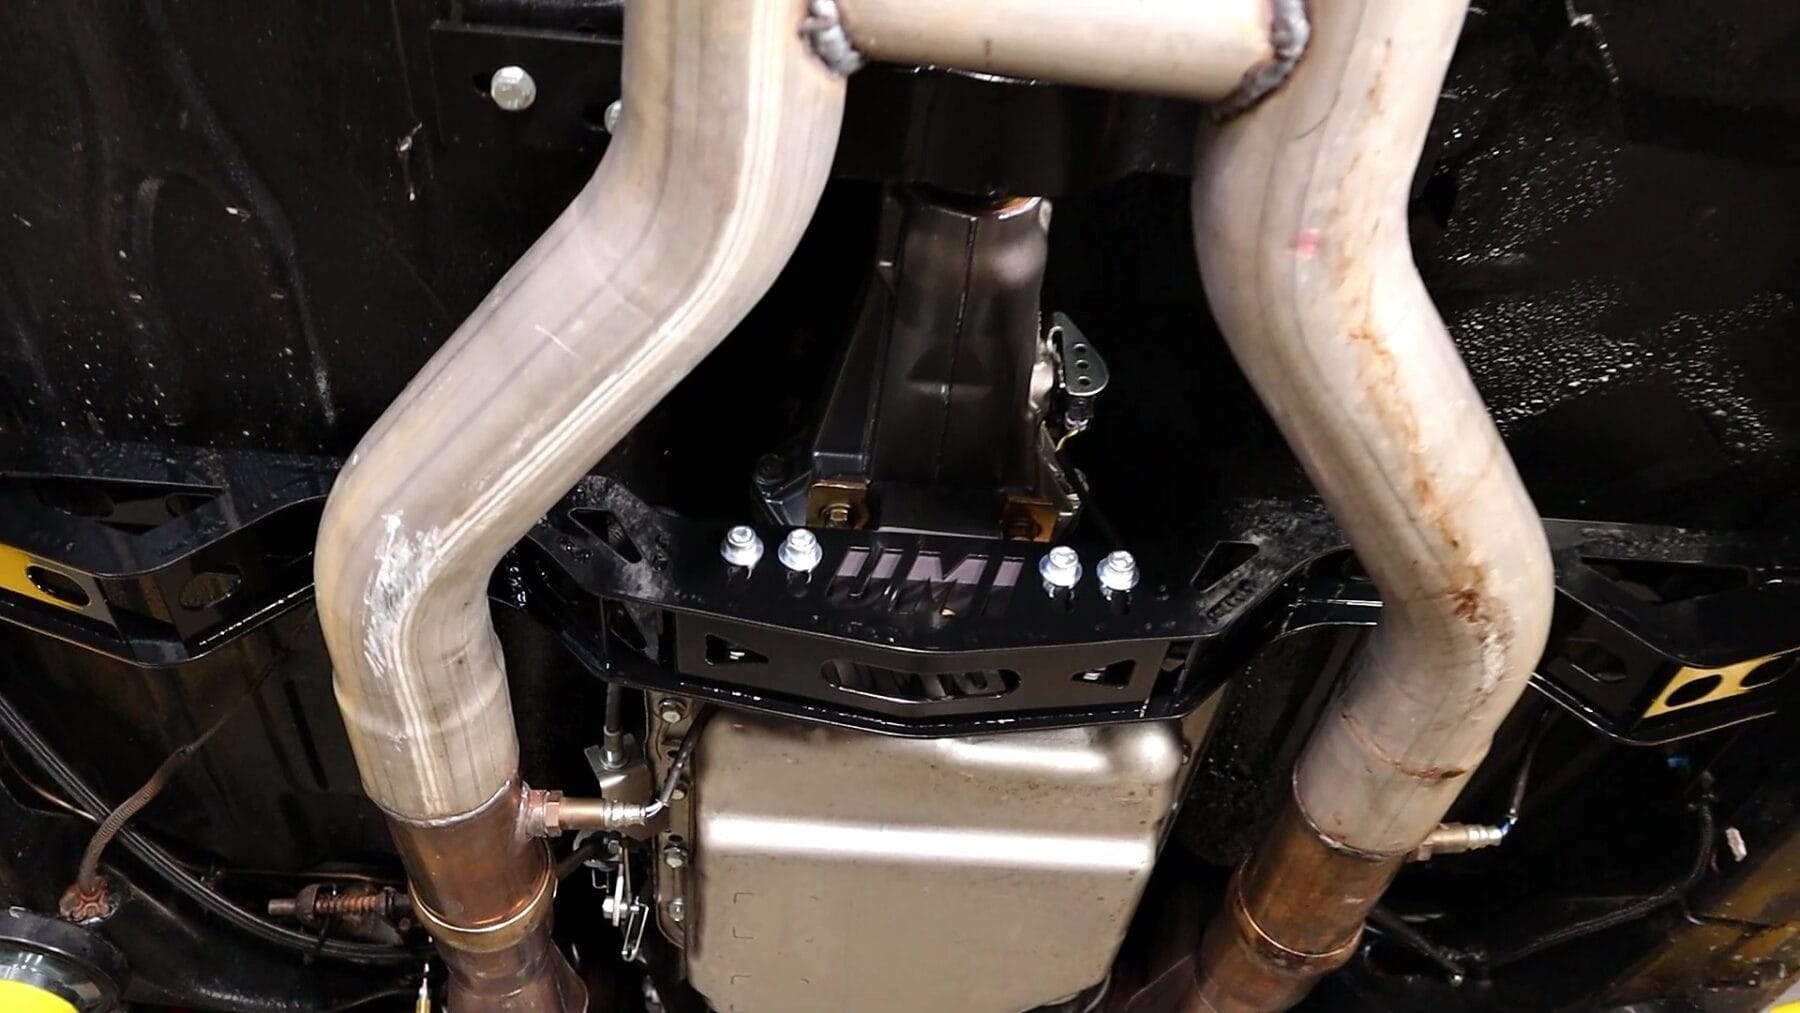
With the engine accessories and valve covers sorted, the next crucial step was mounting the engine securely in the chassis. We used our LSX poly engine mounts, designed to provide a perfect balance between comfort and performance. The frame side mounts, part number 2406, fit multiple GM G-body years and engine styles, including Buick, Olds, Pontiac, and Chevrolet. They feature a double shear mount design, which adds strength and durability.
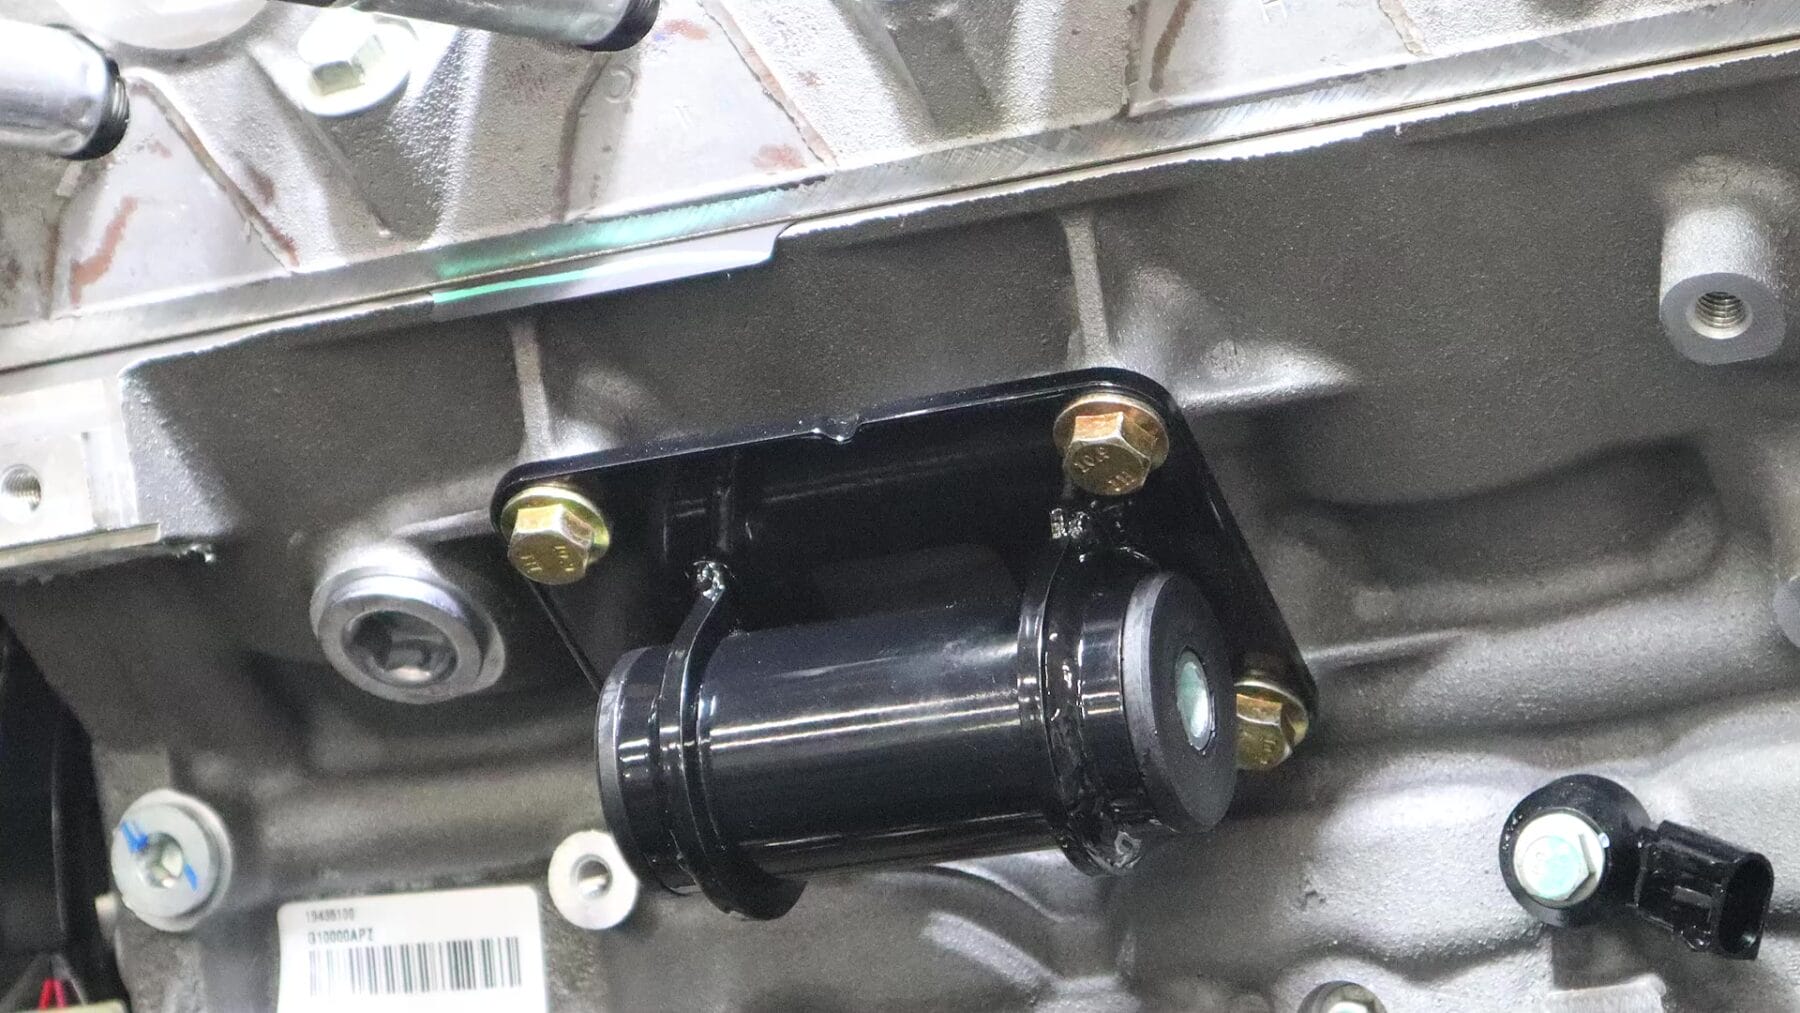
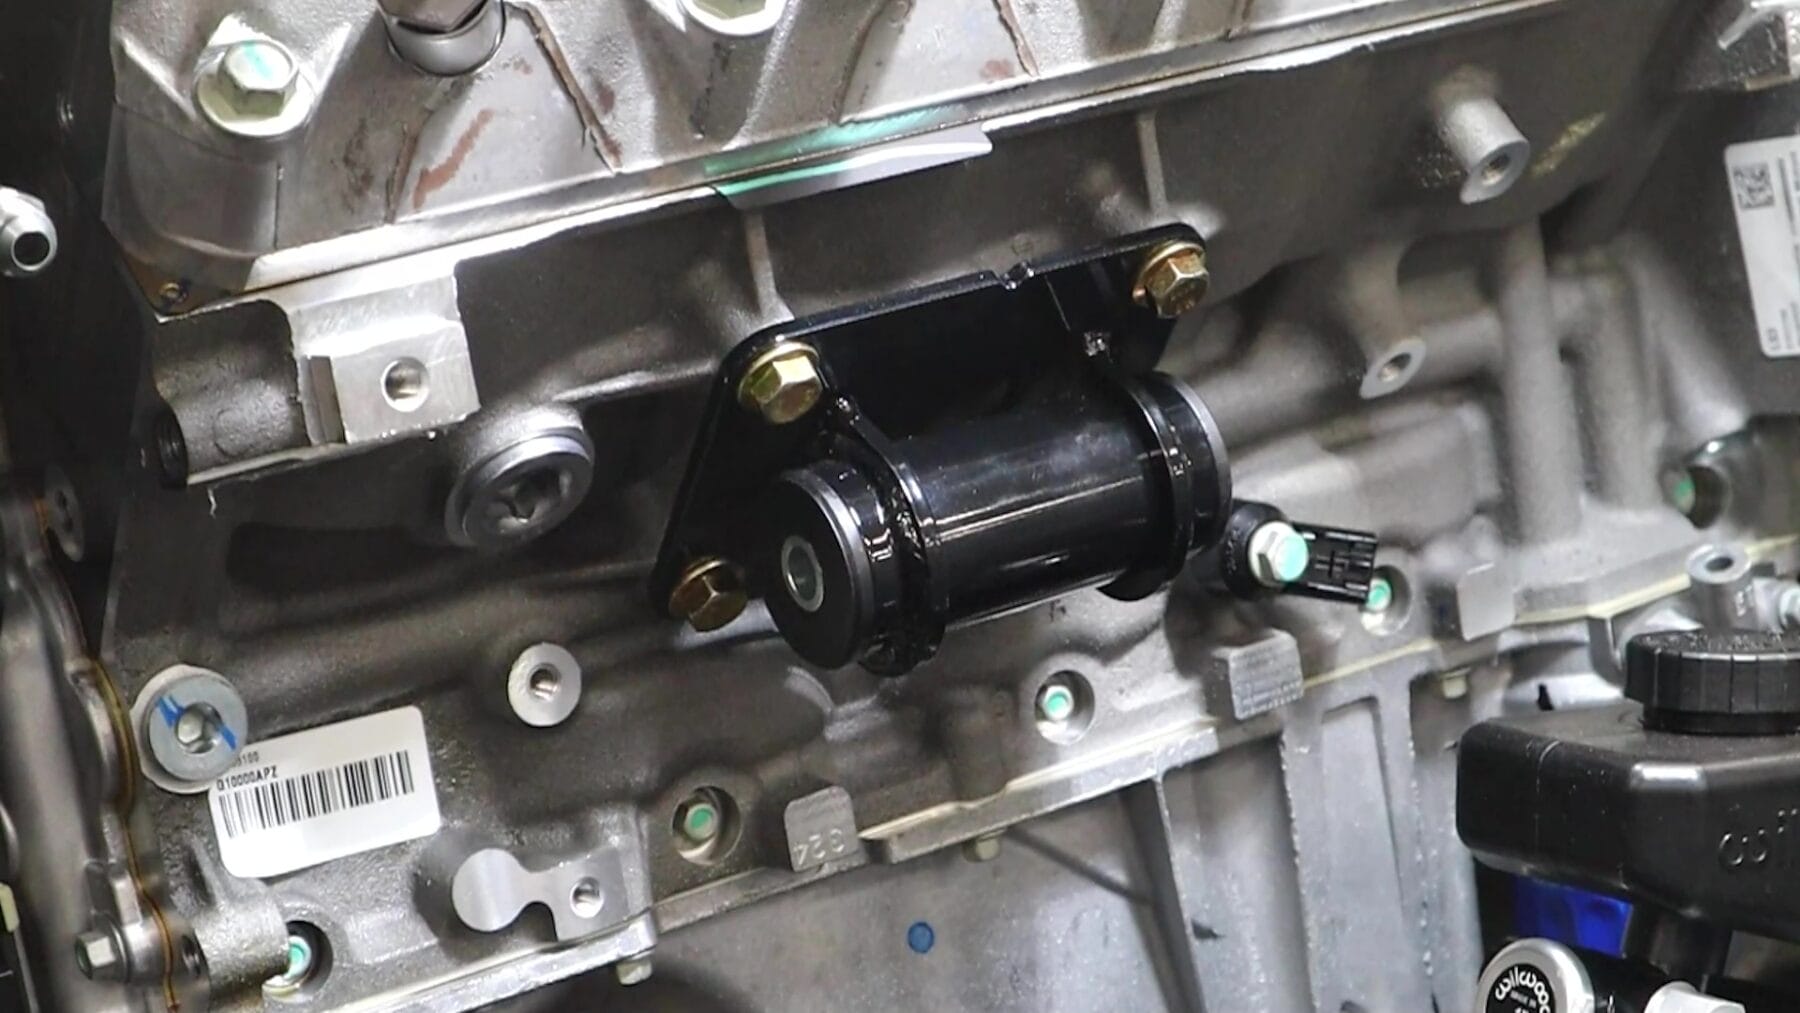
The LS engine side mounts, part number 2329, are made from polyurethane to reduce vibration while maintaining a solid connection. This combo allows for a direct bolt-in LS engine installation into 1978-1988 GM G-body cars, making the process more straightforward and reliable.
One of the benefits of these mounts is that they provide enough flexibility for street driving comfort while being robust enough for high-performance applications.
With mounts ready, we moved on to installing a set of American Racing headers, which are custom-fit for the LS swap with no clearance issues on the frame or header itself. These headers are designed specifically for smooth integration into the G-body chassis, ensuring performance gains without the need for extensive modifications.
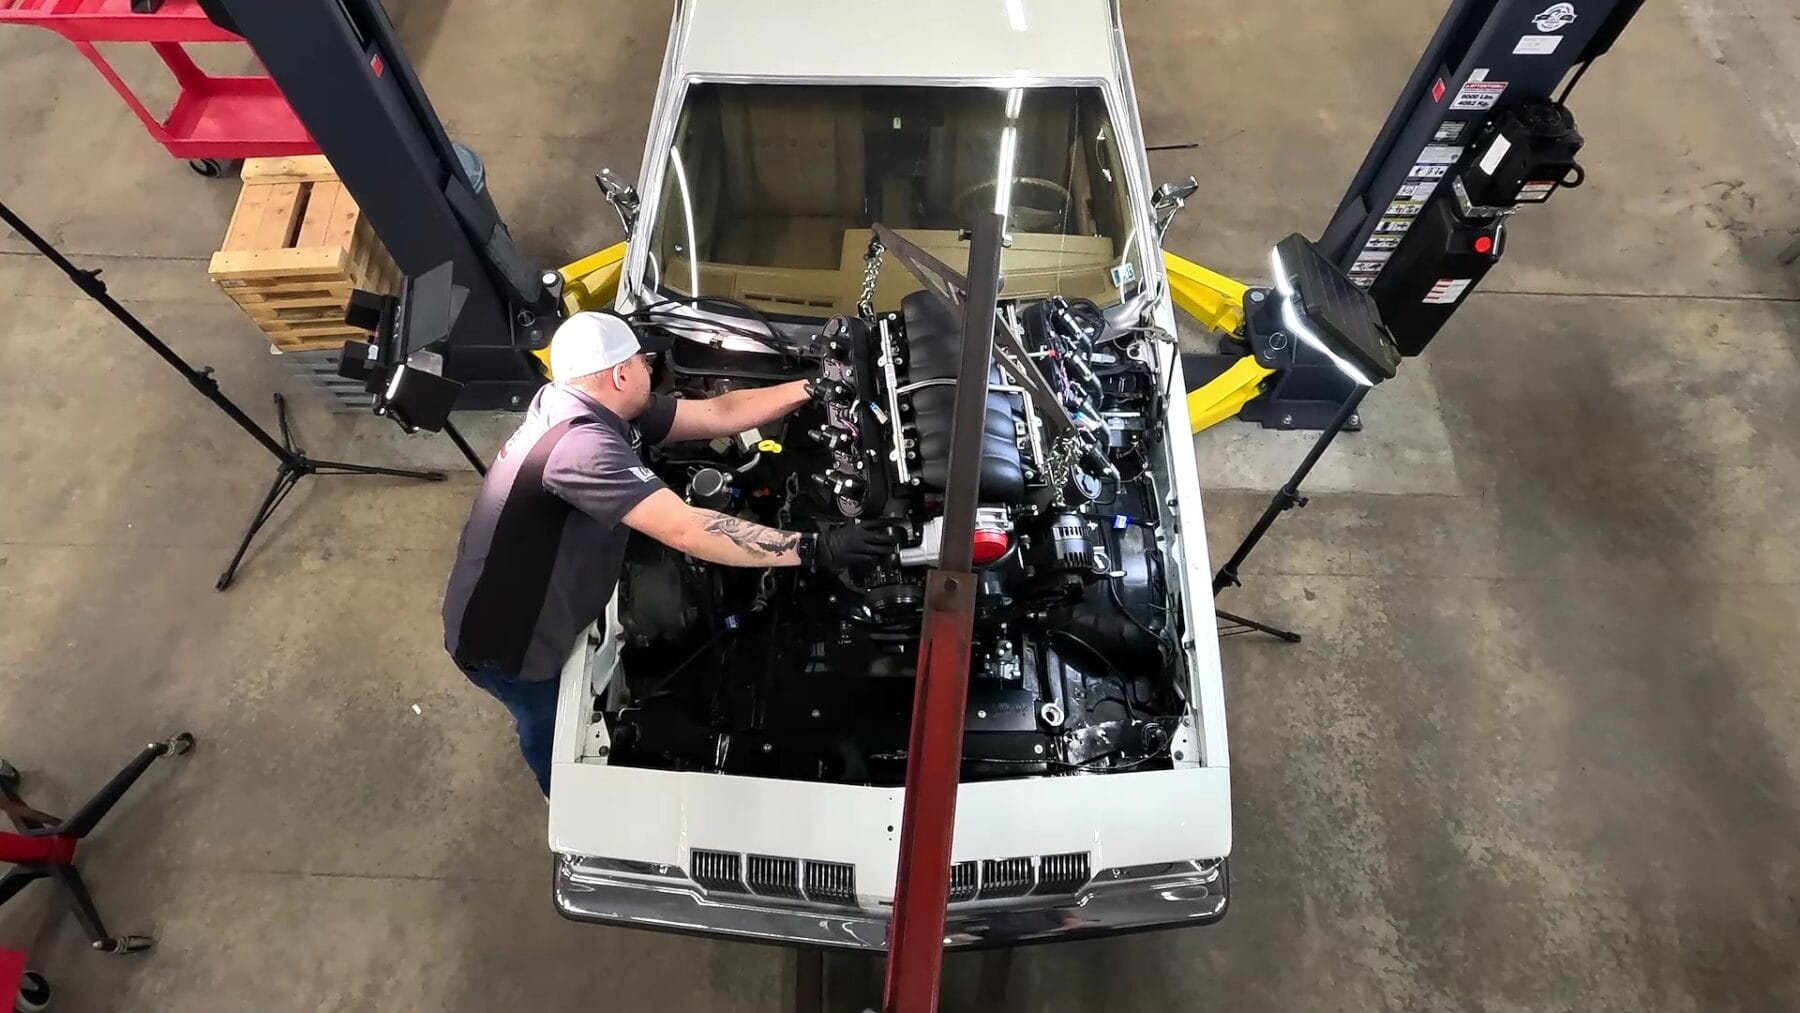
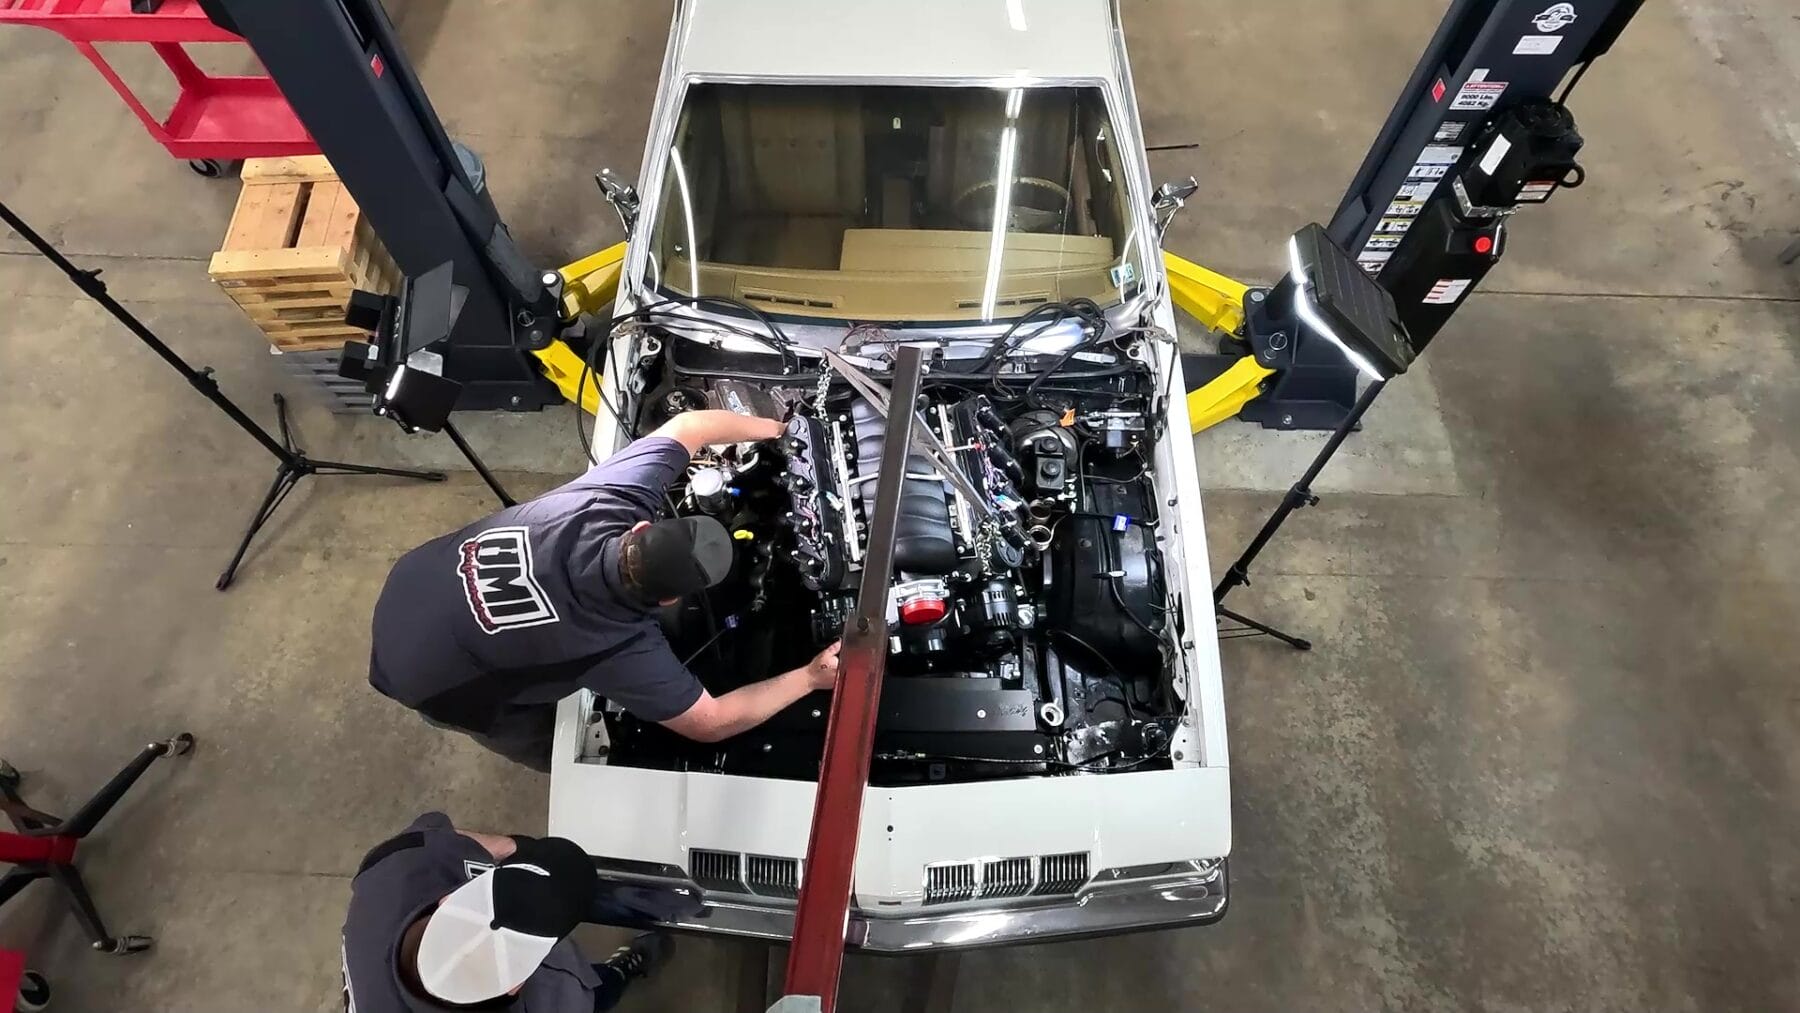
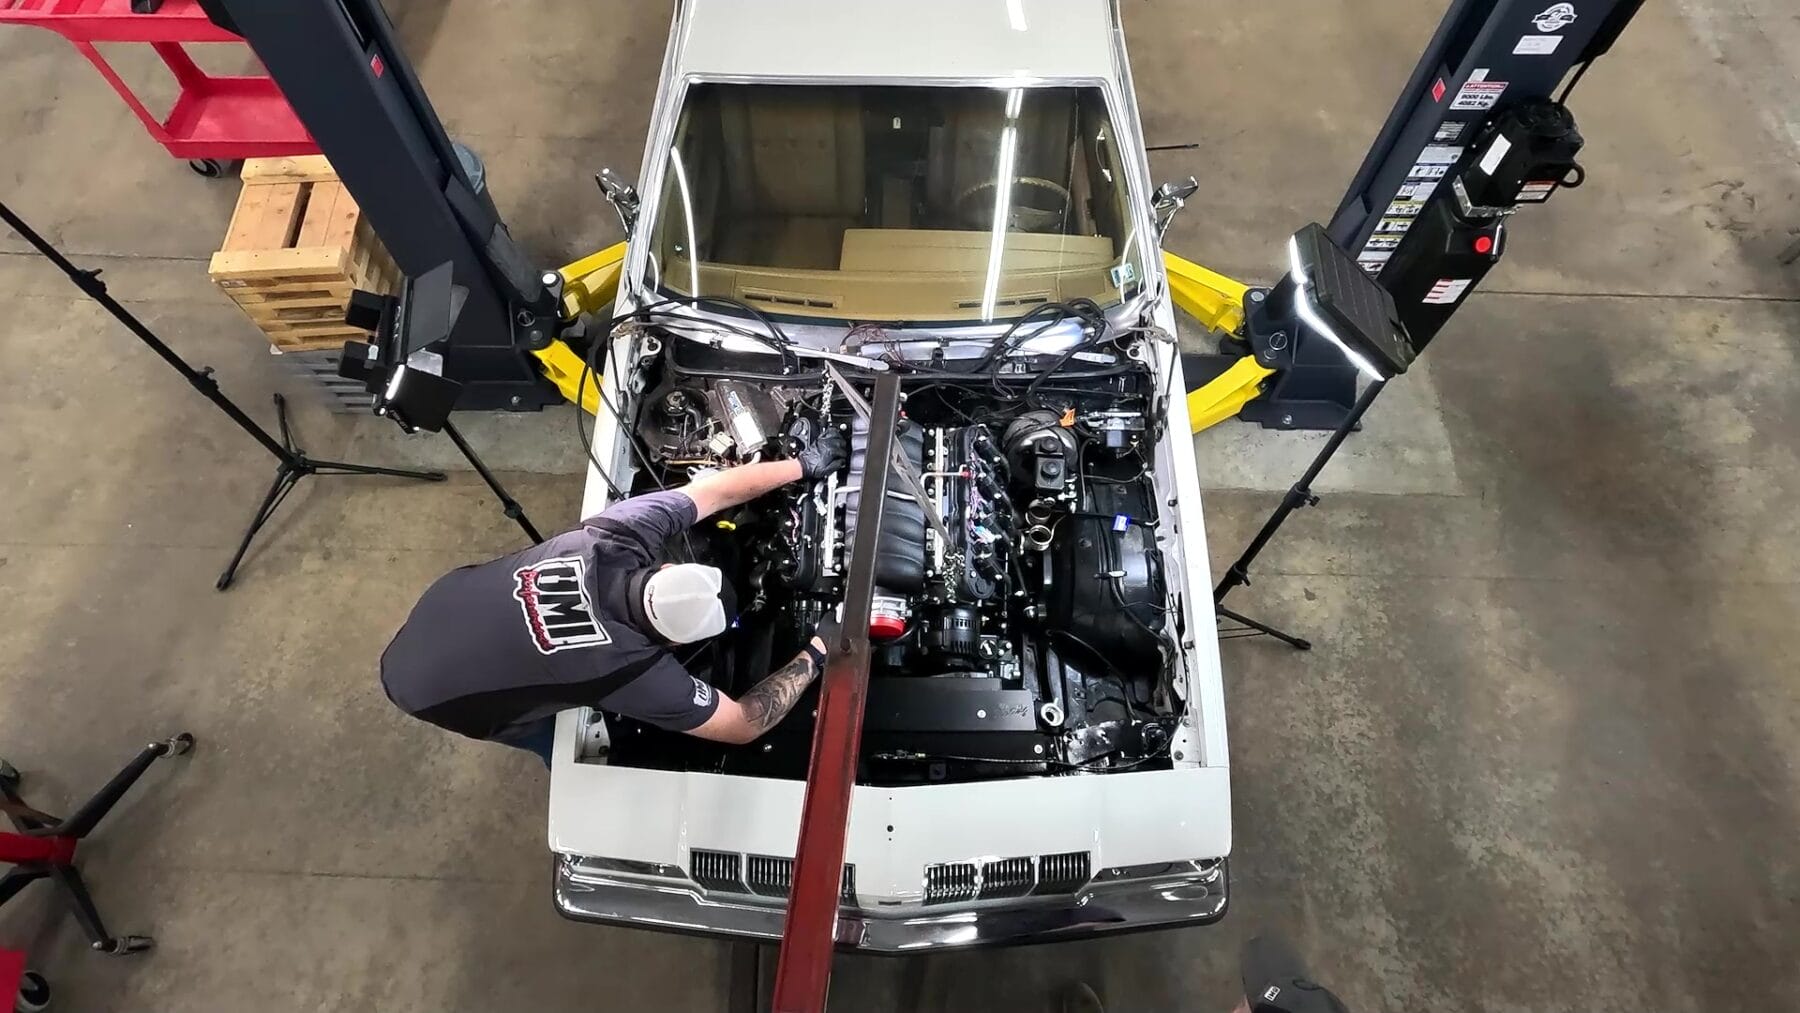
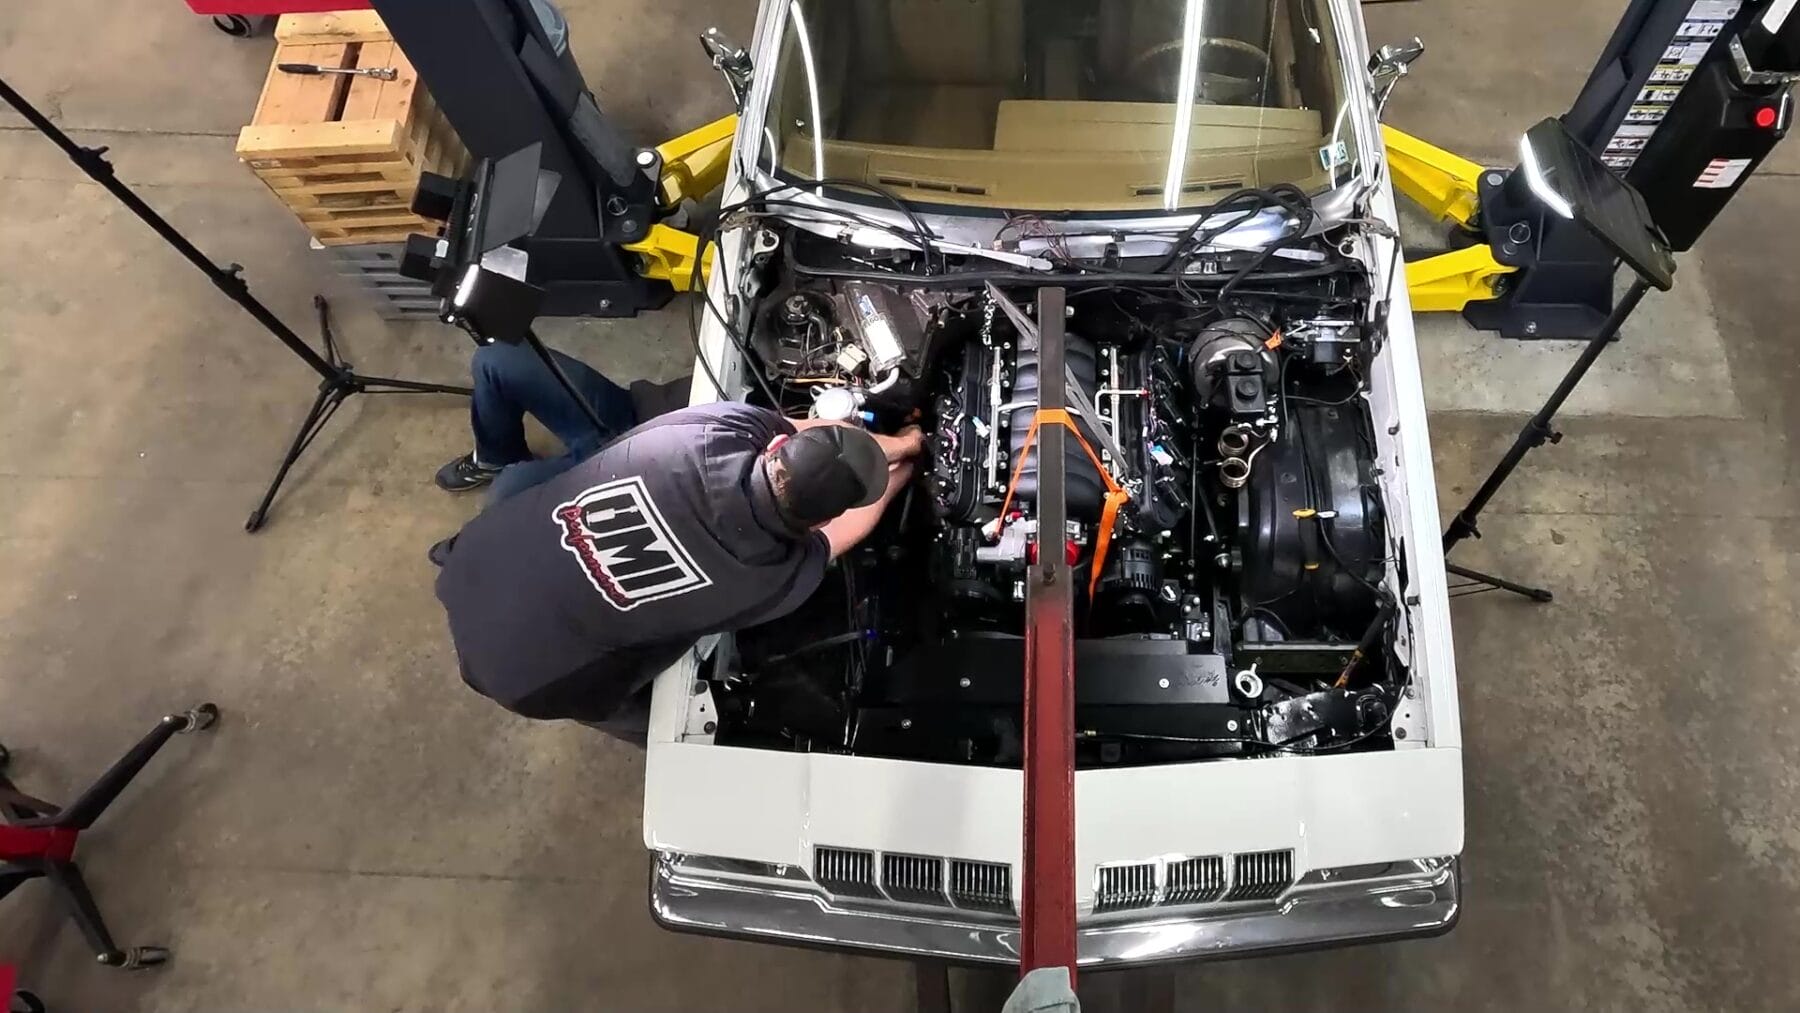
Before dropping the Pace LS3 engine into the Cutlass, we made sure the headers were positioned in the engine bay, as installing them afterward isn’t feasible. The engine bay is tight, so careful maneuvering and patience were key to avoiding any scratches or damage during installation.
To help level the engine during the drop, we improvised using a ratchet strap as a balancing tool, demonstrating that even without professional equipment, a well-planned approach can get the job done safely and effectively.
We also learned that leaving the chassis side of the motor mounts loose during installation allows for easier adjustments to ensure the engine sits perfectly before tightening everything down. This tip is invaluable for anyone tackling a similar project.
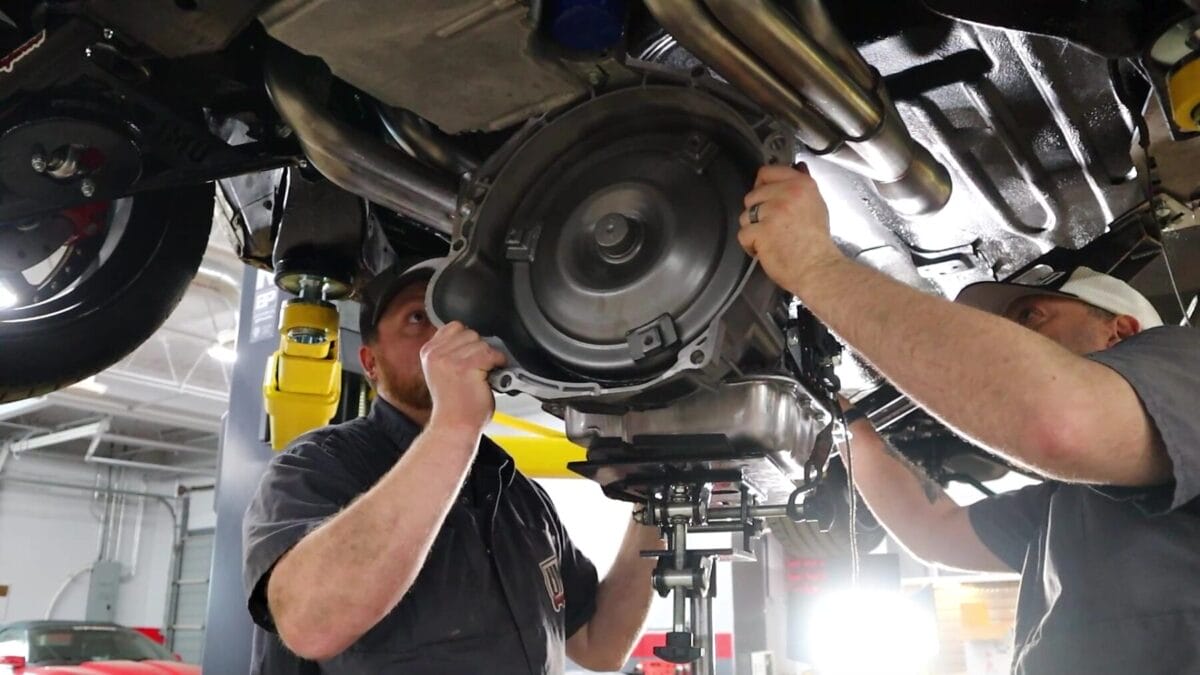
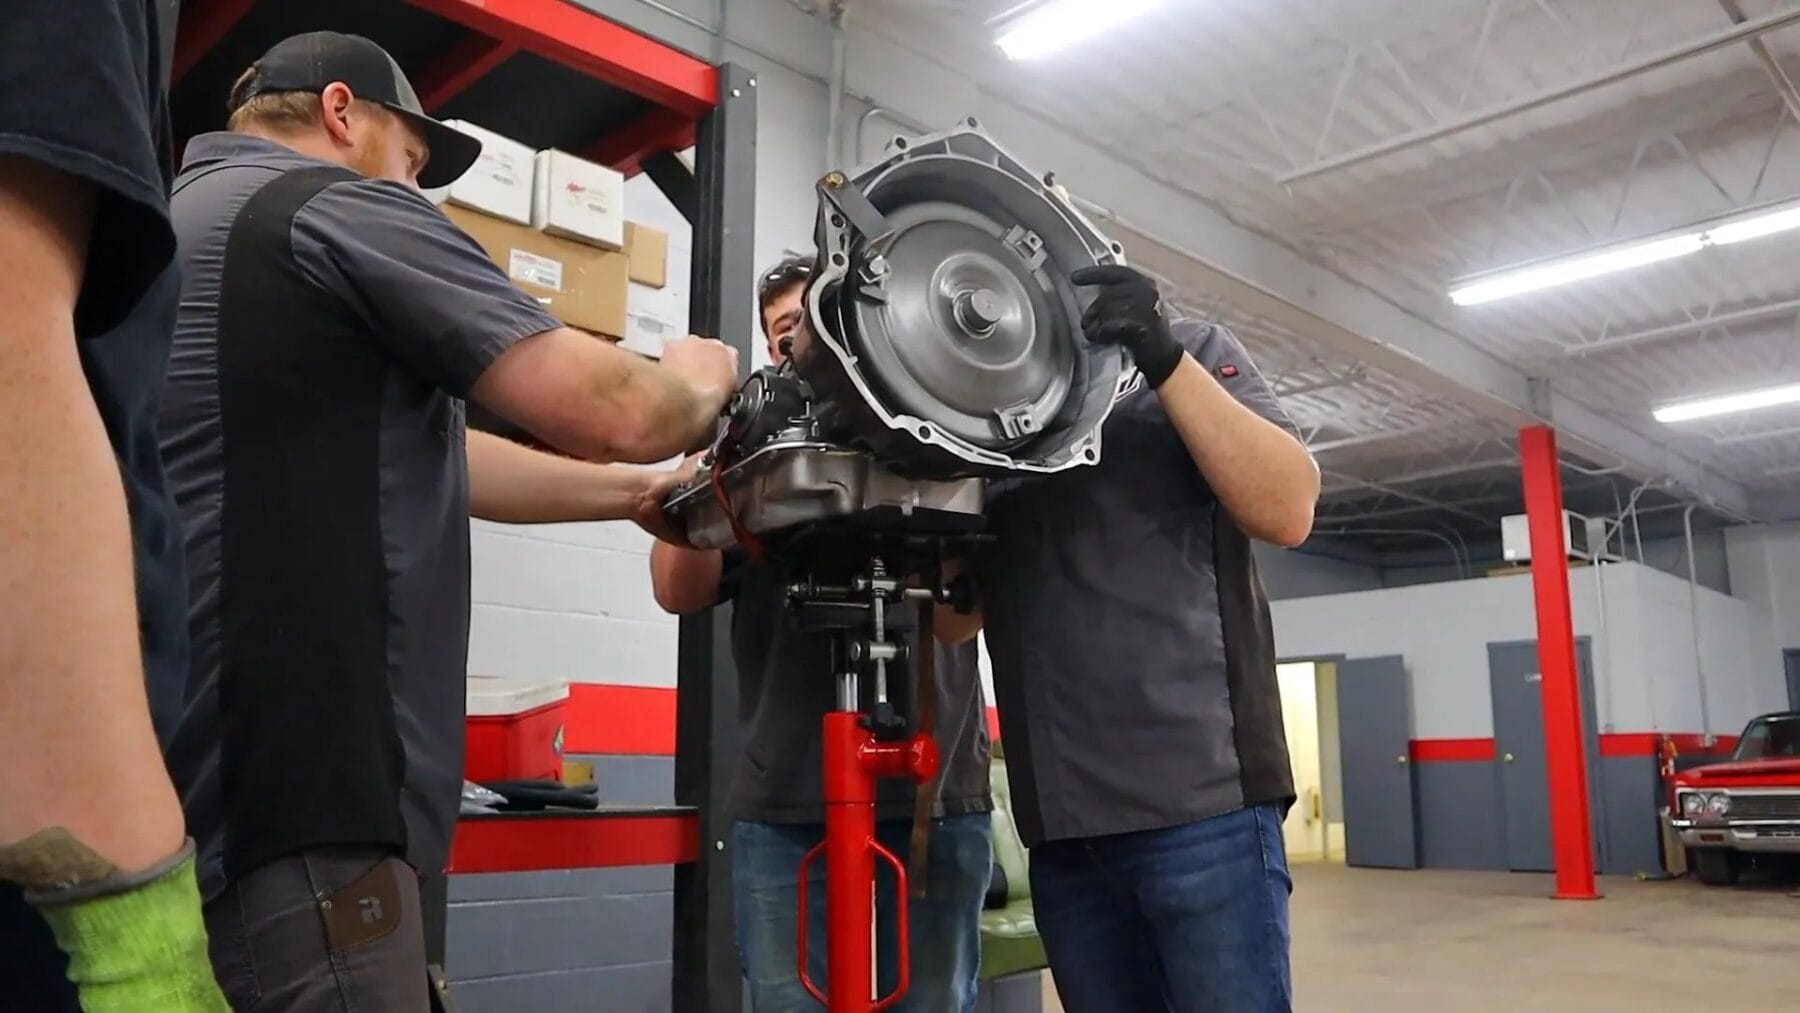
After securing the engine, it was time to install the transmission capable of handling the LS3’s power. We chose the Bowler Tru-Street series four-speed automatic, rated for around 500 horsepower. This transmission is well-known for its durability in both street and racing scenarios.
The transmission came equipped with a computer and cooler to manage heat generated during intense driving conditions such as racing or burnouts. We filled it with Royal Purple Air Max ATF, a premium fluid known for its distinctive purple color and superior performance compared to traditional red fluids.
We appreciate the craftsmanship from Bowler Transmissions and look forward to shaking hands with their team one day. Their transmissions are built bulletproof and have been a long-time reliable partner in our builds.
Using a transmission jack, we carefully raised the Bowler transmission to mate it with the LS3 engine. The transmission features dowel pins that align perfectly with the engine’s bell housing, ensuring the crankshaft and transmission centerlines match up flawlessly. This precise fitment is critical for smooth operation and longevity.
Once aligned, the transmission slid right into place, ready to be bolted and connected to the rest of the drivetrain.
Our G-body ls swap install on the 1978 Cutlass was a rewarding project that combined modern performance technology with classic muscle car heritage. From selecting a stealthy Holley mid-mount system to overcoming fitment challenges with valve covers and expertly installing a Bowler transmission, every step was about precision, quality, and respect for the car’s legacy.
For those considering a similar swap, we recommend:
We hope this detailed overview inspires you and provides valuable insights for your own muscle car projects.
Ready to start your own G-body LS swap? Check out our full stage two kit and engine mounts at UMI Performance:
In stock
In stock
In stock
No account yet?
Create an Account


