


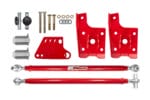


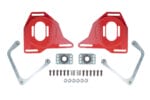


304647 – 1978-1988 GM G-Body C5/C6 Front Brake Conversion Hubs, Bearings, Bracket Kit
SKU:
304647
In stock
$579.99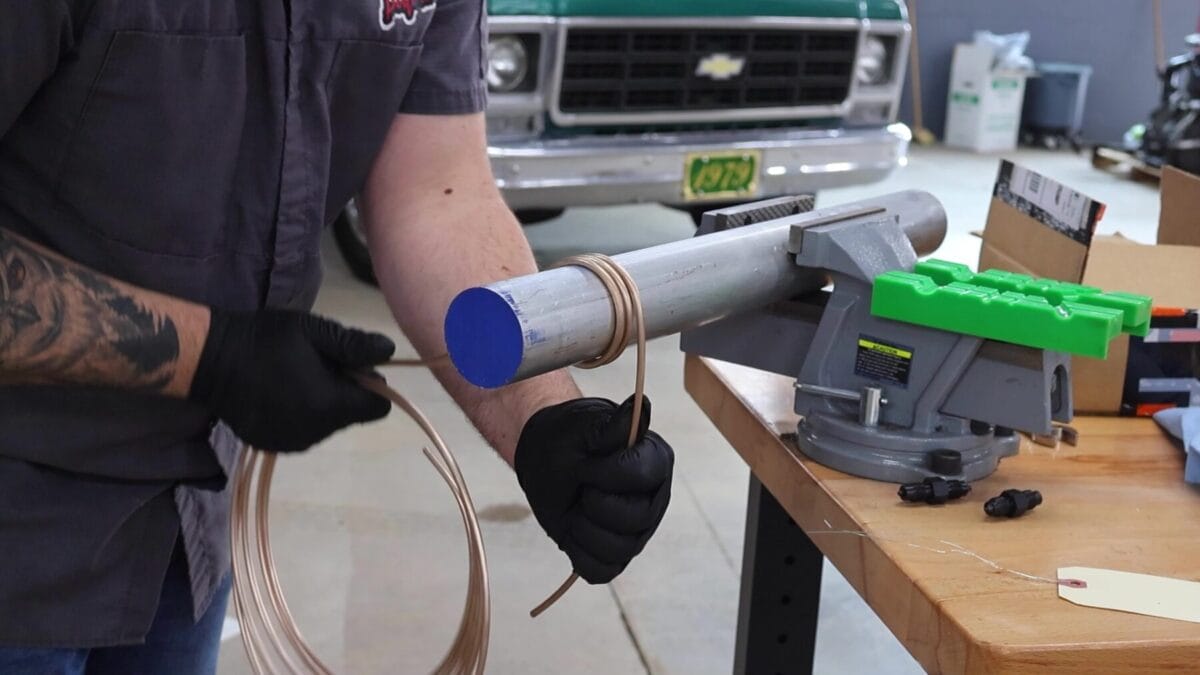
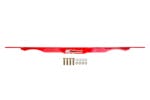
 6452F - 1963-1987 GM C10 Front Lowering Springs, 2" drop
$149.99
6452F - 1963-1987 GM C10 Front Lowering Springs, 2" drop
$149.99
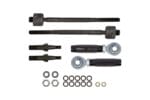
 643233 - 1973-1987 GM C10 Street Performance A-Arm Kit
$1,488.99 – $1,568.99Price range: $1,488.99 through $1,568.99
643233 - 1973-1987 GM C10 Street Performance A-Arm Kit
$1,488.99 – $1,568.99Price range: $1,488.99 through $1,568.99
 6410 - 1973-1987 GM C10 Flip Kit
$149.99
6410 - 1973-1987 GM C10 Flip Kit
$149.99

 303233 - GM A-Arm Kit, Delrin Bushings, Standard Upper Ball Joints
$1,389.99
303233 - GM A-Arm Kit, Delrin Bushings, Standard Upper Ball Joints
$1,389.99
 383001 - 1982-2003 S10/S15 Handling Kit, Corner Max, Race/Street Handling
$2,948.99
383001 - 1982-2003 S10/S15 Handling Kit, Corner Max, Race/Street Handling
$2,948.99
 3833 - 1982-2003 S10/S15 Sway Bar, Front , Solid, 1-¼”
$259.99
3833 - 1982-2003 S10/S15 Sway Bar, Front , Solid, 1-¼”
$259.99
 3059 - Competition Front End Kit
$2,259.99 – $2,309.99Price range: $2,259.99 through $2,309.99
3059 - Competition Front End Kit
$2,259.99 – $2,309.99Price range: $2,259.99 through $2,309.99
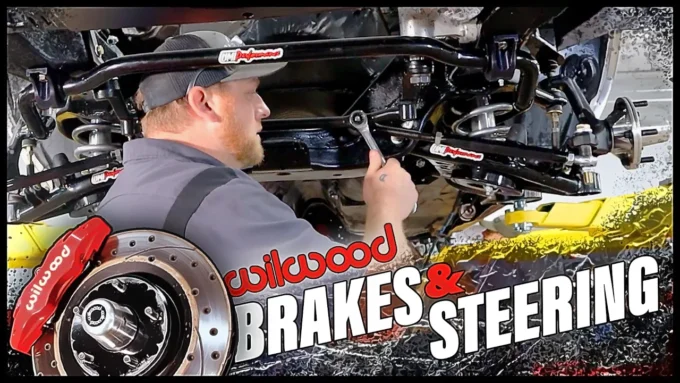
At UMI Performance, we love bringing classic cars back to life with modern technology and performance upgrades. Today, we're diving into a comprehensive G-body brake and steering upgrade on our 1978 Cutlass project. This build focuses on replacing worn-out factory components with top-tier Wilwood brakes and UMI steering parts to dramatically improve handling, safety, and driving enjoyment. Whether you’re restoring a classic or upgrading your G-body for spirited driving, this guide will walk you through the essential steps and considerations for modernizing your front brakes and steering system.
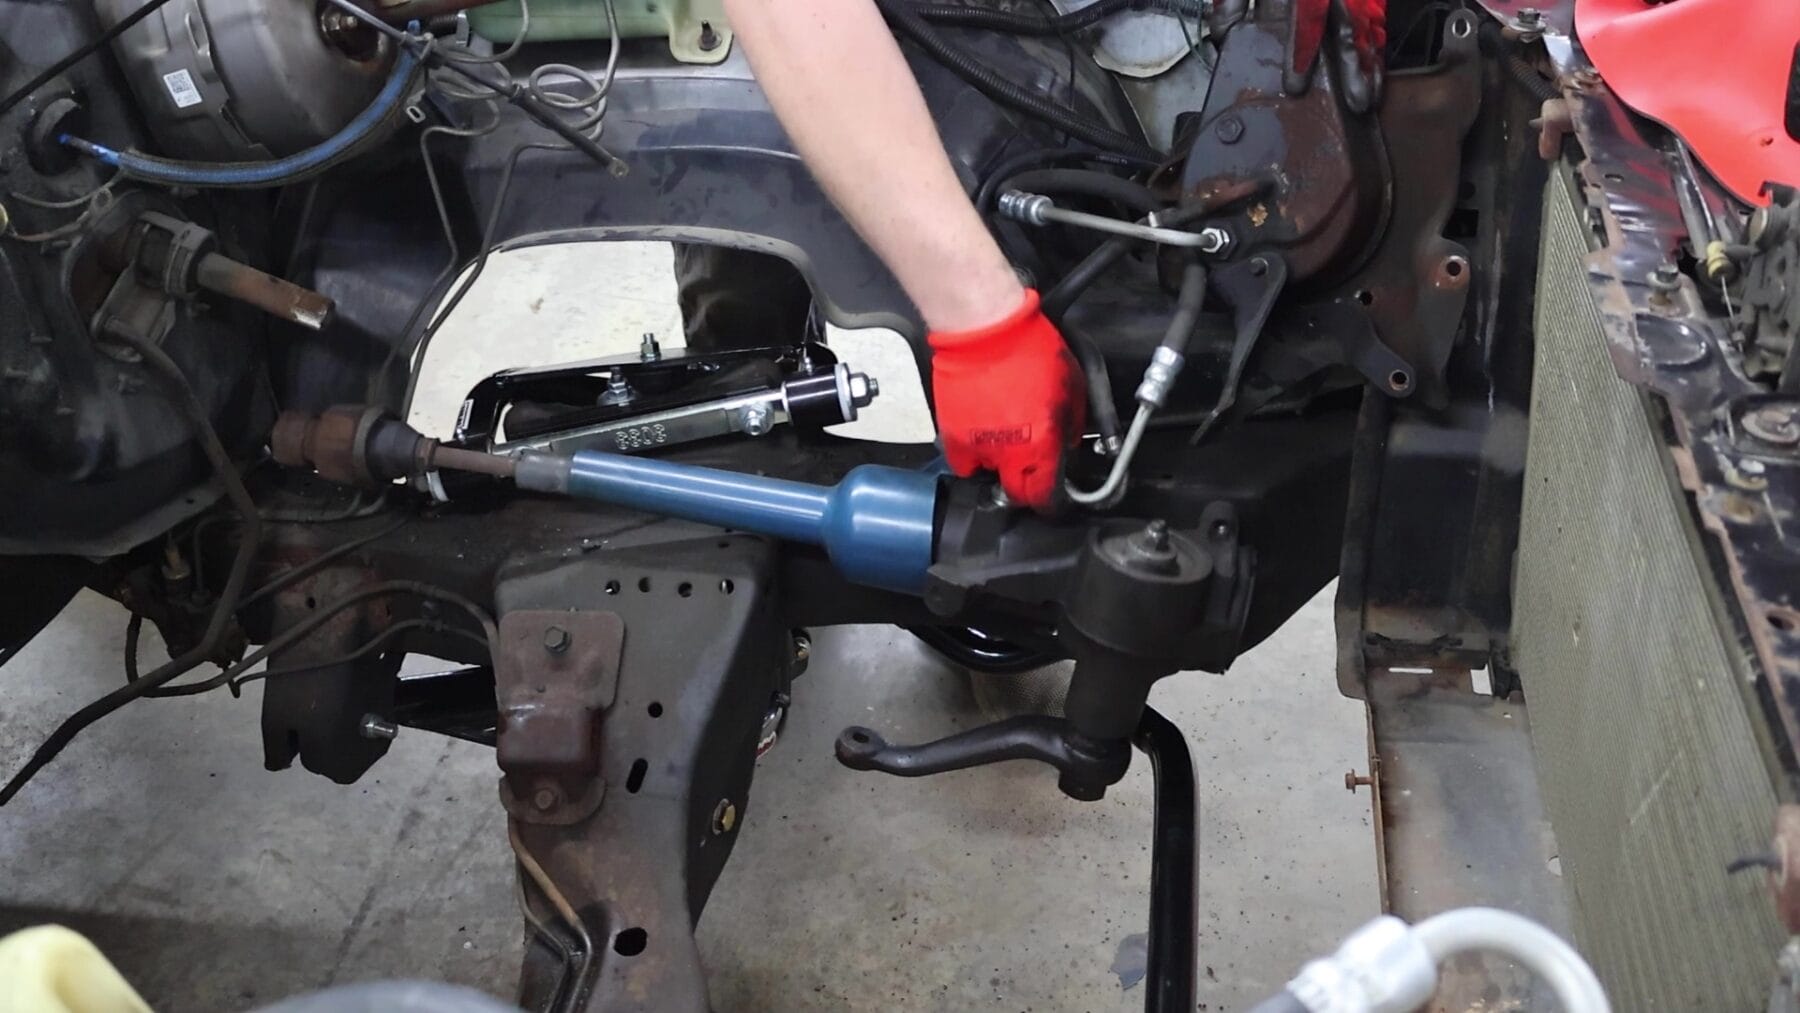
Our first step was clearing the front end of the Cutlass to prepare for the new hardware. We removed the steering shaft and power steering pump, knowing these were due for replacement along with the front links, tie rod ends, and other steering components. The factory parts from 1978 were pretty worn out and were headed straight to the junk pile.
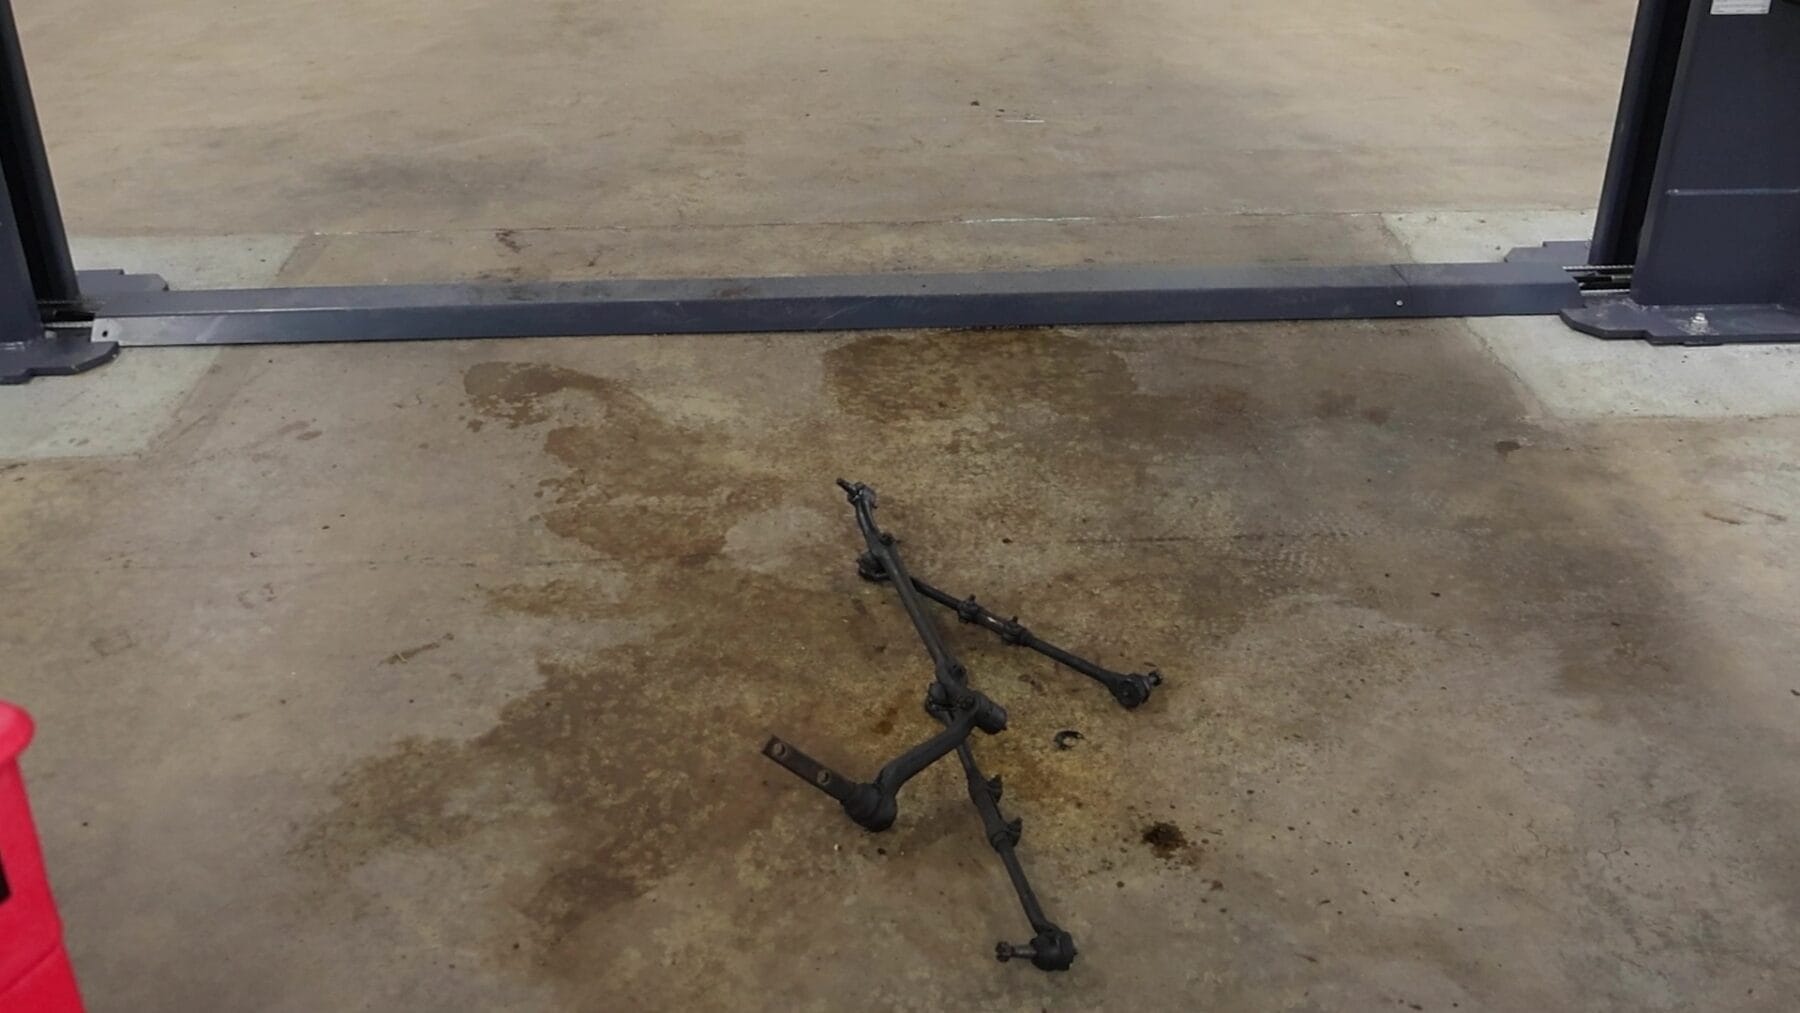
Disassembly involved pulling off the idler arm, center link, and all the original tie rods. This teardown is a crucial starting point because it allows us to inspect the condition of the existing components and make way for precision-engineered replacements that will return the steering to tight, responsive operation.
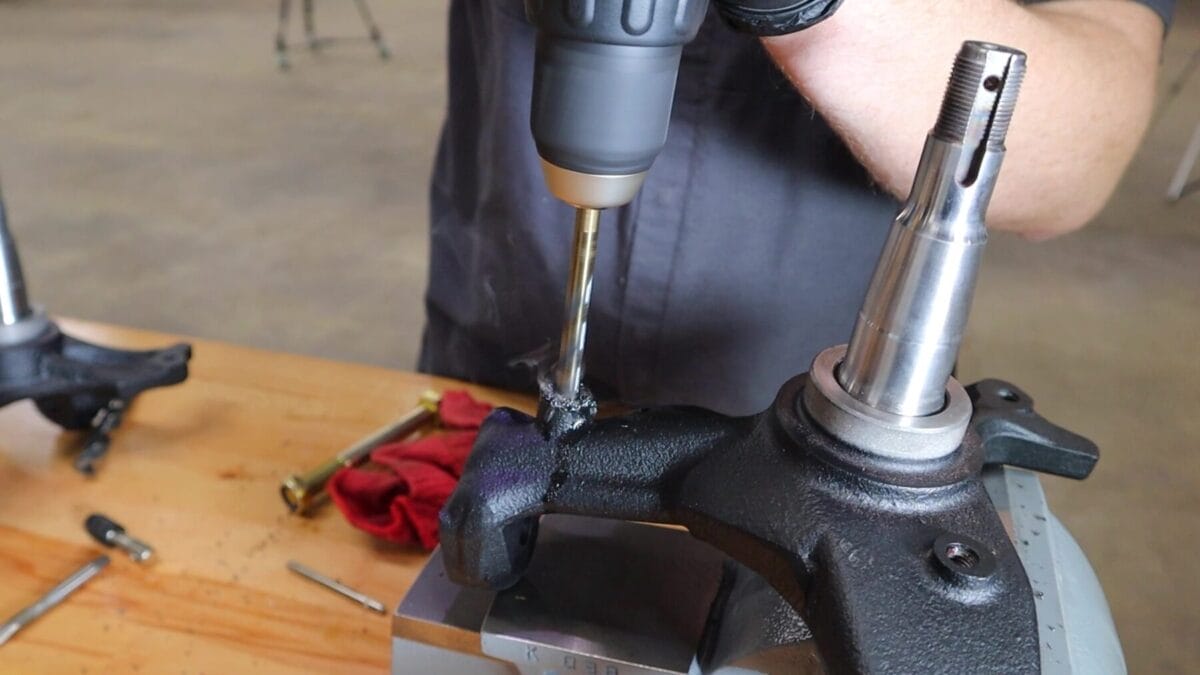
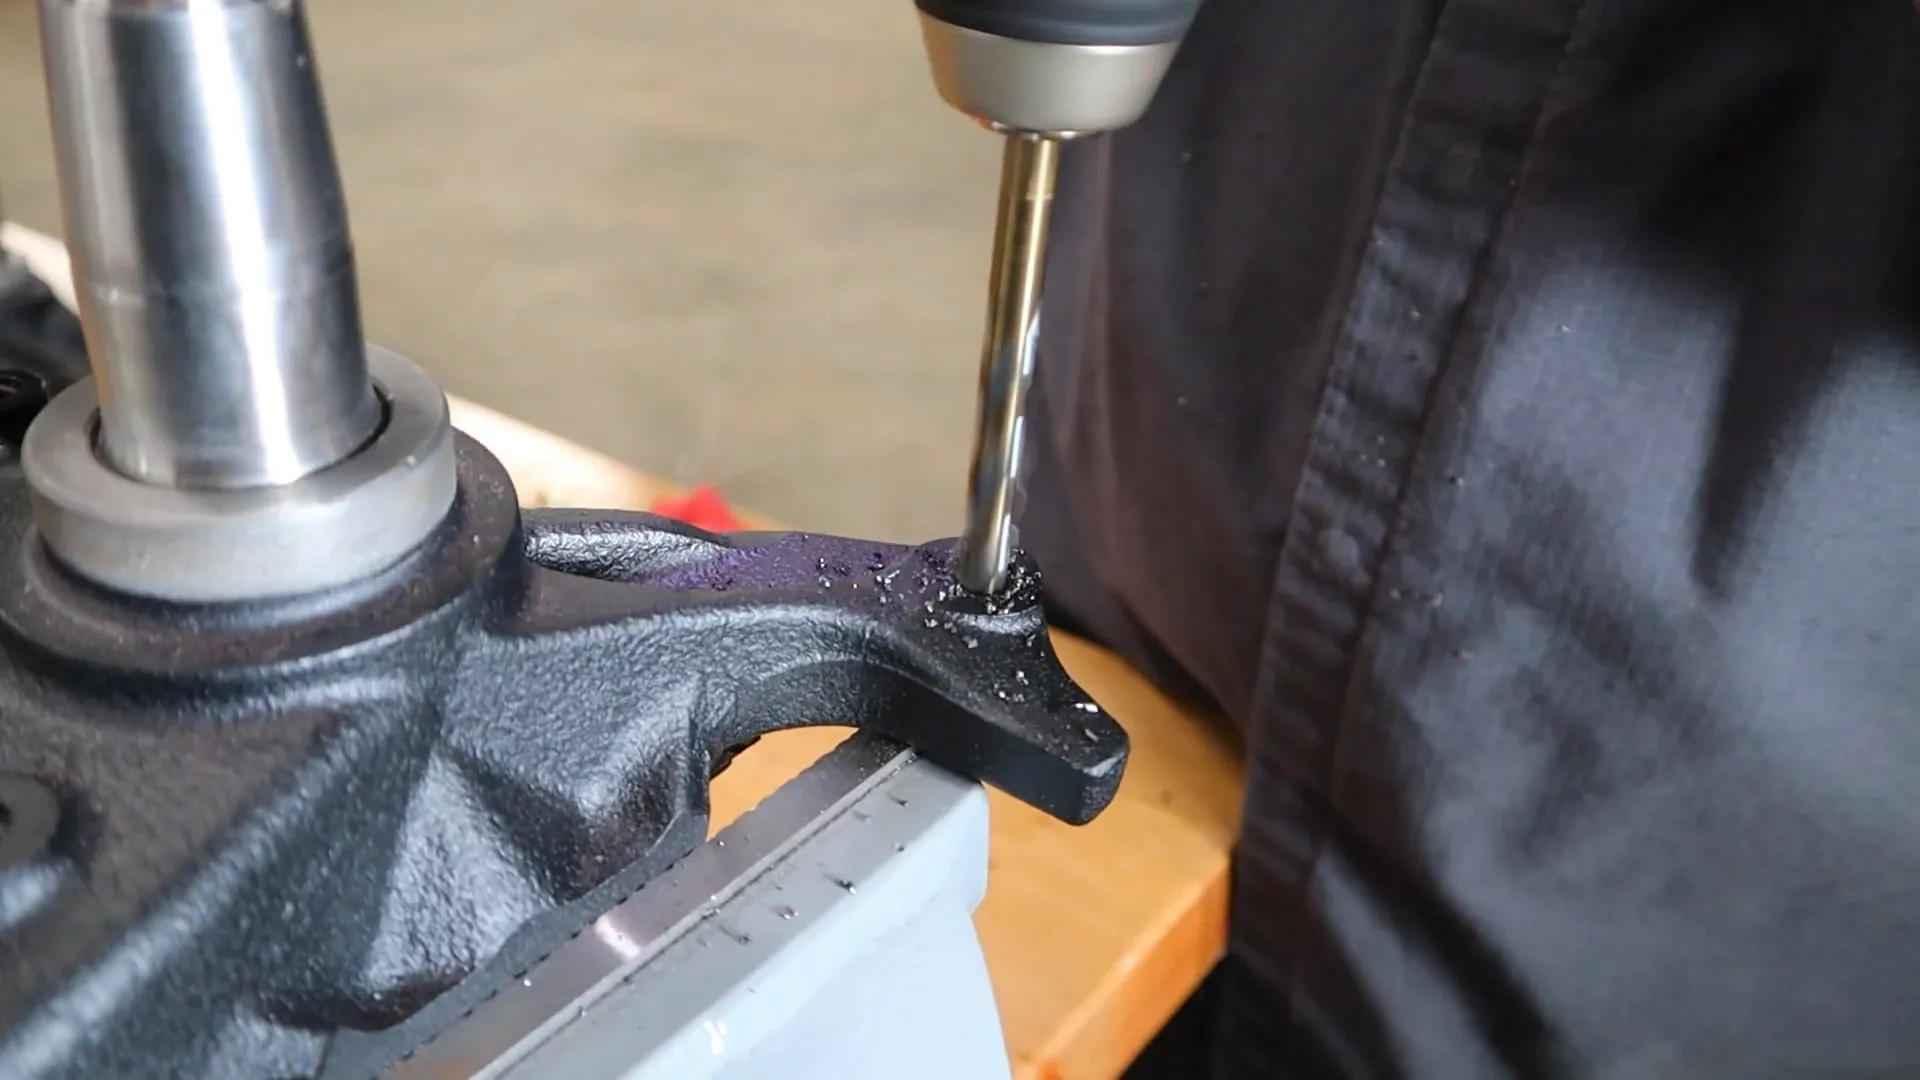
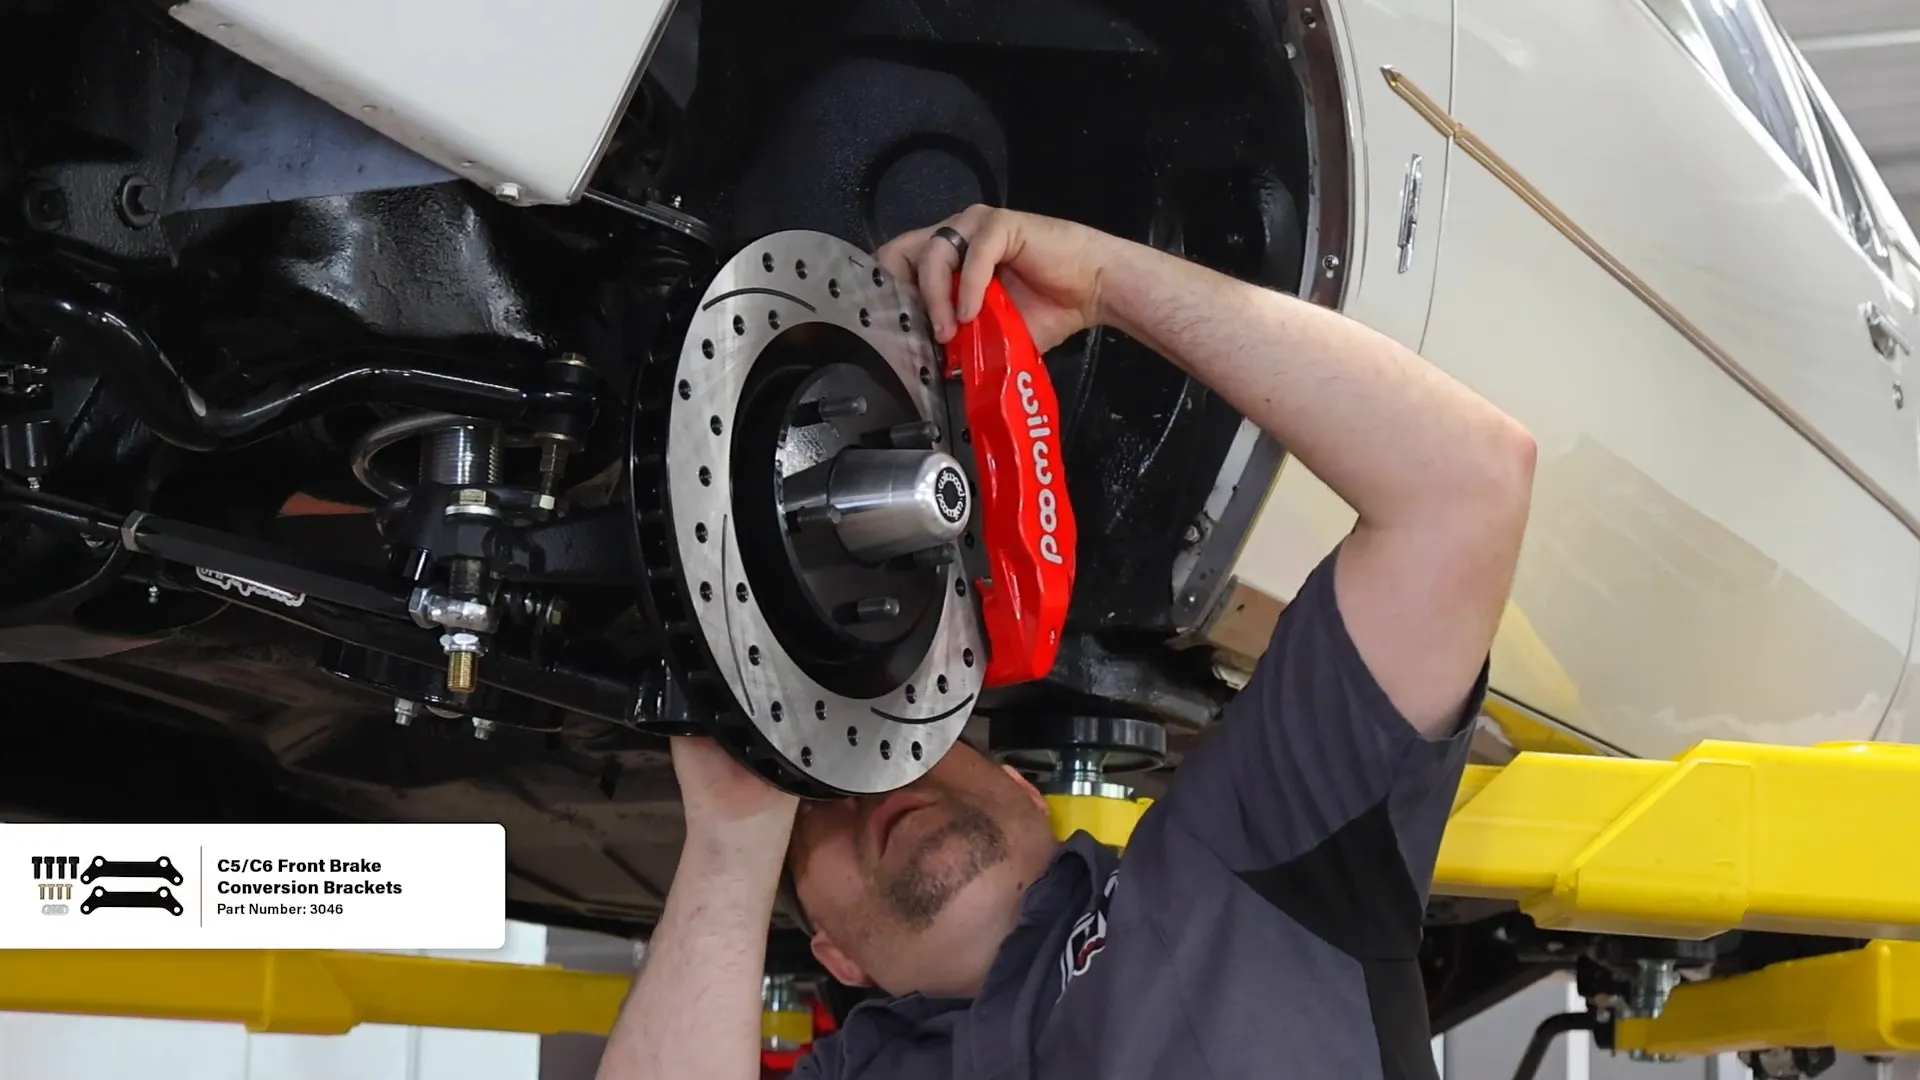
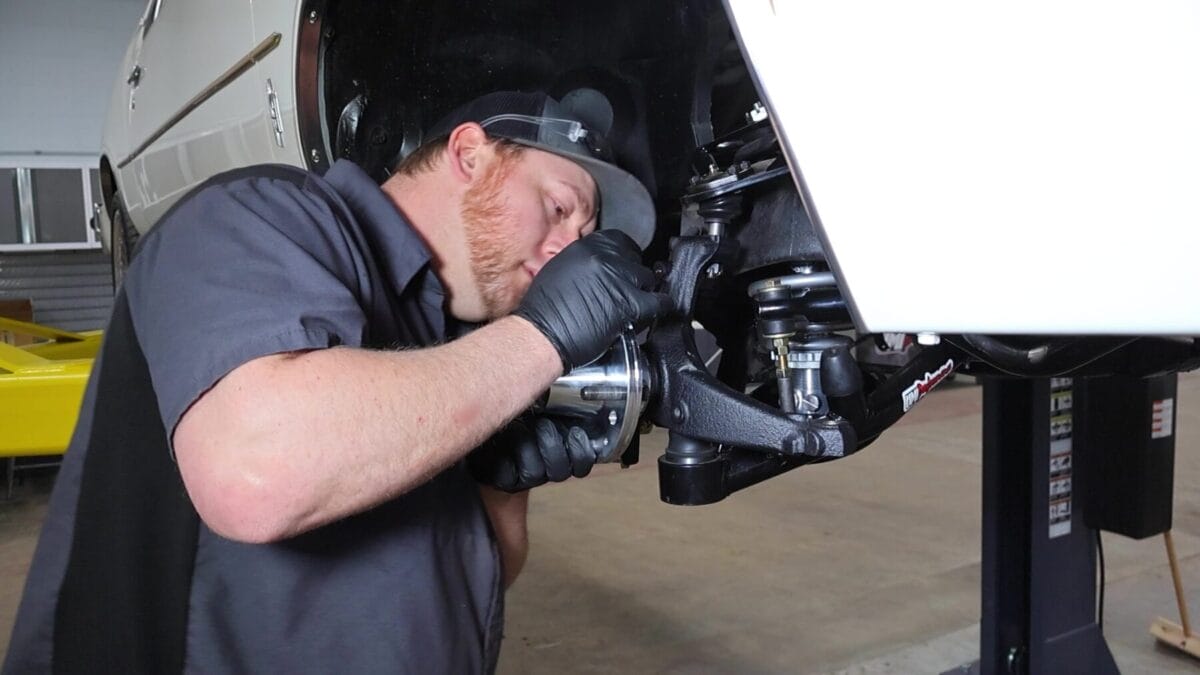
Next, we focused on the brake side of things. Wilwood brake brackets bolt onto the dust shield holes on the spindles, but the original holes were too small to accept the larger bolts required for a solid connection. We drilled out and re-tapped these holes to fit the bigger hardware, ensuring the brackets will mount securely for maximum braking performance.
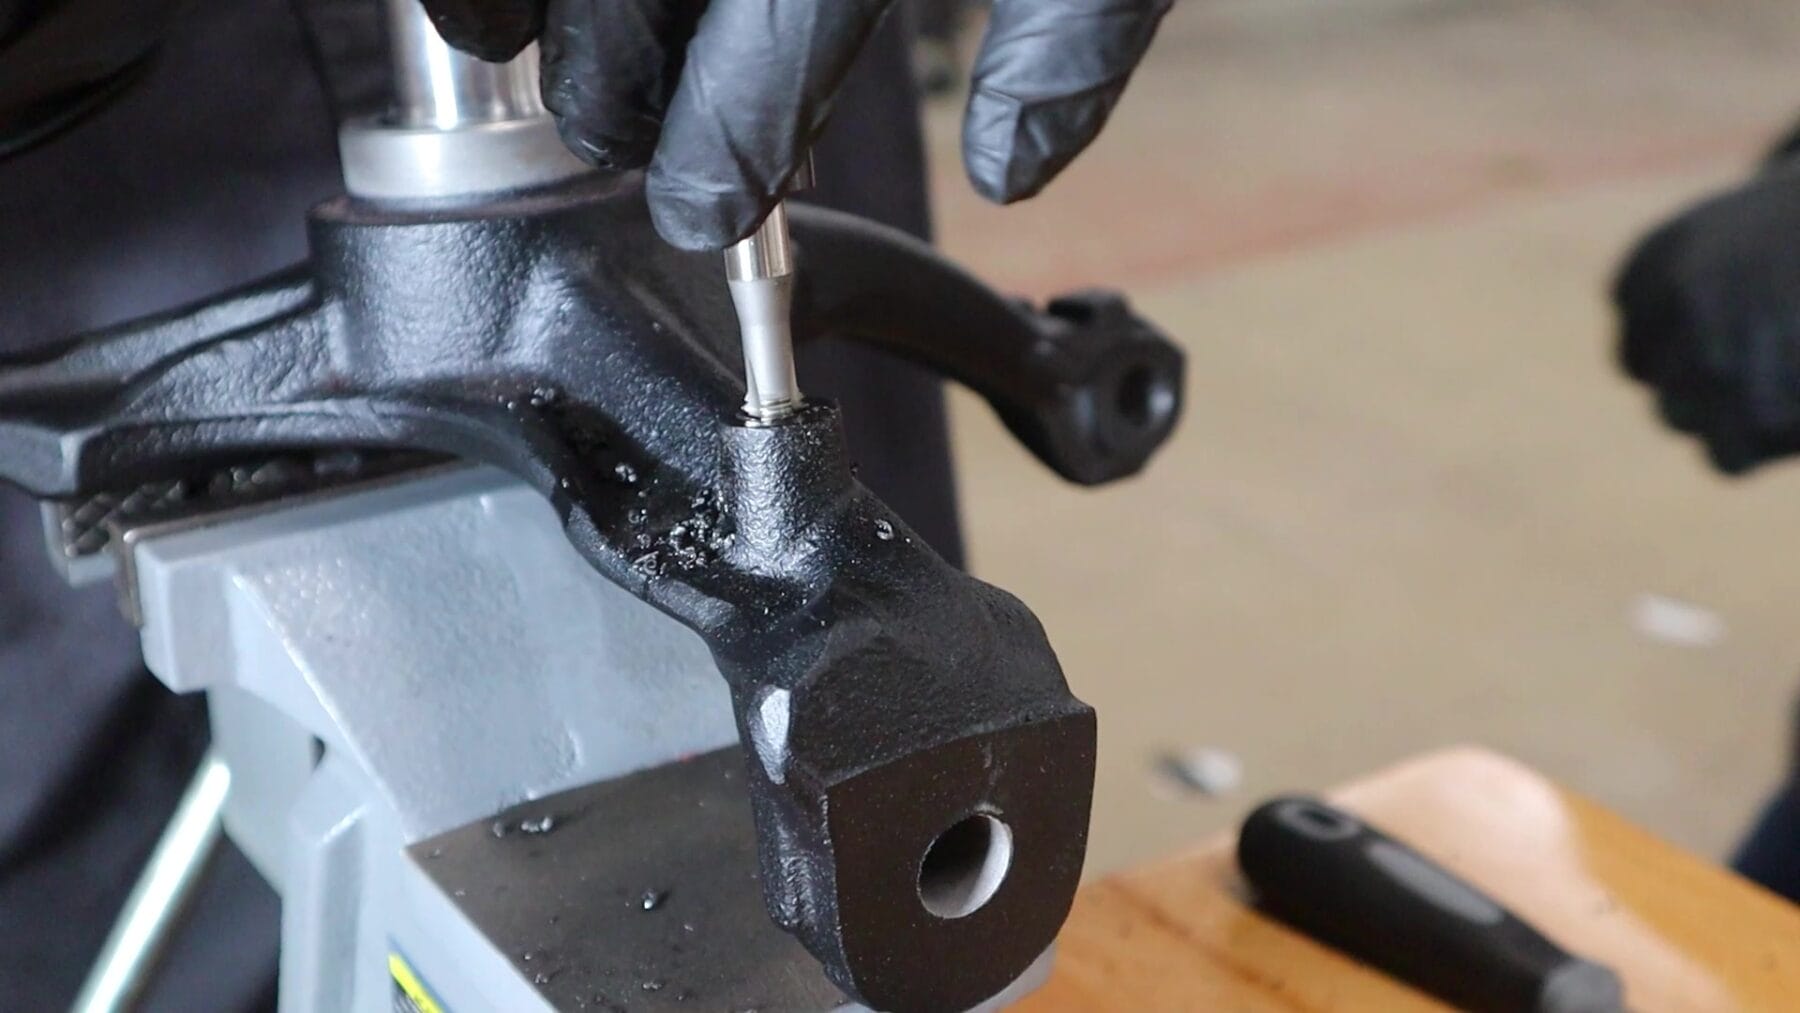
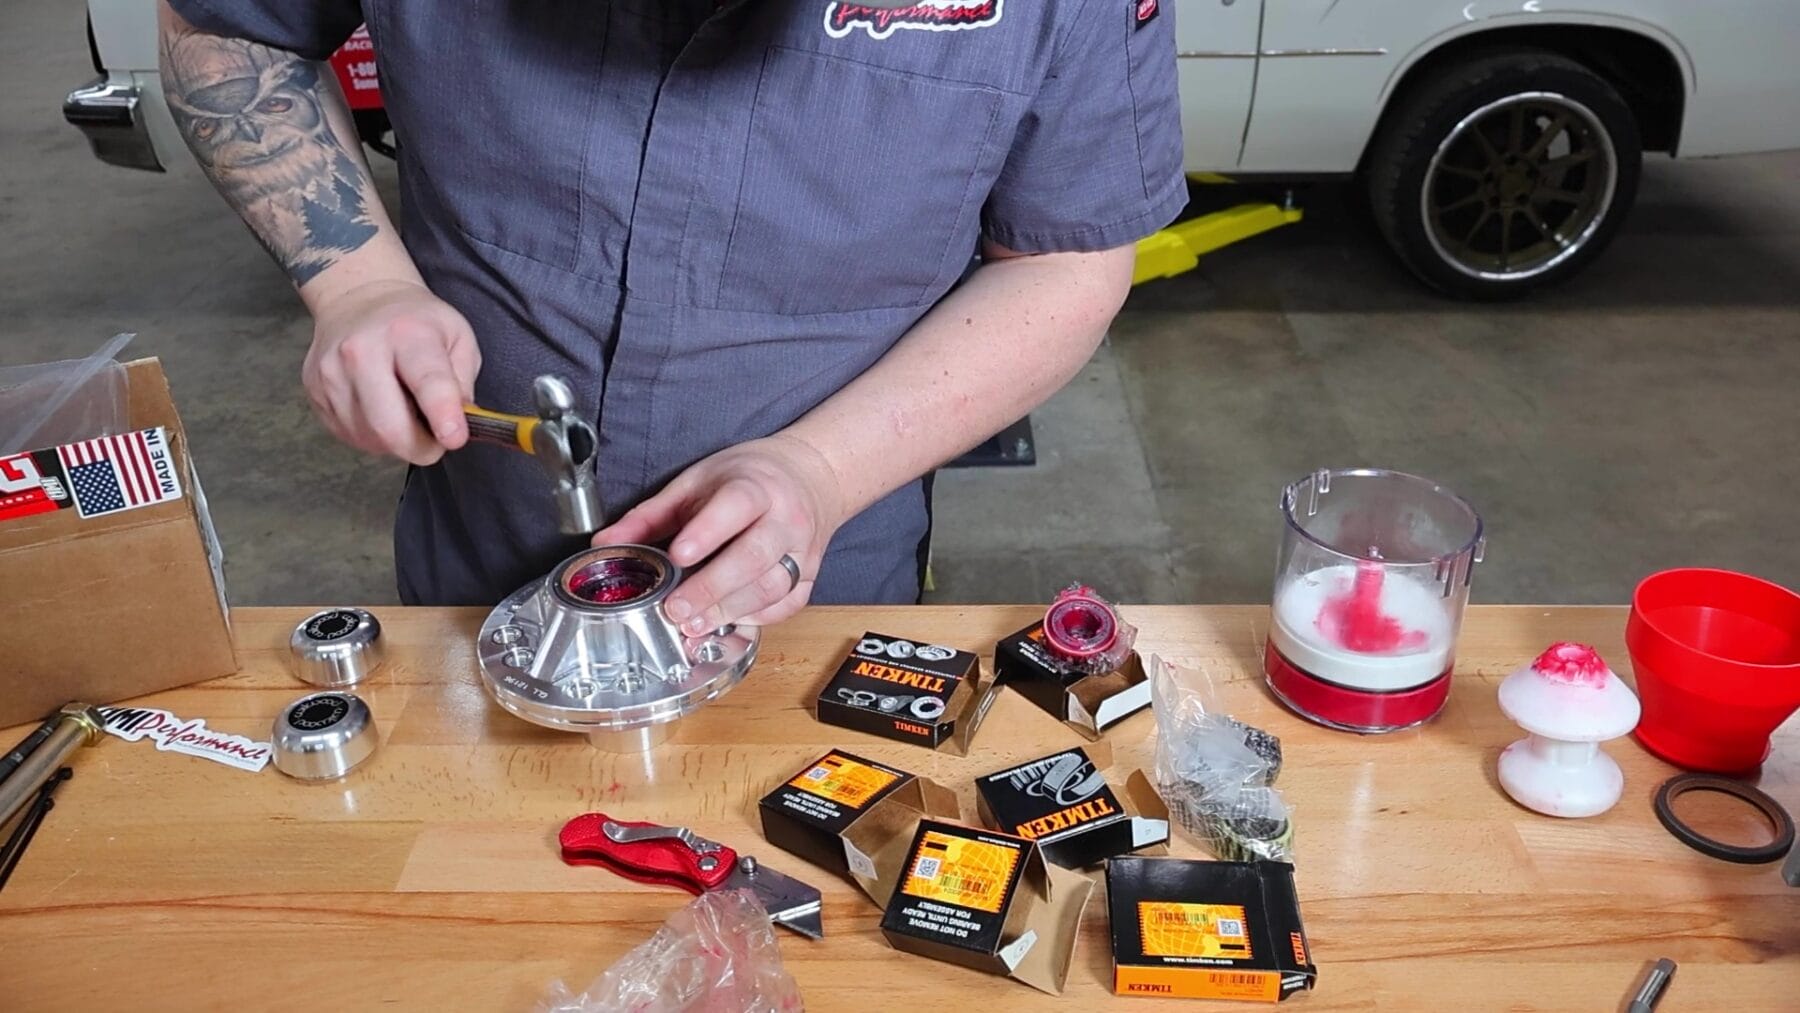
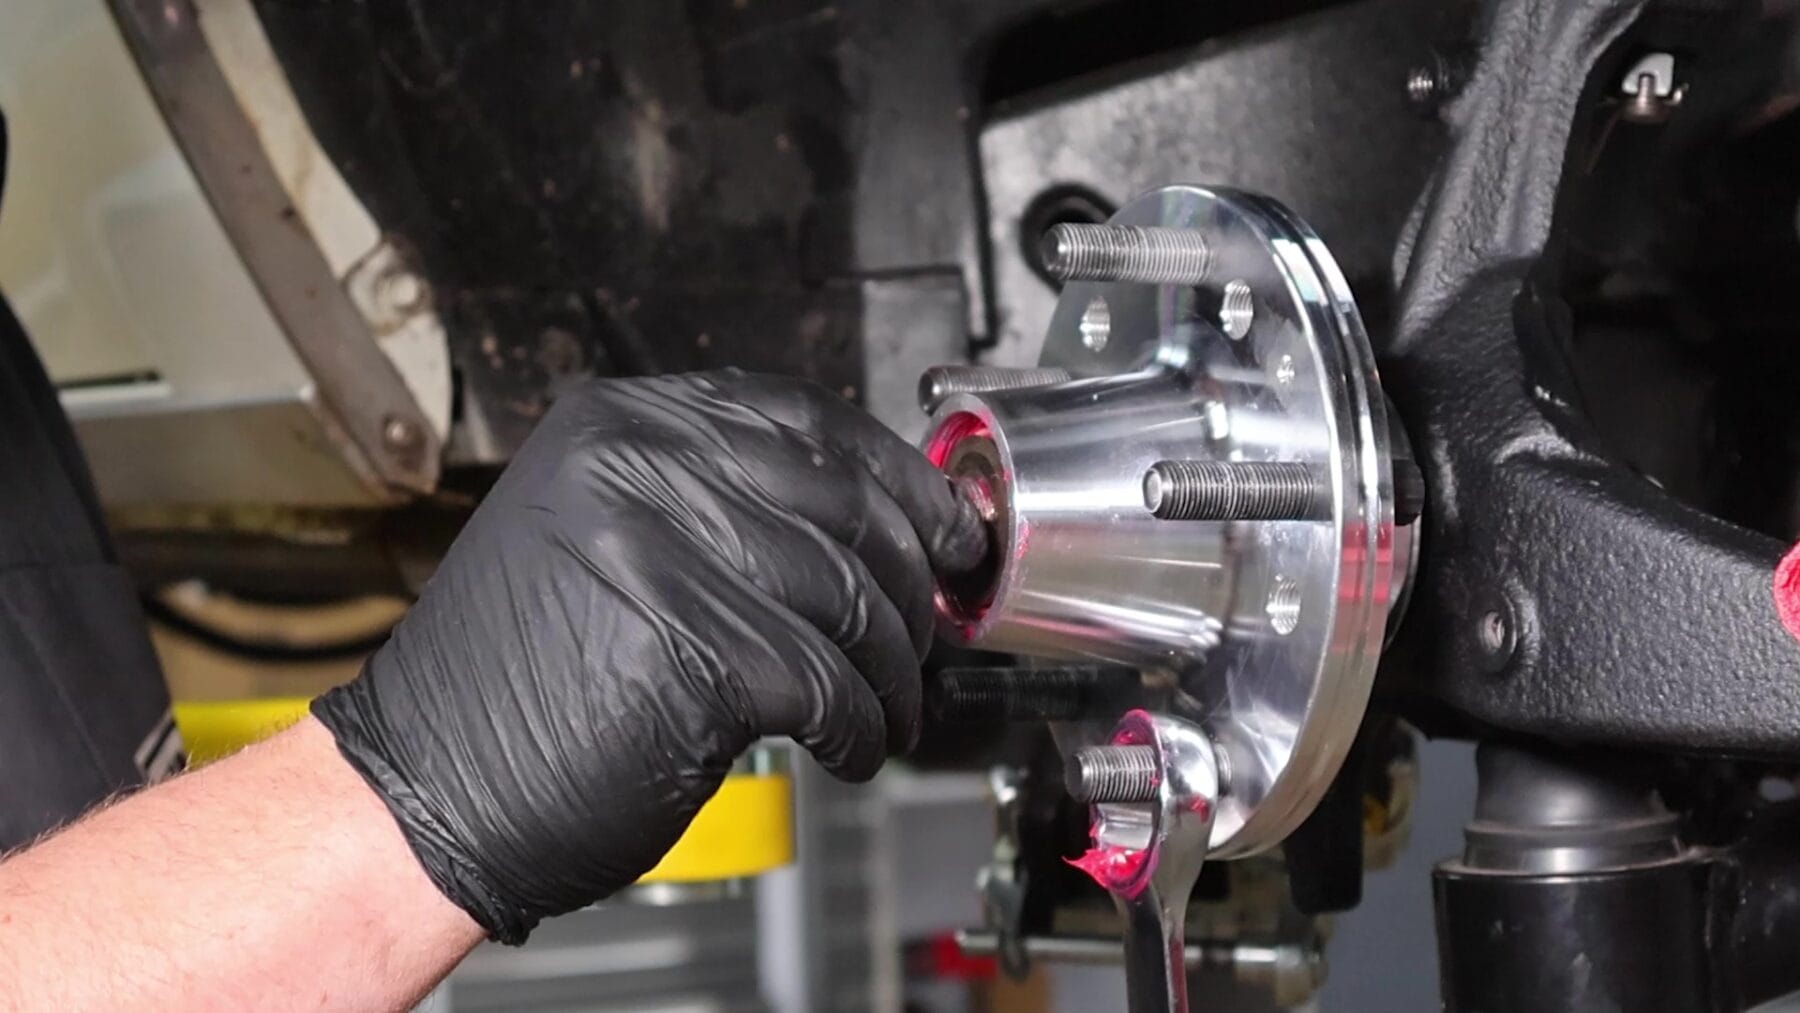
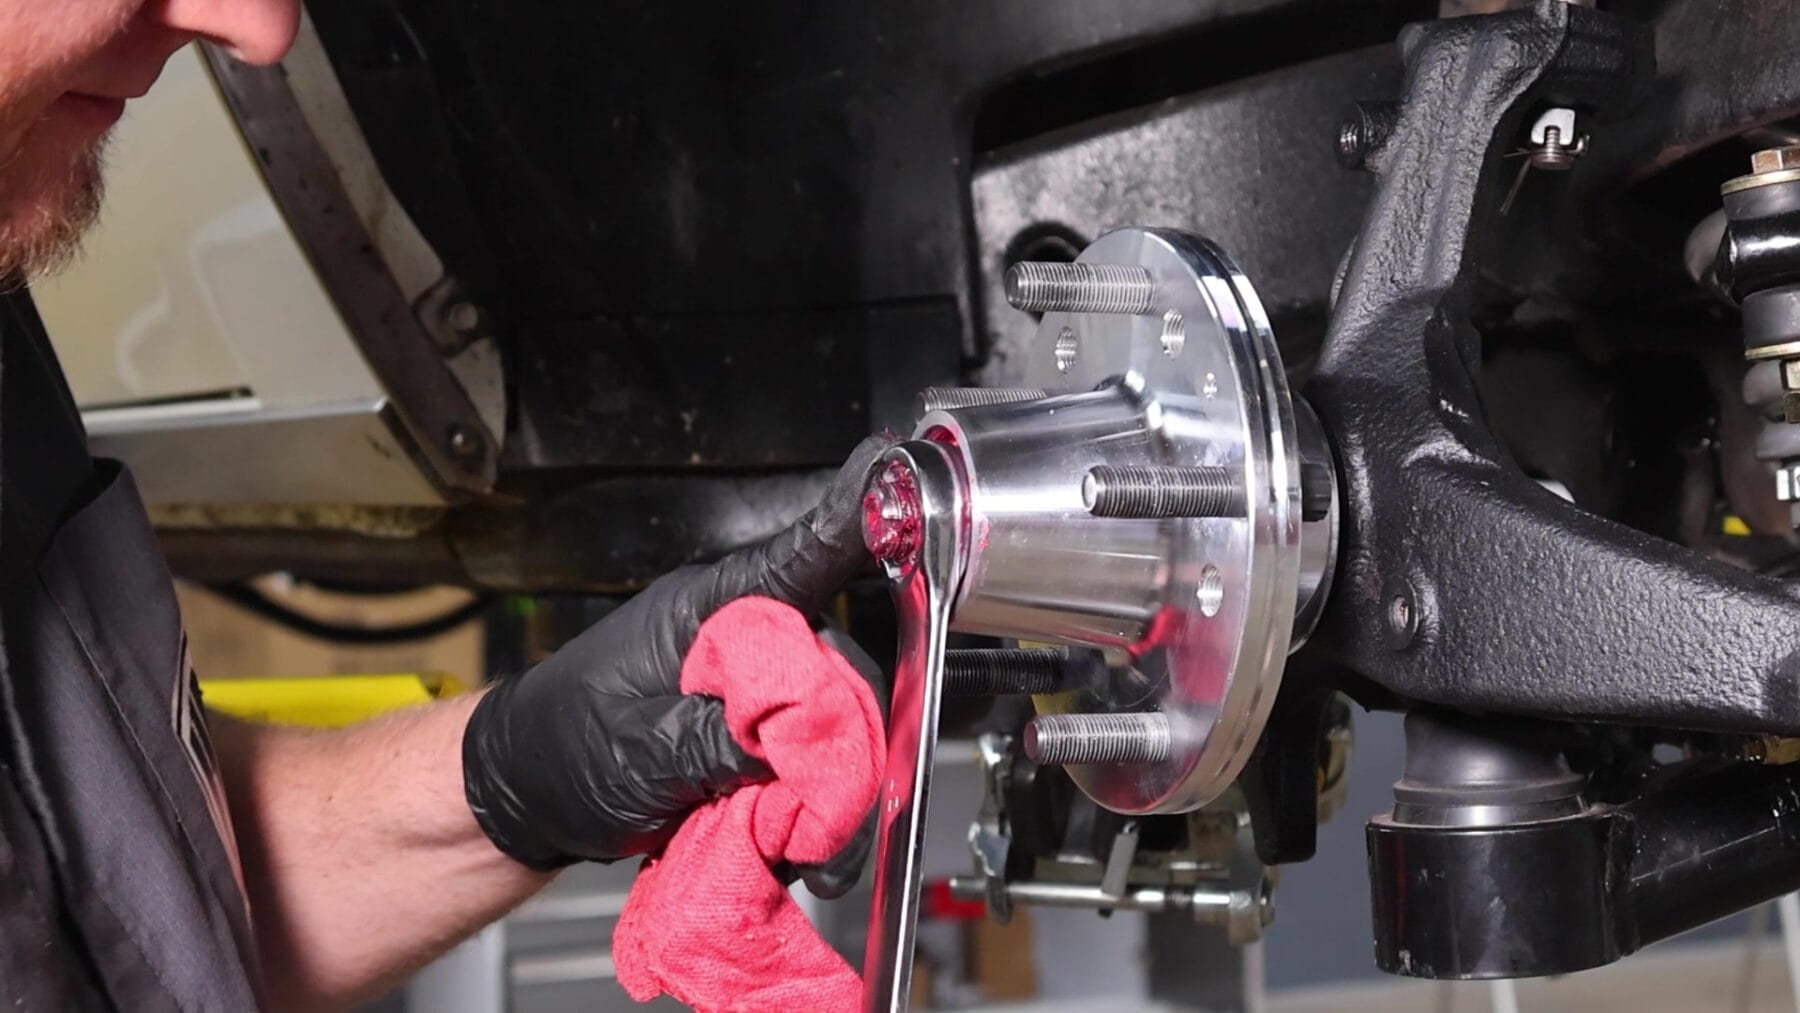
Once the spindles were prepped, we moved on to packing the bearings for the Wilwood hubs. Using a grease packing tool made this process quick and efficient — a worthwhile investment if you plan to work on bearings regularly. After packing the bearings and sealing everything up, we fitted the new hubs onto the spindles, making sure everything was clean and centered for a perfect fit.
One key detail when installing hubs is tightening the castle nut just enough to keep the hub secure but still allow smooth rotation. Don’t forget to align the cotter pin correctly to prevent the nut from backing off, an essential safety step.

With the hubs and spindles ready, we began installing the new steering components. Starting with the idler arm, we attached it to the frame, then installed the center link, making sure it connected properly to the idler arm first. After verifying clearance and ensuring nothing binds or rubs, we installed all the Zerk fittings for lubrication.
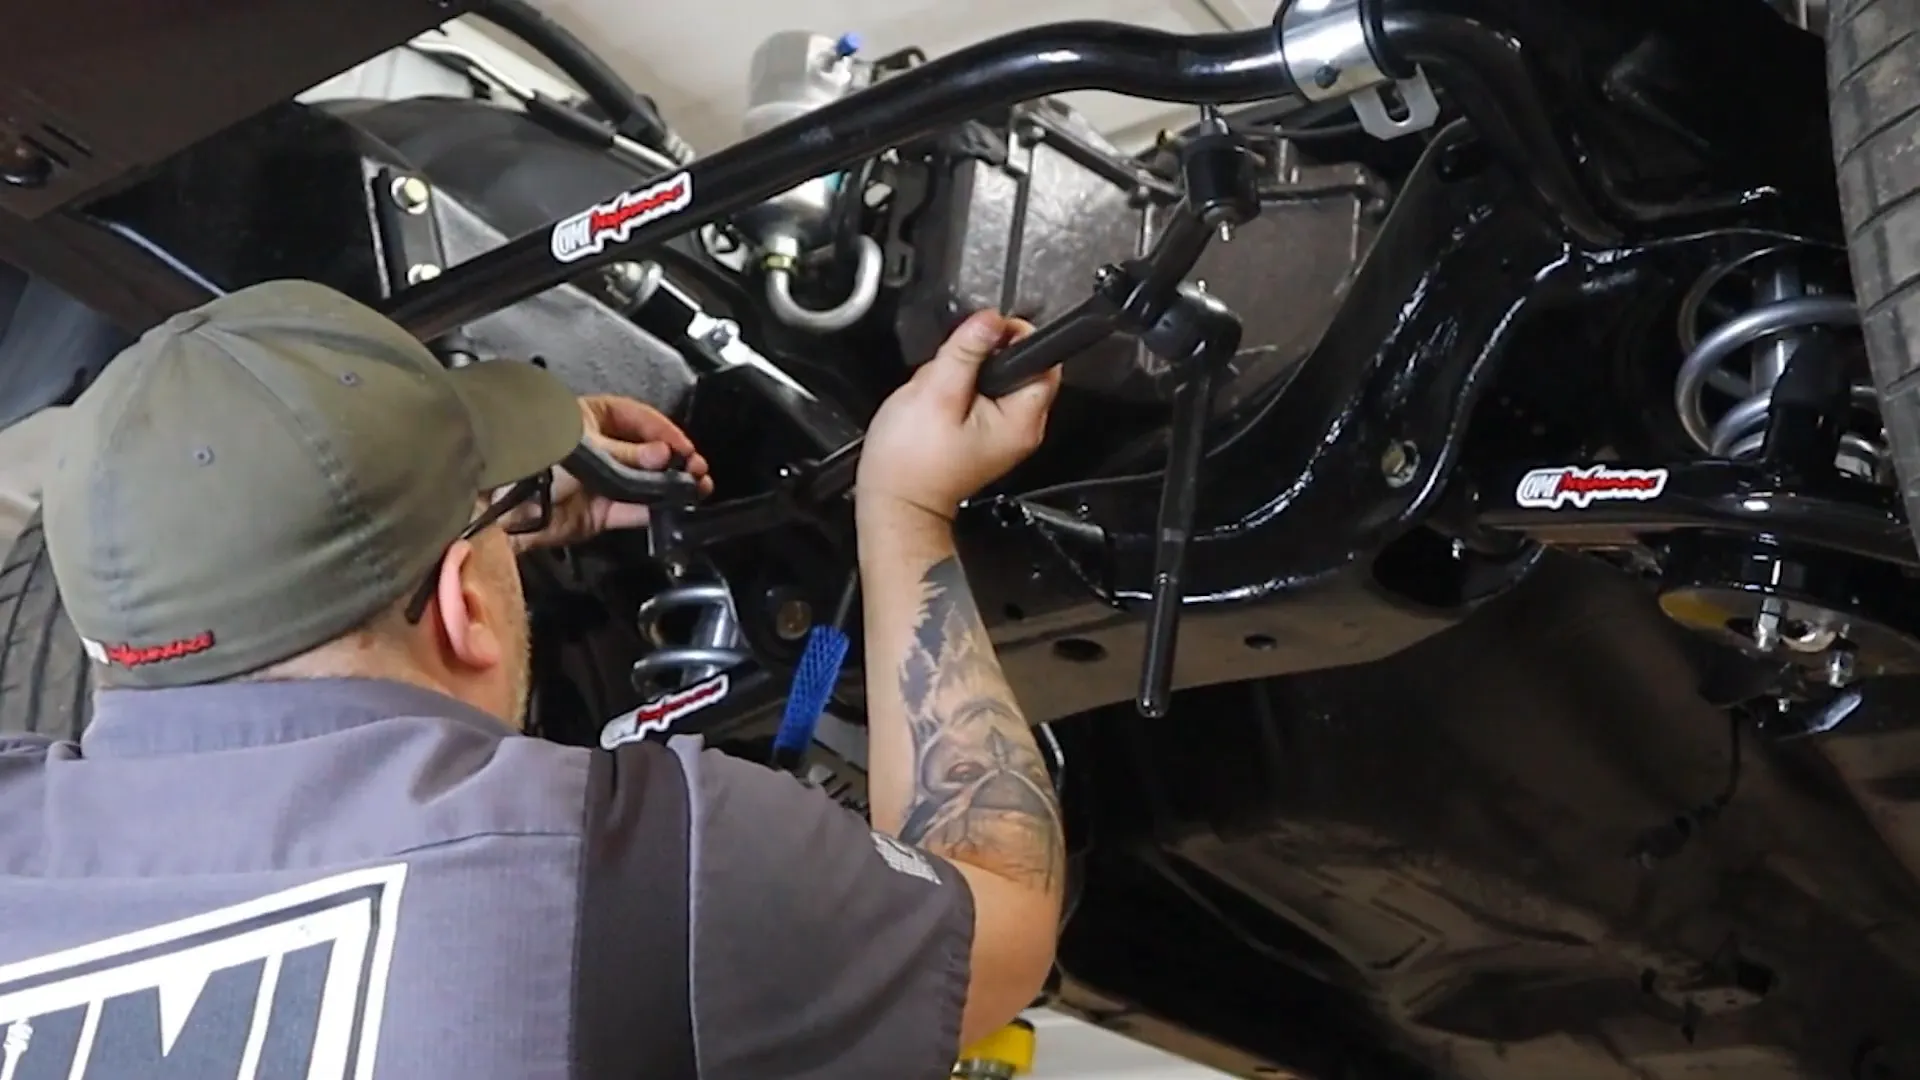
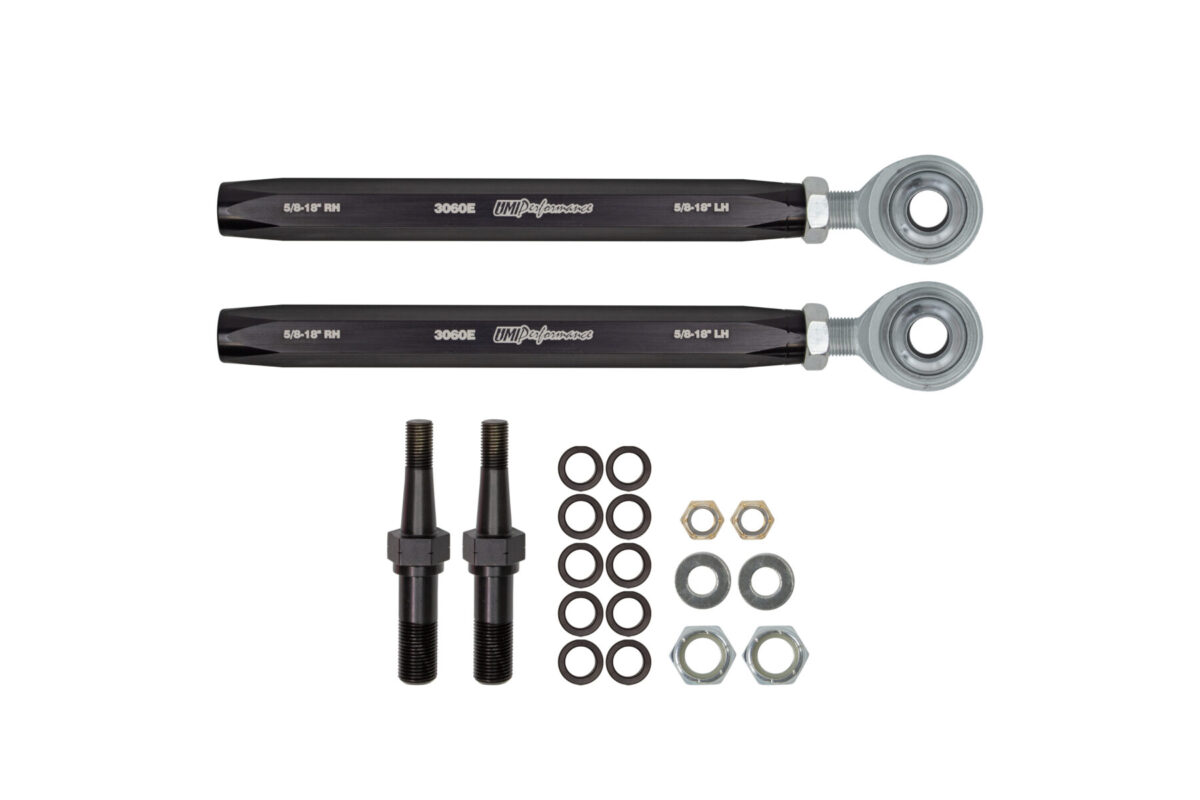
Instead of sticking with traditional tie rod ends, we opted for the UMI 3060 bump steer kit. Bump steer occurs when the toe angle changes during wheel travel, which can cause unpredictable handling characteristics. The UMI bump steer kit helps eliminate this by correcting the angles and geometry of the tie rods relative to the a-arms, improving stability and steering feel as you drive.
The kit features a 6061-T6 hex sleeve that replaces the stamped sleeve and outer tie rod end, along with a heat-treated 4140 chromoly bump steer stud. This stud fits the factory steering arm, and spacers adjust the tie rod angle to reduce bump steer. For racers and autocross enthusiasts, there's a heavy-duty 5/8” bolt version recommended for more demanding applications, although it requires drilling the steering arm during installation.
To get everything dialed in, we measured the factory tie rod ends and transferred those dimensions to the new setup. This approach helps get the alignment close right from the start, making final tuning easier. A bit of anti-seize on the threads helps avoid corrosion and makes future adjustments smoother.
Once all front steering components were installed, we double-checked every bolt and cotter pin to ensure nothing would come loose on the road — safety is always a priority.

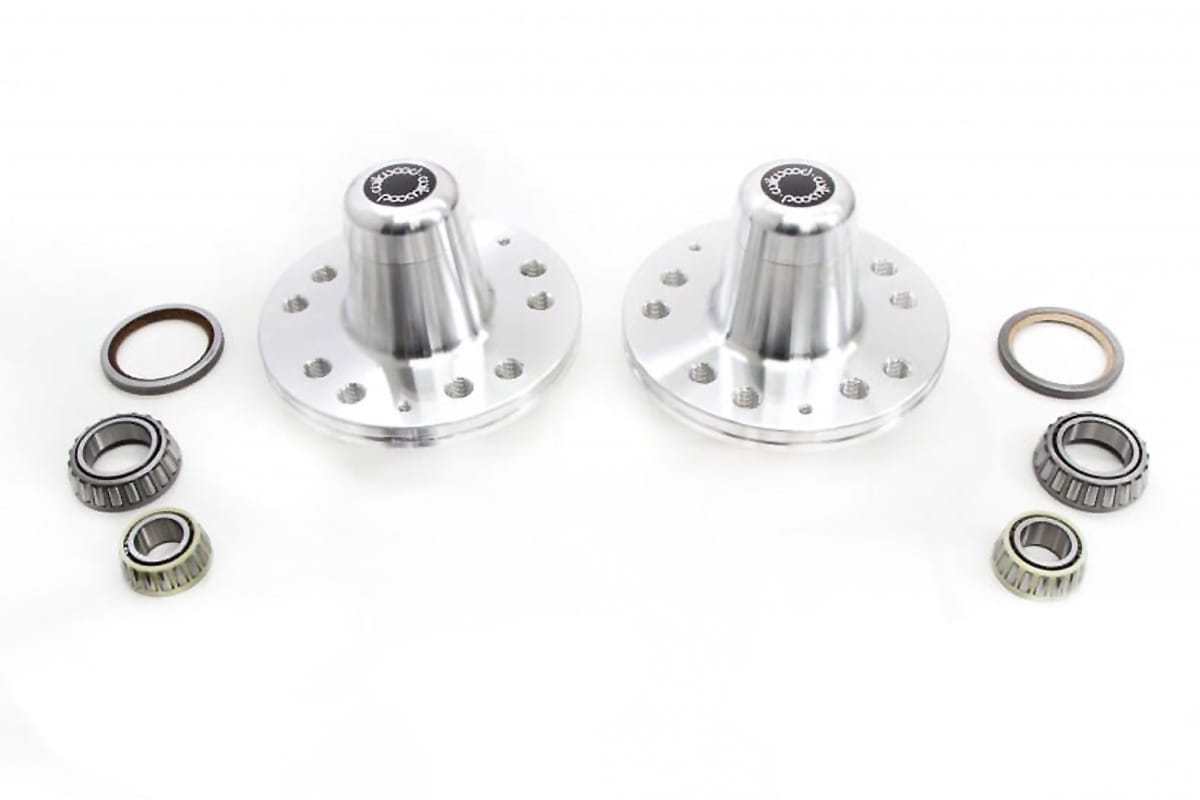
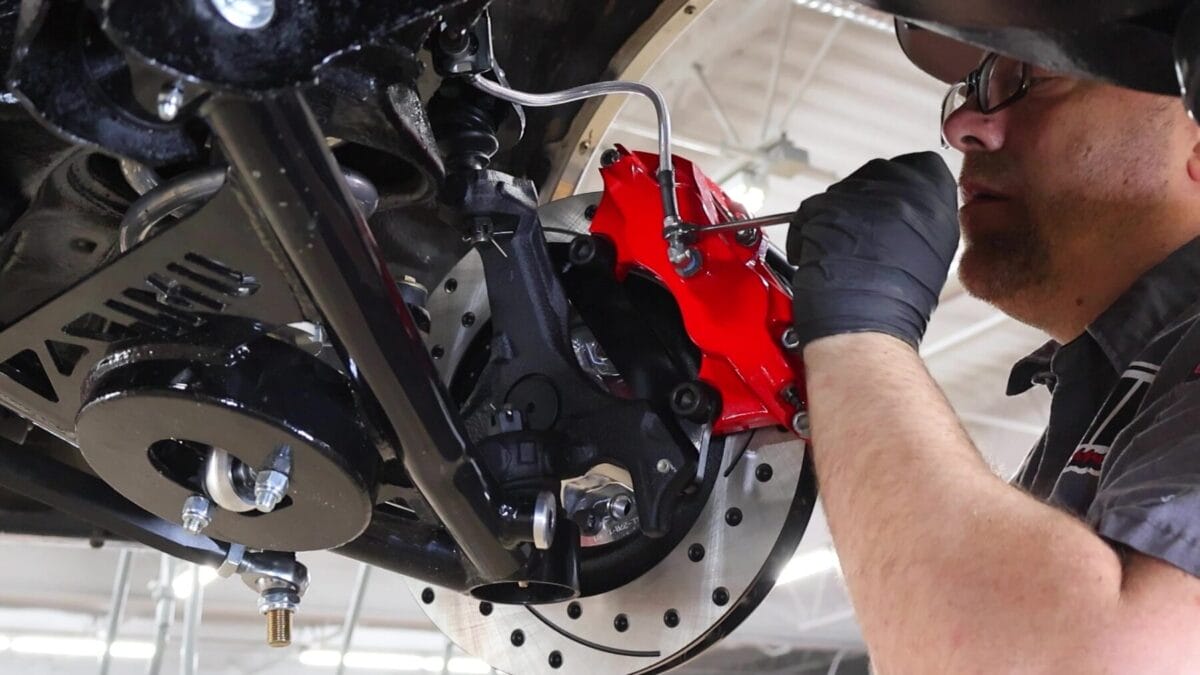
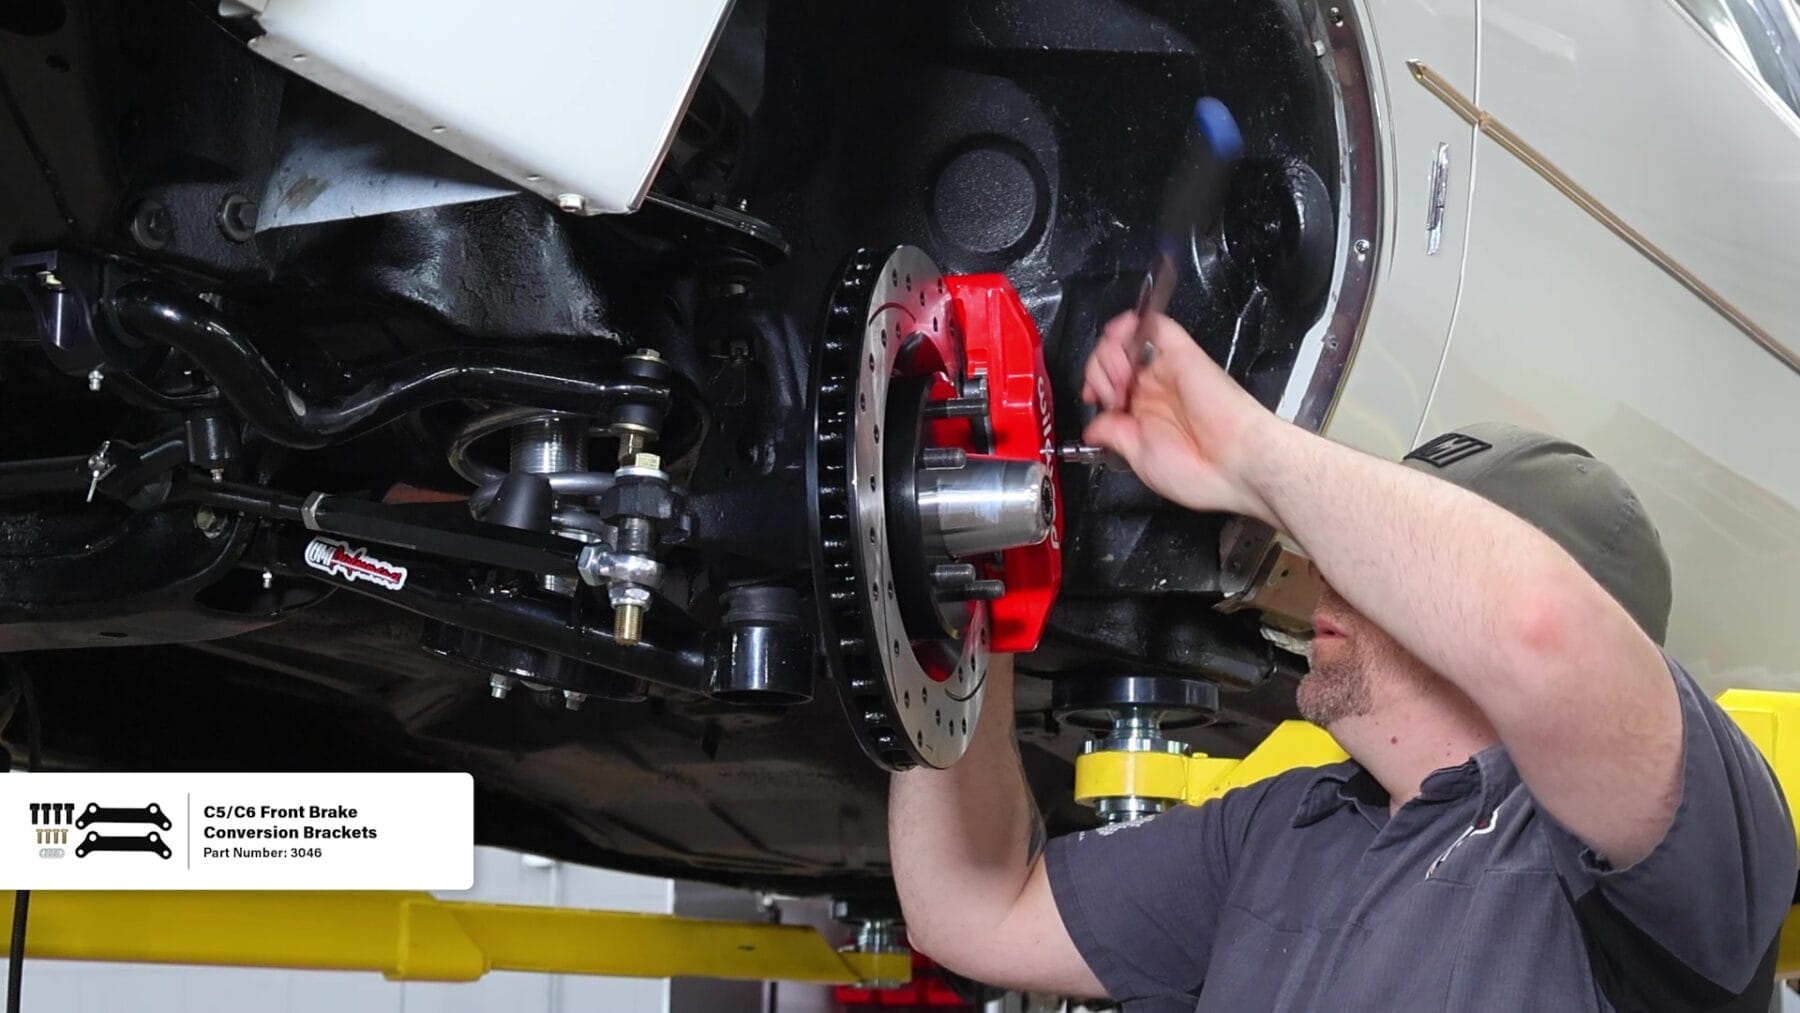
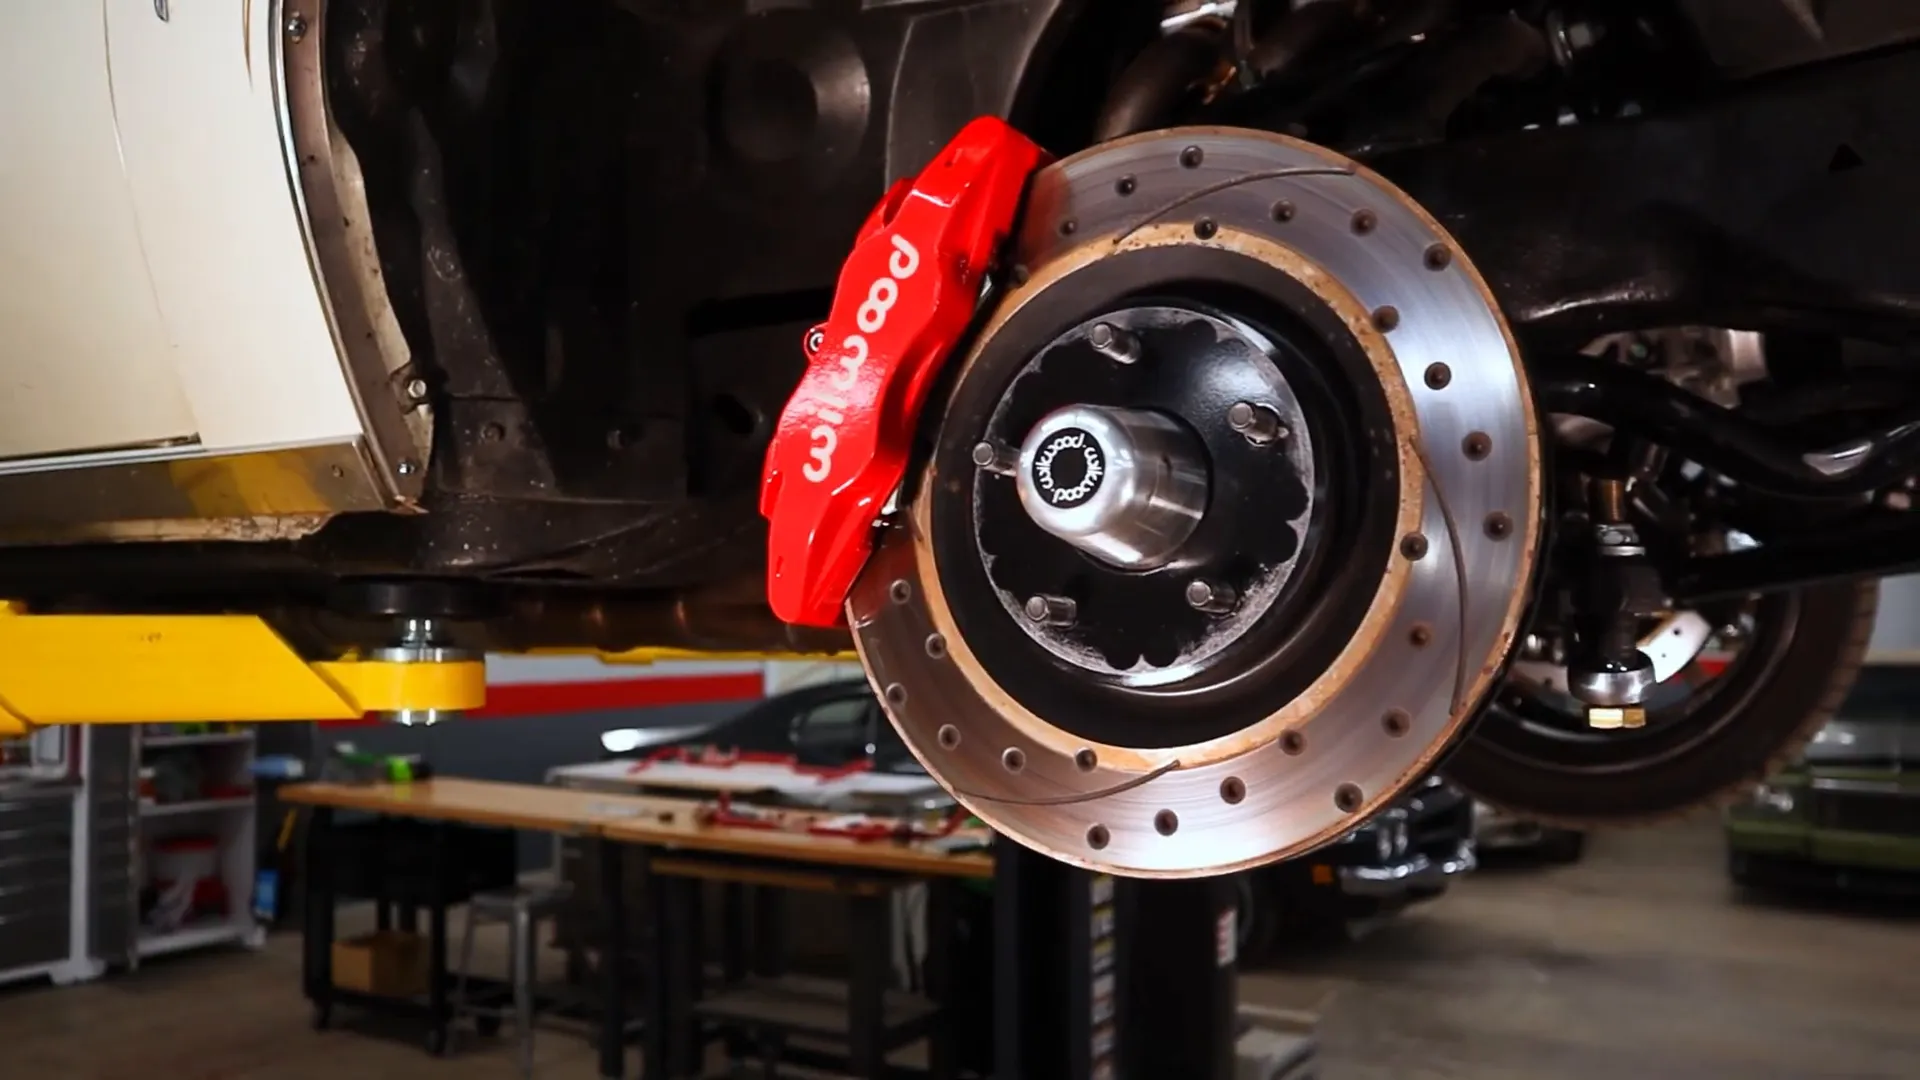
Performance upgrades are incomplete without proper stopping power. Our Cutlass is getting a power boost, so it needed brakes that can handle the added performance. We installed Wilwood front brake conversion brackets designed to fit larger diameter rotors and calipers from the C5 Corvette or SLC 56 Wilwood lineup.
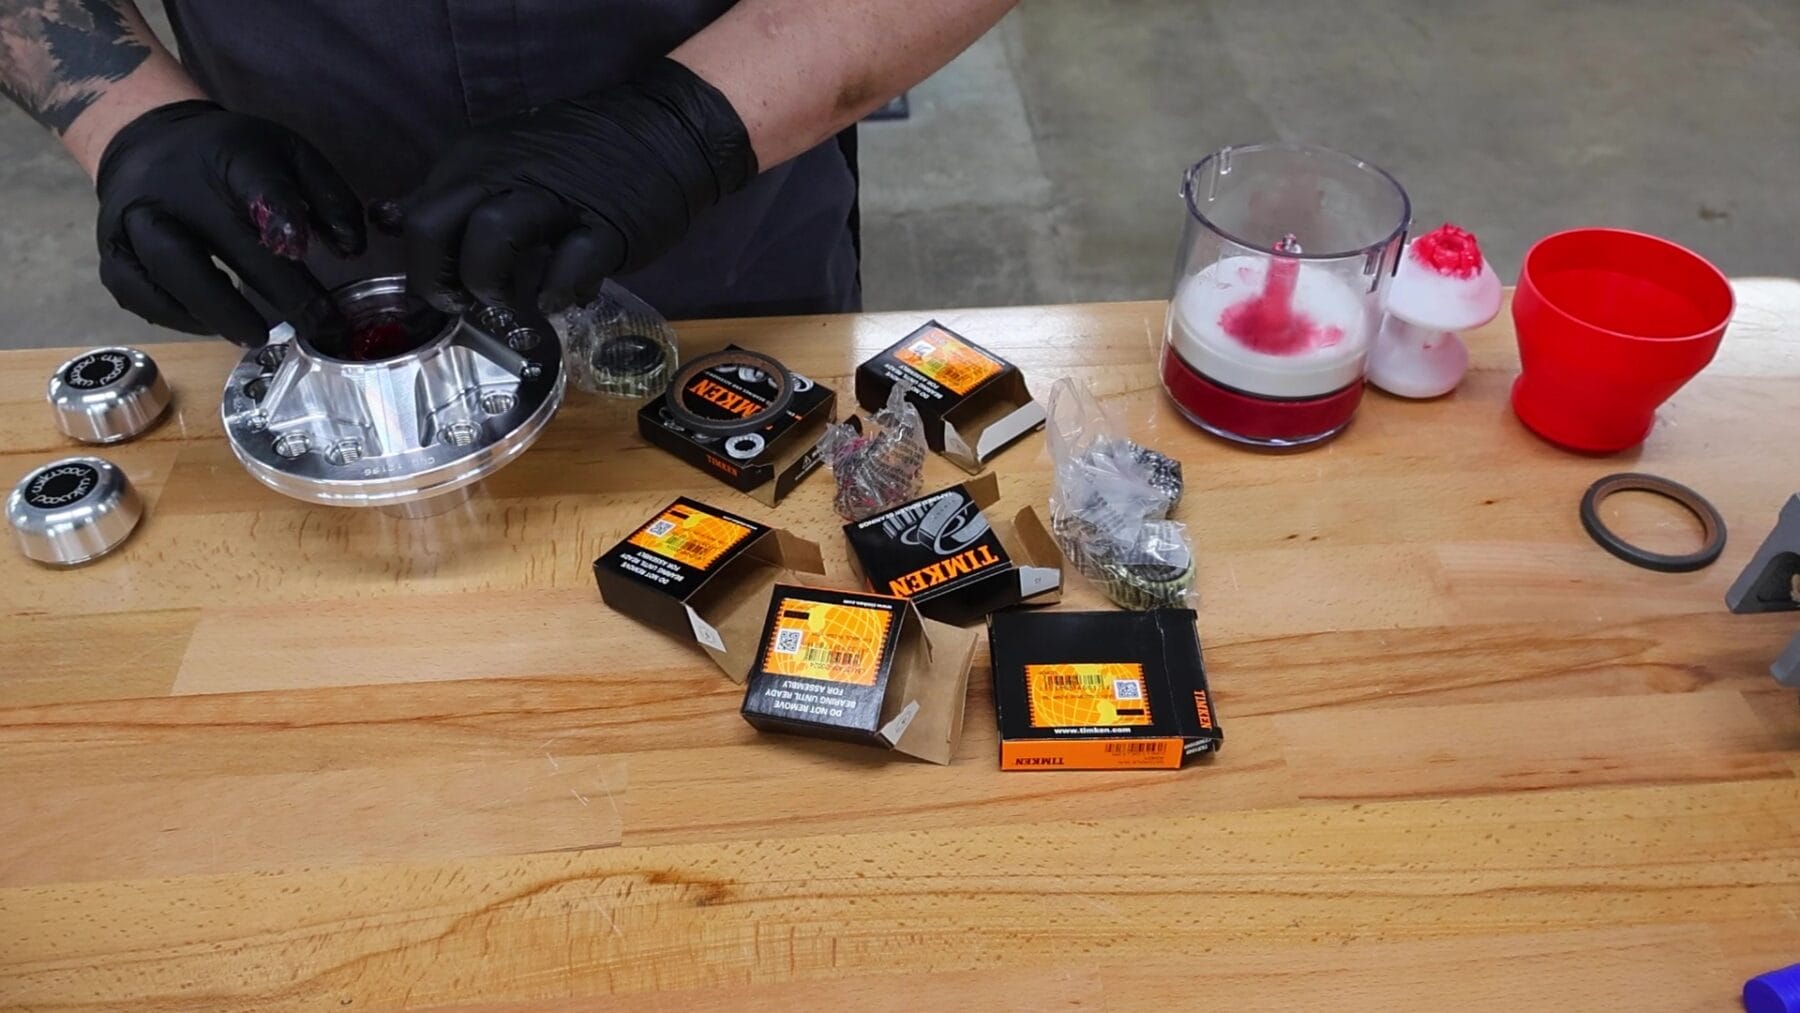
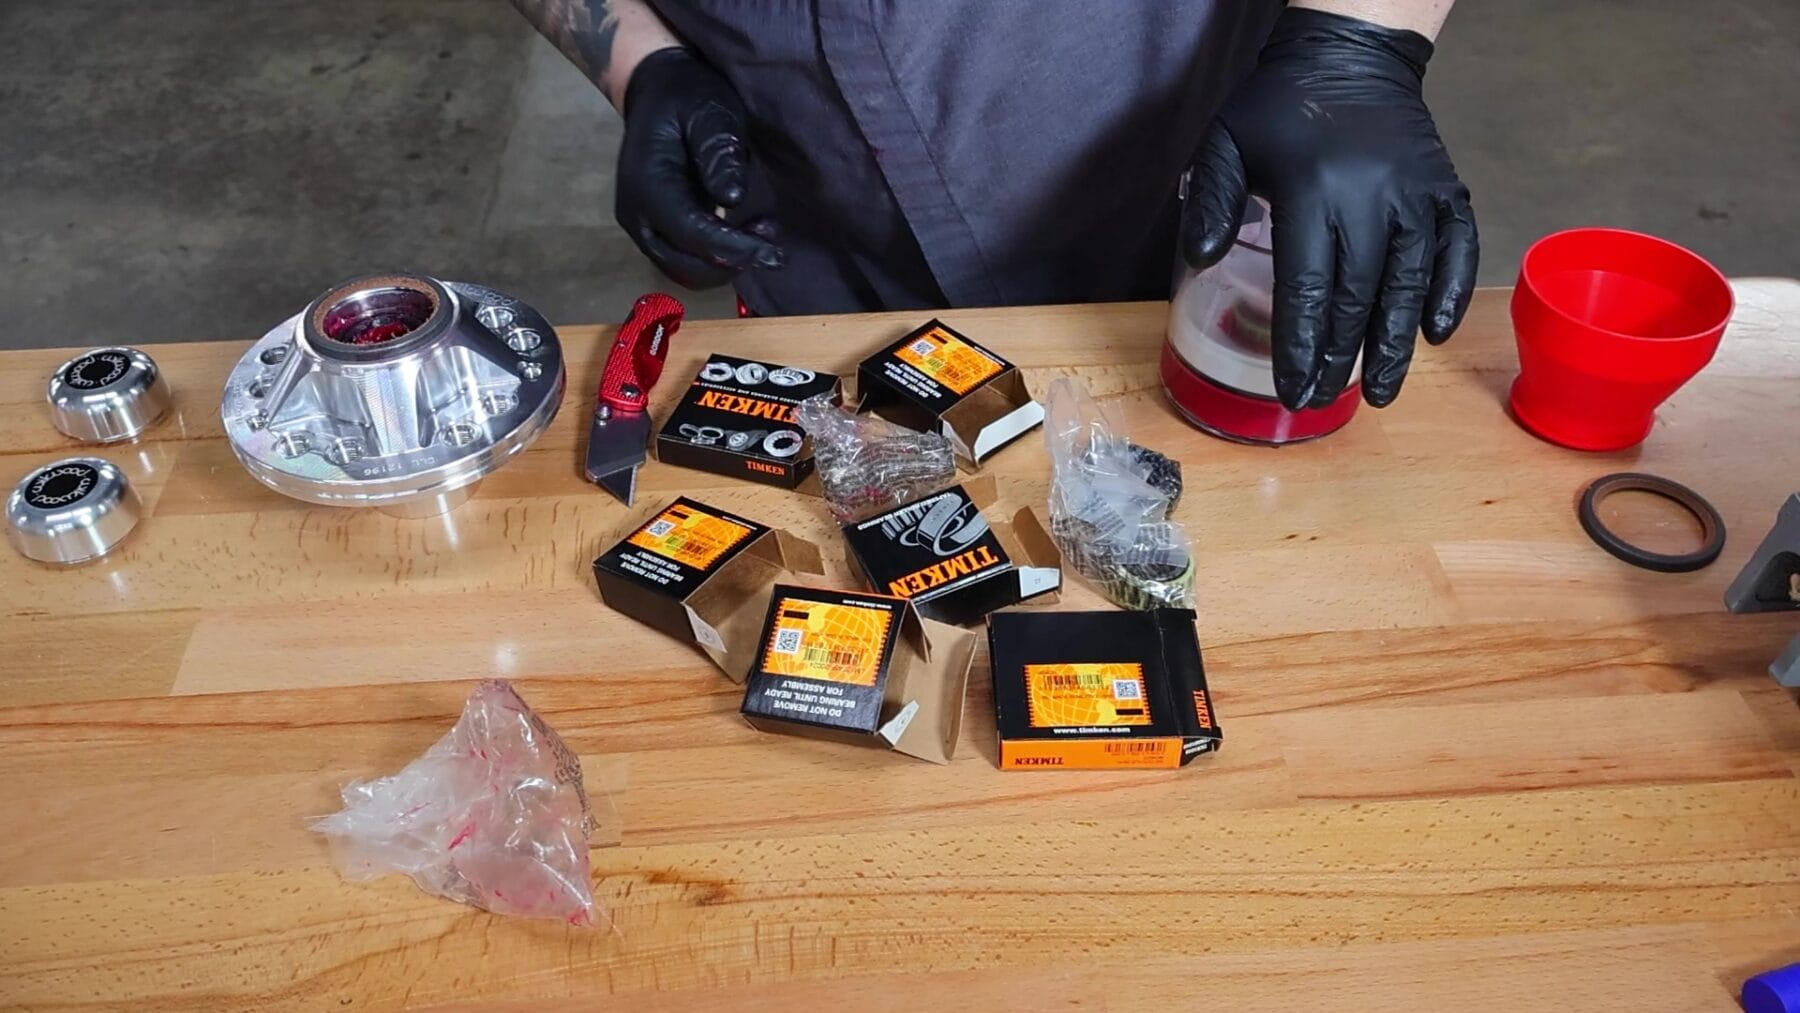
The UMI 3046 bracket kit bolts right onto the Cutlass’s spindle, allowing easy integration of these high-performance calipers. The kit comes with all the necessary hardware, making installation straightforward. For a complete upgrade, the 3047 kit includes Wilwood hubs that fit the C5 brake rotors, along with high-quality Timken bearings made in the USA.
Combined, the 3046 and 3047 kits provide a bolt-on solution for significantly improved braking capability, matched perfectly to the G-body chassis. This upgrade not only improves stopping distances but also enhances pedal feel and brake modulation, critical for spirited driving or track use.
In stock
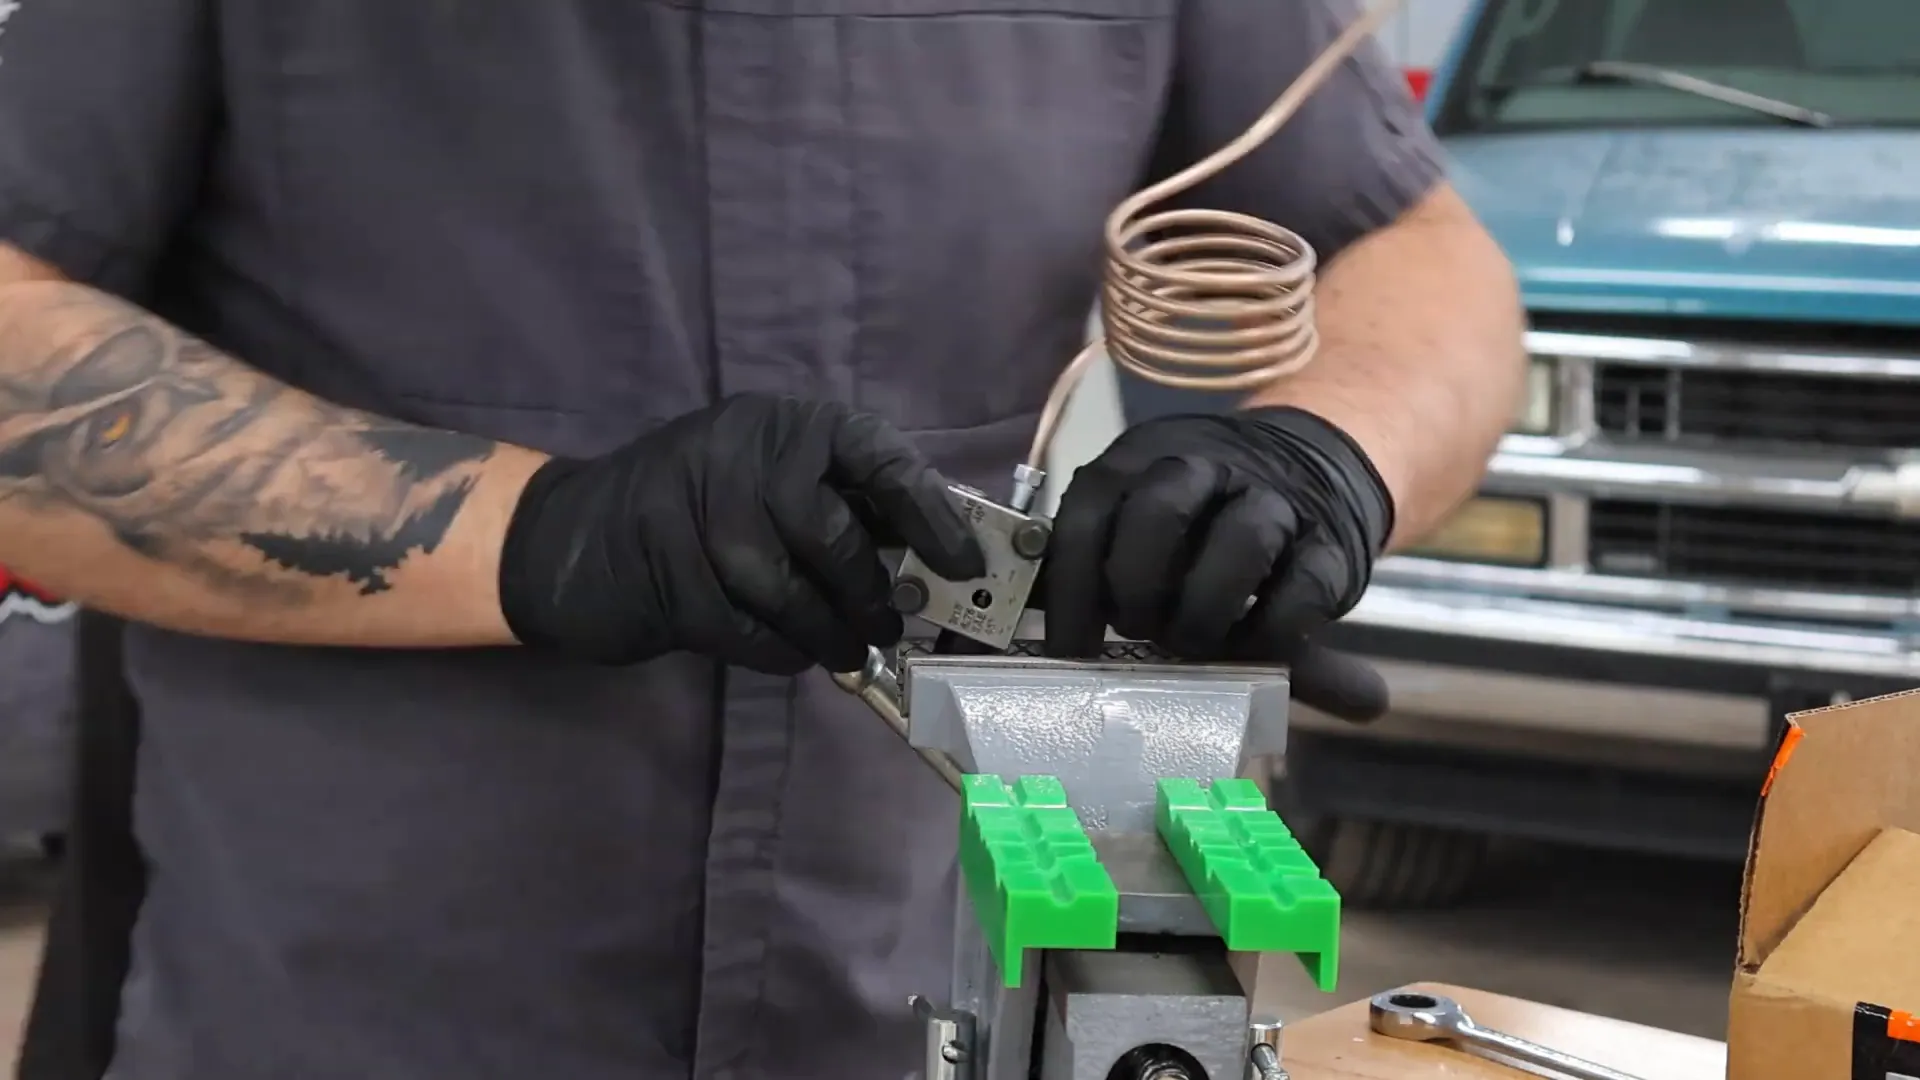
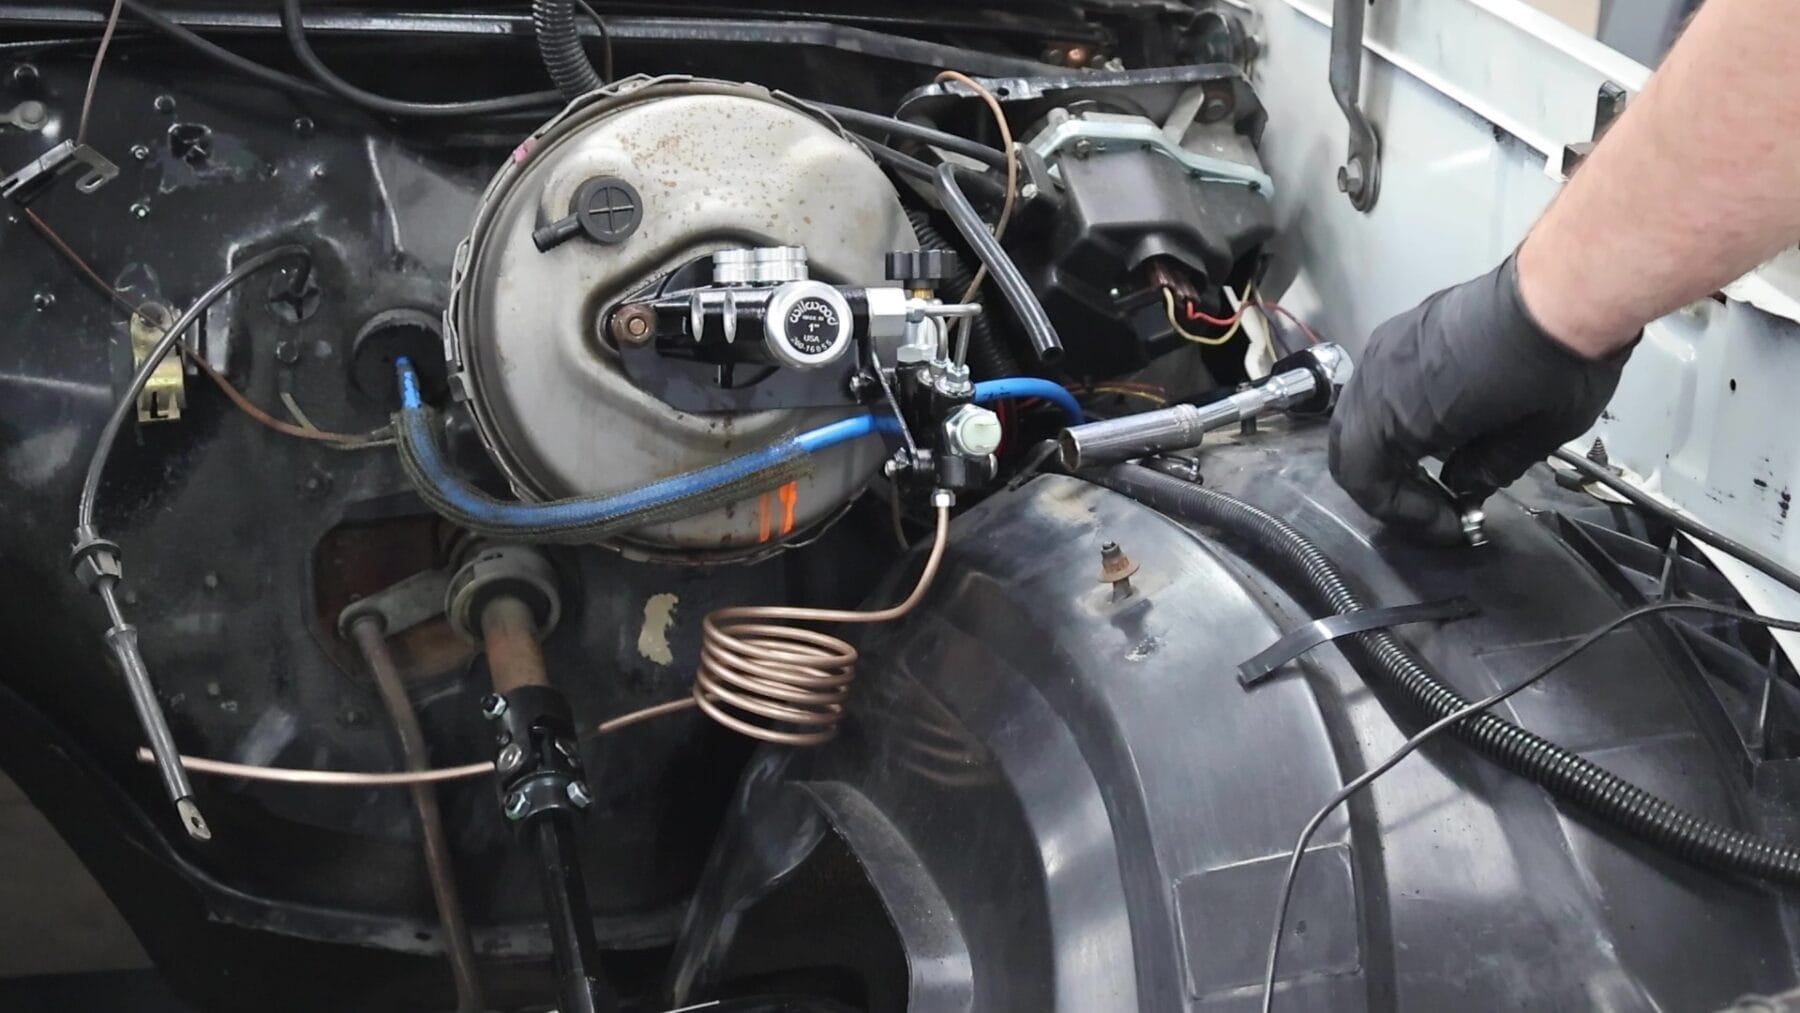
$579.99The original brake lines on the Cutlass were in rough shape, so instead of replacing them with off-the-shelf parts, we fabricated fresh stainless steel brake lines for a custom fit. Using a simple flaring tool and aluminum tubing, we created new coil lines that fit perfectly and maintain proper clearance.
We then installed the new brake lines onto the Wilwood master cylinder, completing the hydraulic side of the upgrade. With fresh lines and high-performance calipers, the Cutlass’s braking system is ready to match its improved power and handling capabilities.
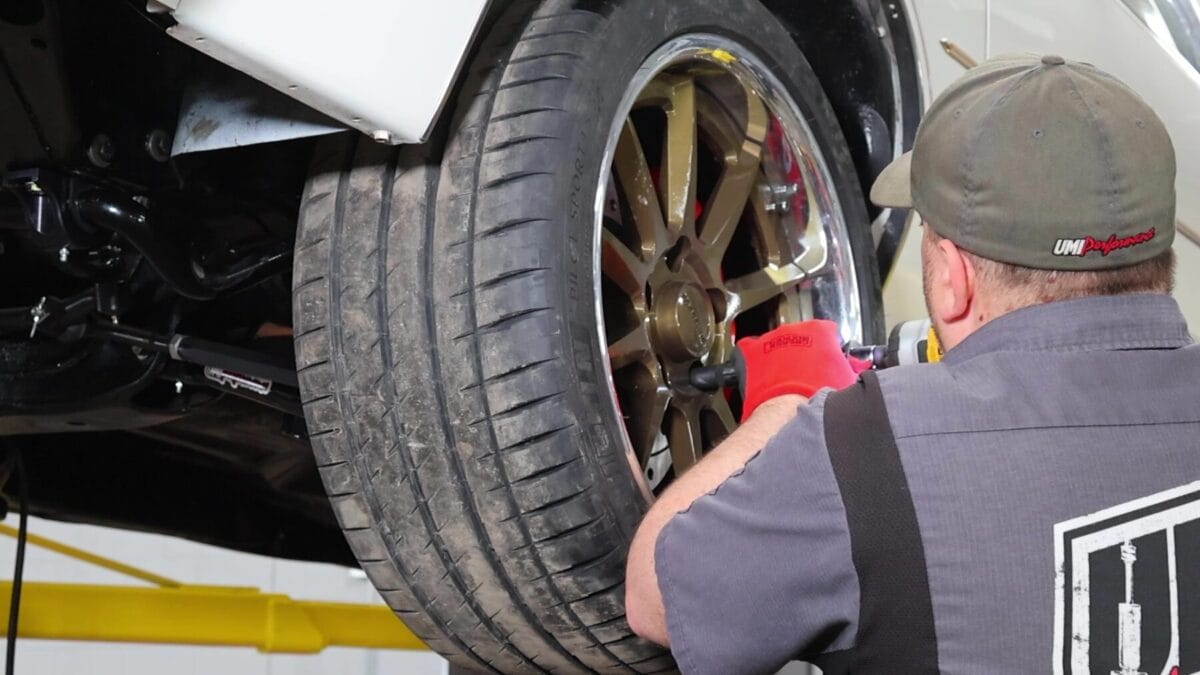
With all components installed — steering, hubs, brakes, and lines — we mounted the wheels back on. The wheels themselves play an important role in securing the rotors in place, clamping them down firmly once the lug nuts are tightened. The calipers clamp the rotors during braking, but the wheels hold everything steady when driving.
After a thorough final check to ensure all bolts were tight and safety pins secured, the Cutlass was ready for a test drive. This g-body brake and steering upgrade transforms the driving experience, providing improved stopping power, precise steering, and enhanced road feel — all essential for enjoying a classic car with modern performance standards.
Modernizing a classic like the 1978 Cutlass is about more than just power — it’s about control and safety. The g-body brake and steering upgrade we performed significantly enhances the car’s drivability by addressing two critical areas: stopping power and steering precision.
Wilwood’s proven brake components, combined with UMI’s bump steer correction kit, provide a balanced upgrade that retains classic style while offering modern performance benefits. Whether you’re hitting the street, the strip, or the track, these improvements ensure your Cutlass responds confidently and predictably.
If you’re considering similar upgrades, remember to take your time during installation, double-check safety measures like cotter pins and torque specs, and always start your alignment close to factory specs to simplify tuning.
No account yet?
Create an Account


